
Make your artwork look like they're from an alternate universe. These Cyberpunk presets work with Photoshop (via the Camera Raw filter) and Lightroom. Download all 788 presets for 90% off.
Learn how to create a Converse Chuck Taylor shoe and create beveled text. This tutorial will show you some drawing basics and techniques for applying textures.
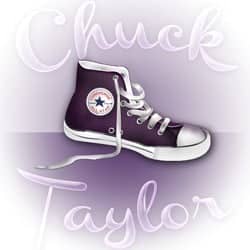
Preview of Final Results

Download the PSD
Chuck Taylor.zip | 8.55 MB
Download from FileSonic
Download from Website
Converse Chuck Taylor Shoes Photoshop Tutorial
Resources
- Channel - DaFont
- Bou College - DaFont
- Bradley Hand ITC font - Design Graphics
- Brushed metal Pattern - Tutorials ETC
- Weave Pattern - Texture Mate
Step 1 New Document
Create a New Document. The size of my canvas is 600px x 700px with a 72dpi resolution.

Step 2 Background
Now we will create the background. On your 'background' layer add this Layer style by double clicking this layer and adding a Gradient Overlay


Step 3
Create a new layer above your background layer and grab your Rectangular Marquee tool. Make a selection, a little less than half of your canvas.

Step 4
Next, grab your Gradient Tool and make sure that your tool is set to these settings. The gradient is #5B3C70 to transparent.

Step 5
Take your tool and start from the top of the selection and drag it down to the bottom.

Step 6 Illustrator
Now open up Adobe Illustrator and with the pen tool selected, create the shape of a shoe. I created my outline of my shoe in Illustrator because the pen tool is a bit easier for me to use. It doesn't matter what color you fill it with.

Step 7
Now transfer it over to Photoshop by using 'drag and drop' and name it shoe and duplicate this layer. Now apply this color overlay to the 'shoe' layer.

Step 8
Then go to Layer>Layer Style>Create Layer. Now we will leave this 'shoe' layer alone for now and on your 'shoe 2' layer add this pattern overlay. Make sure that this layer Fill is at 0%

Step 9
Now 'convert it to a smart object' and 'rasterize' it. Then change this layer to Multiply. You can rename this layer 'pattern'

Step 10
Create a new layer and name it 'shadow.' Grab your paint brush tool and with a 92px soft round brush (#000000) selected darken in the areas around the edge of the shoe erase any areas that go outside of the shoe. And change this layer to soft light.

Step 11
Create a new layer and with your pen tool make a shape like the image below for the tip of your shoe.

Step 12
Create a new layer and select your paint brush tool (#dedcdc 61px soft round brush Flow: 27%) and paint along the bottom tip of the shoe, erase away the areas that go outside the tip of the shoe.
2 comments on “How to Draw a Converse “Chuck Taylor” Shoe in Photoshop”
Awesome I love it so much :D
so nice