
Luminar AI lets you turn your ideas into reality with powerful, intelligent AI. Download the photo editor and see how you can completely transform your photos in a few clicks.

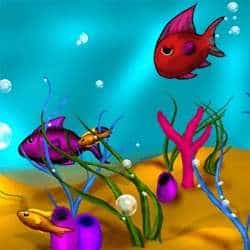
Step 43
Make a new layer at the top of th scene and title it “bubble”.

Step 44
The first thing you want to do is turn off shape dynamics, and then create a pure white circle on the “bubble” layer.

Step 45
Then erase one side and the center of the bubble with a soft round eraser set to 33% opacity.

Step 46
The last step is to copy and paste the bubble all over the image. By varying the size and rotating the bubble (Ctrl + c), you can make it look like there are all kinds of bubbles in your seascape.
(It is very important that every so often during this process you merge the layers back down to the “bubble” layer, otherwise you will end up with thirty to forty new layers.)

Final Results