Luminar AI lets you turn your ideas into reality with powerful, intelligent AI. Download the photo editor and see how you can completely transform your photos in a few clicks.
Design a beautiful navigation bar in Photoshop. This tutorial will teach you how to combine several layer styles to create a beautiful yet simple navigation bar.
Preview of Final Results

Blue on Black Navigation Bar Photoshop Tutorial
Step 1
Firstly, create a new document - the size I've used is 540 by 220 pixels. Now for the background I've filled it with a black colour. To do this go Edit > Fill with the colour #0d0d0d.

Step 2
Secondly, we'll be making the background for the navigation buttons to go inside. Create a new layer (Layer > New > Layer) and select the rounded rectangle tool. Make fixed size selection of 480 by 50 pixels with a radius of 5 pixels in the middle of the document.
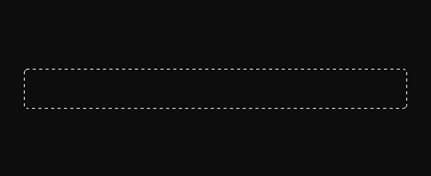
Fill this selection with a linear gradient from the colour #151515 to #050505 using the gradient tool. Deselect - Ctrl + D. Set the fill of the layer to 60% (the setting underneath the opacity in the layers window). The difference between opacity and fill is simply opacity changes the opacity of the entire layer and fill changes the opacity of everything except the layer styles.

Step 3
Now we'll be adding a couple of layer styles to this navigation background.
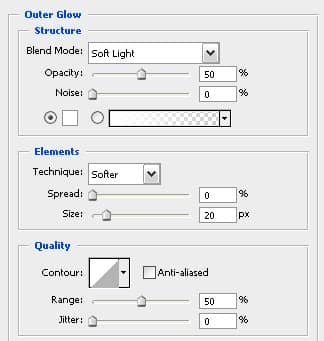
Layer > Layer Style > Outer Glow
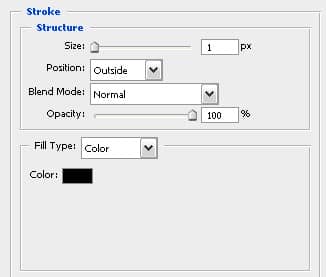
Layer > Layer Style > Stroke
Now your document should be looking something like this.

Step 4
Next up we'll be adding in the buttons. Create a new layer and using the rounded rectangle tool again make a selection of 150 by 40 pixels (with a radius of 5 pixels again) on the left side of the navigation bar.

Fill this selection with a linear gradient from #323232 to #161616 using the gradient tool. Set the fill for this layer to 50%.

Step 5
I've applied three layer styles to this button to give it some depth and make it look cooler.
Layer > Layer Styles > Inner Glow
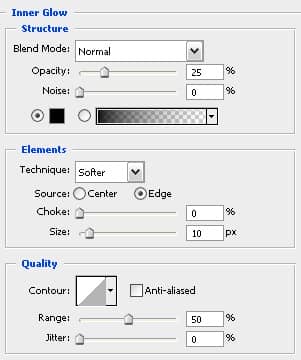
Layer > Layer Styles > Gradient Overlay
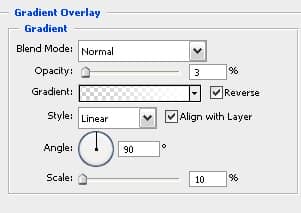
Layer > Layer Styles > Stroke
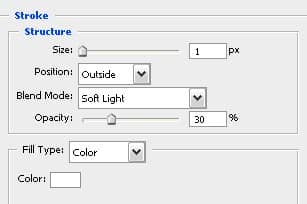
Your navigation bar should now look something like this.

Step 6
Select the text tool and add in some text - the font styles that I have used for the text are Bell Gothic Std, Bold, 20 pt, Crisp, #ffffff.

Step 7
Now repeat the button steps so you have two new buttons - I've decided that I'd make the middle one a different colour to stand out (this can be like a mouse over effect or something if you decided to code this navigation bar for a web layout). The blue colours I used for that are #14b9ef and #054573.


3 comments on “Blue on Black Navigation Bar”
cool. and its so easy to do
Thank you! It helped me with my exam.
cool!