
Download Lightroom presets and LUTs, absolutely free. Use the presets to add creativity and style to your photos.
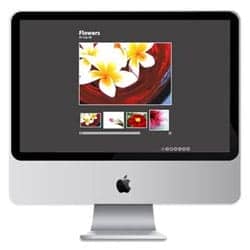
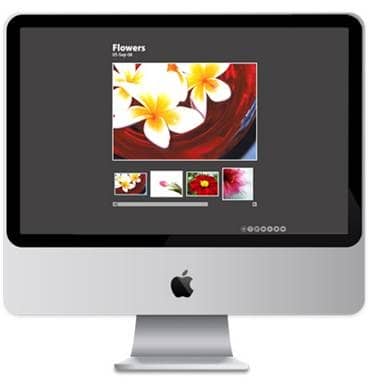
Preview of Final Results
Web Photo Gallery Photoshop Tutorial
There are variety of settings that allows you to customize the style & looks of your photo gallery which includes colors, text, security features etc. It also allows you to add sound to your gallery to give it a more personalized feel.
In the following tutorial, I will guide you through the steps by which you can create a photo gallery for web.
Step 1
When you enter the Web Photo Gallery wizard you will be prompted to select the source folder from where your images will come from. So the first step obviously will be organizing all the photos that you want to include in your gallery in a folder & giving it a appropriate name. For this tutorial, I have placed all my images in a folder named “Flower photos”.
Alternatively, instead of making a folder you can select individual images from various locations in your computer to include in the gallery. To do that open up Adobe Bridge & choose the folder you want in the Folder window on the top left and then Ctrl/Cmd click to select the images you want.
Step 2
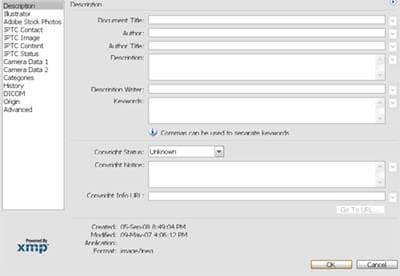
After you’ve selected & organized the images in a folder, you will decide whether you want the title & description of each of the images to be included in the photo gallery. Open your photo in Photoshop, go to File>File Info & enter the text in the Document Title, Author, Description etc. boxes.
Step 3
Alternatively, if you’re using Adobe Bridge, you can enter the file info as mentioned in Step 2, by opening up your Bridge, selecting a image & choosing File>File info, now you can enter the Document Title, Description etc. as mentioned in Step 2.
Step 4
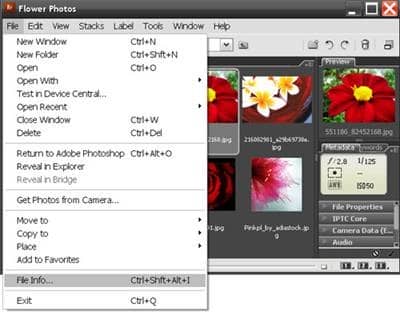
Now that we are done with initial preparatory stages of selecting, storing, naming & adding description & stuffs to the images, it is time to open Photo Gallery wizard to automate the task for creating a web gallery. For this, go to File>Automate>Web Photo Gallery.
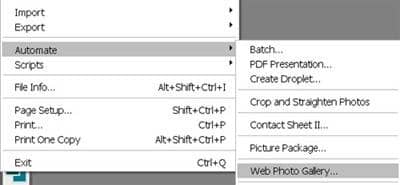
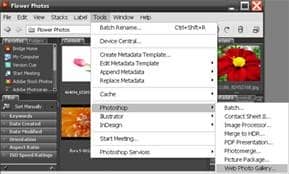
Alternatively, if you’re using Adobe Bridge, you can access it via Tools>Photoshop>Web Photo Gallery.
Step 5
Now with the Web Photo Gallery dialog box open click the Styles drop down menu for various gallery template styles. I select, Flash Gallery Style, you can select any of them you like.