
Make skin look perfect in one-click with these AI-powered Photoshop actions.
Step 7
The motion blur is barely visible and the ends are quite square. First, we'll make the ends sharper by applying the Motion Blur filter again. To do this, simply press Ctrl+F or open the Filter menu and select the first listing: Motion Blur. Now we'll make this layer more visible by applying an Auto Levels. Press Shift+Ctrl+L or open the Image> Adjustments menu and select Auto Levels. Once you apply Auto Levels, the flare from the first half of the star should be very visible.
Step 8
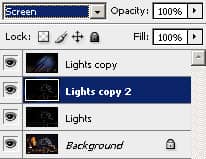
Now we're going to apply the same process to create the other half of the star. Select the Lights layer and press Ctrl+J to duplicate the layer or open the Layer menu and select Duplicate Layer. Change the blending mode of the new layer to Screen.
Step 9
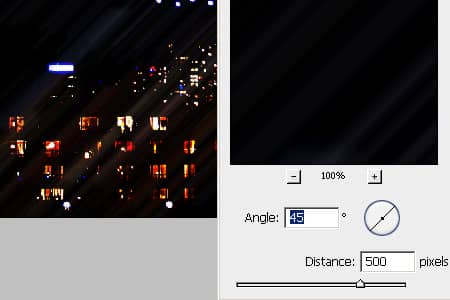
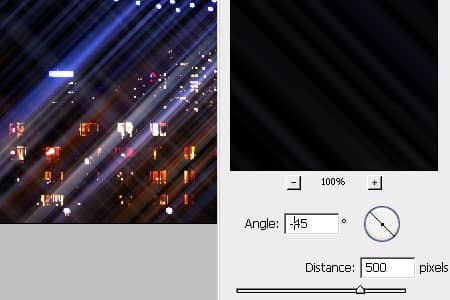
Now we'll apply the same Motion Blur filter but with the opposite angle. Open the Filter> Blur menu and select Motion Blur. In the Motion Blur window, simply change the angle value to a negative number by typing a "-" in front of the value and click OK.
Step 10
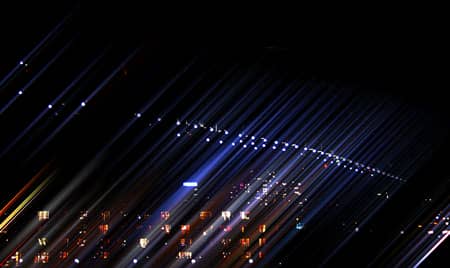
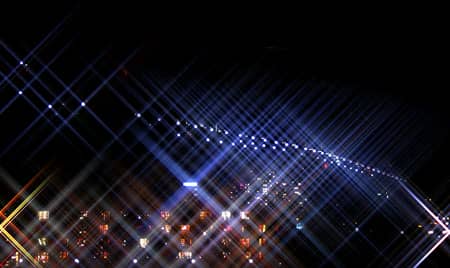
Press Ctrl+F or open the Filter menu and select the first listing: Motion Blur. Then, press Shift+Ctrl+L or open the Image> Adjustments menu and select Auto Levels to apply an Auto Levels. You should now see the effect of the star.
Step 11
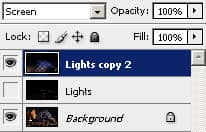
Now we'll enhance the contrast of the star. To begin, select the top layer and press Ctrl+E to merge the layer with the one below it or open the Layer menu and select Merge Down. Then, click on the eye icon beside the Lights layer to hide the layer.
Step 12
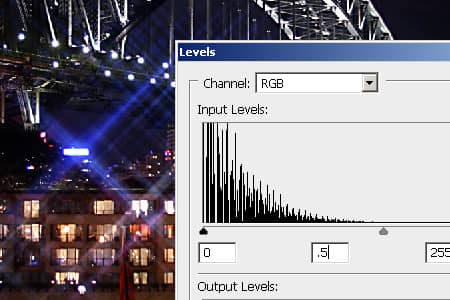
Press Ctrl+L to access the Levels tool or open the Image> Adjustments menu and select Levels. In the Levels tool, drag the middle input silder towards the right to reduce the amount of stars in the image and click OK. A setting of 0.5 for this area is a good starting point for most photos. The effect may seem more subtle now, but don't worry because we'll make it more visible in the next step.
Step 13
If you want to make the stars brighter, simply perss Ctrl+J to duplicate the layer or open the Layers menu and select duplicate layer. You can repeat this step if until the stars are as bright as you would like it to be.
8 comments on “Star Filter”
I use this tutorial all the time in my airplane photography, particularly to highlight the beacons. My only issue is that sometimes the rays are a bit thick. What I do, is to to the individual offending highlight and 1.) black out a significant portion of the highlight which allows for sharper, more realistic rays, and 2.) Make sure the the highlight is the color I want. Aircraft beacons flash red, BUT the core is yellow, so I will paint the core in the color (red in this case) I want the rays to be. When you SCREEN all the layers you don't lose the yellow core of the beacon, but the rays will be red! I also use it for street lights, and other highlights that may have two or more colors!
I MAY have an idea for the rainbow (laser etched) effect
Can you share your idea for the rainbow/laser effect?
I add a rainbow gradient and clip it to the flare layers to give it a holographic look but I have troubles making the flares thin without going in by hand and shrinking every large blob.
how can you give off a gradient effect to the star? like a rainbow
I just tried this out and it works perfectly! Thank you!
In step 7, there is no Auto Adjust in Image>Adjustments. Perhaps you meant in Levels?
I was unable to see any change when doing step 6 thus was unable to adjust the size of the star. I had to reach step 7 and use Levels>Auto Adjust before I could see the radiants.
After finishing my star bursts were blunt, not tapered to a point like yours.
Yes sorry this might have been removed in an update.
You can use Levels and click on the auto adjustment or just press Shift+Ctrl/Cmd+L.
If it's not as tapered, make sure you've applied the motion blur several times. If you only do it once, it won't have the sharp pointy edge.
Hope this helps!
^^
nice