

Make your artwork look like they're from an alternate universe. These Cyberpunk presets work with Photoshop (via the Camera Raw filter) and Lightroom. Download all 788 presets for 90% off.
Intensify photos with vivid colors in just a few simple steps! This Photoshop effect is perfect for fun vacation photos and is easy for novice Photoshop users.
Step 1
Open a photo you would like to edit. Or, you may use the photo used in this tutorial (from iStockPhoto).
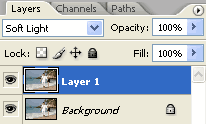
Step 2
Duplicate the layer (Layer> Duplicate or Ctrl+J) and change the blending mode of the new layer to Soft Light.
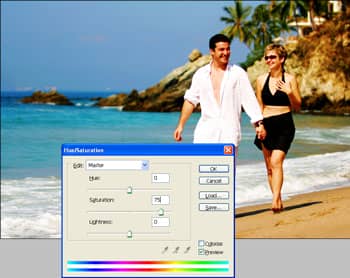
Step 3
To increase the saturation, we'll use the Hue/Saturation tool. Open the Hue/Saturation tool (Image> Adjustments> Hue/Saturation or Ctrl+U) and with the preview checkbox checked, increase the saturation as desired.
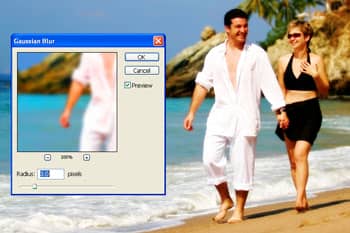
Step 4
If the effect looks too hard, soften it using the Gaussian Blur filter. Adjust the radius in the Gaussian Blur filter sparinly. Using a radius that's too large will reduce the effect and may create halos.
Step 5
To reduce the intensity of the effect, simply reduce the opacity of the top layer.
Final Results
Rollover the image below to see the before and after effect.
