

Turn any photo into a dot grid artwork with these Photoshop actions. You'll get great results with dots that change size. They get larger in brighter areas and smaller in darker areas. Free download available.

Now add a new Levels adjustment layer by choosing Layer > New Adjustment Layer > Levels. Click on the black point eye dropper tool and click on one of the darkest areas in the image. Select the gray point eye dropper tool and click on the white area of the eye.

Add a new Hue/Saturation adjustment layer by choosing Layer > New Adjustment Layer > Hue/Saturation. Checkmark the colorize option first then adjust the settings as shown in the image below.

Step 7 – Use the burn tool on the face
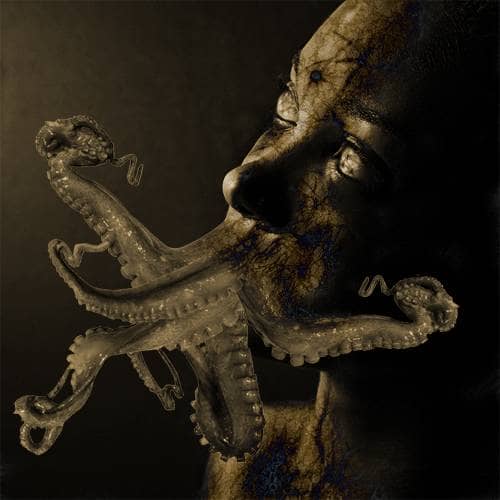
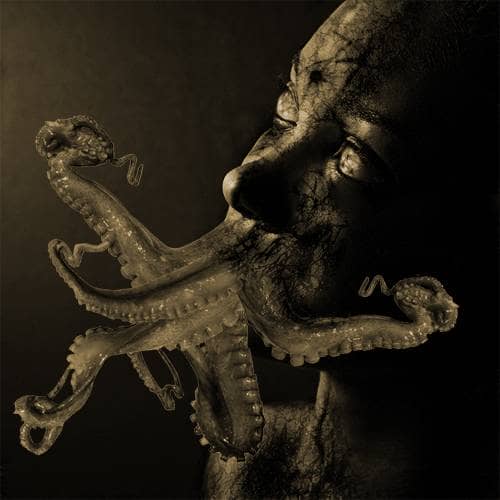
Use the burn tool to darken some areas using a large brush with a soft edge. This will modify the look of the bone structure. Also spend some time to burn certain areas in the octopus arms to make the jaw look wider. You can make him look like Davy Jones in 'Pirates of the Caribbean: At World’s End.

Switch to a small hard edge brush to burn some scars on the face like shown in the image below.

Step 8 - Add an alien skin texture
Start by opening the photo of a marble texture in Photoshop.

We’re now going to copy and paste the marble texture into the image we were working on. Choose Select > All then Edit > Copy. Close the current image of the marble texture to switch back to the alien image we were working on. Choose Edit > Paste to paste the texture into the current document.
Use the eraser tool with a soft edge to erase the marble texture so that it only covers the fast. Change the blending mode to difference.
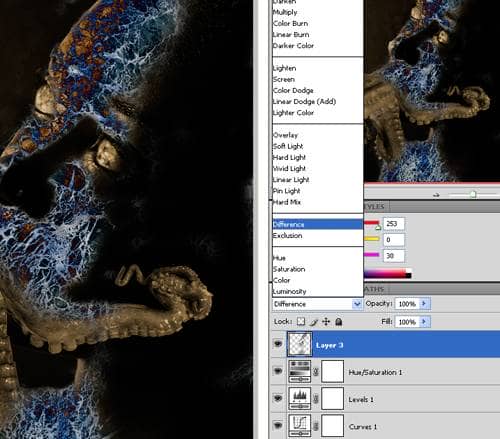
Lower the opacity to about 30%. One note to remember is that the difference blending mode will invert the colors of the layer depending on the layer below. So if you want more blue color on the face, you can use the burn tool on the layer with the face.
You can also move the layer with the marble texture below the adjustment layer to get an effect like this image:
Step 9 – Add some abstract lines
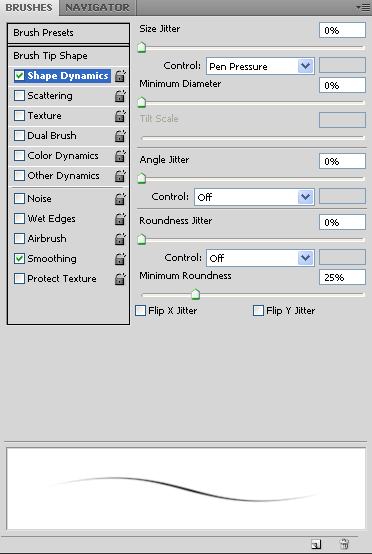
Select the brush tool with a 3 pixel brush and 100% hardness. In the brushes palette (Window > Brushes), apply the settings shown in the image below:
Select the pen tool and, in a new layer, create a curved path like the image below. Then, right click and select stroke path. Select the brush setting and enable the simulate pressure option.
6 comments on “Alien Photo Manipulation”
I hated it
show full steps not half
Very important information for a Graphics Designer. thaks a lot to share this tips
very nice tutorial... loved it... Thanks alot..
Hey!! no one just uses "v" for very! Jack! be a man and type it out
Yo
I don't like how you made the instructions because it is v confusing. I loved this tutorial until you added in the marble overlay and it is v frustrating.
Thanks
yur not special