


Make your artwork look like they're from an alternate universe. These Cyberpunk presets work with Photoshop (via the Camera Raw filter) and Lightroom. Download all 788 presets for 90% off.
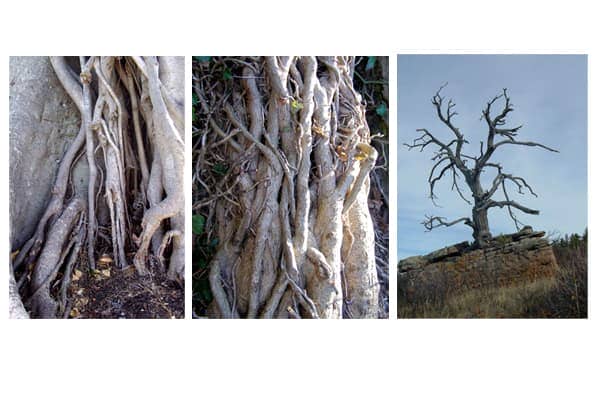
First step will be to look for a beautiful root and select it with your favorite tool (Magnetic lasso or quick mask mode for example). Don’t worry if it’s not a perfect selection, we will modify it later. Copy it and paste in our image.
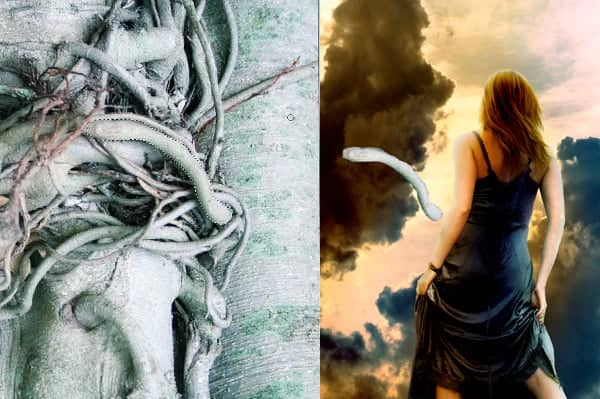
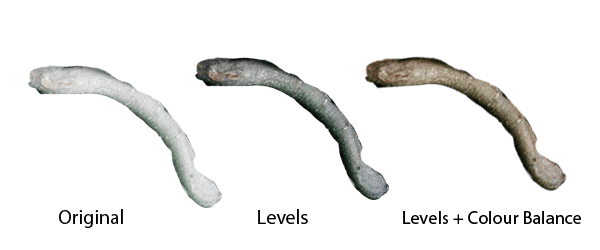
As you can see the new image has not the same light and colors that the others, it looks out of place. What we have to do it’s the same that we did with the sky and the girl. Choose Image > Adjustments > Levels and adjust the input sliders. If you move the one in the center to the left the image will be brighter. If you move it to the right the image will be darker. In our case we are going to move to the right.
Now choose Image > Adjustments > Color Balance and add color depending of the place where you are going to put the root. If the root it’s on the left arm of the girl, for example, it will need red and yellow. But if it is on the right arm you have to add blue and cyan. This time we are going to add yellow and red. This is how it looks with the modifications:
When you have the root ready, just place it where you think that it will look good and select the eraser tool with a focus brush. Erase all the part that you don’t need and give the correct form to the root, now it’s when you have to improve the selection root.
The final step will be to use the burn tool in the areas where we should see shadows. For example, in the image below, it was used over the arm or in the bottom. I have added a little of blue using Image > Adjustments > Color Balance too. The last step is to erase the upper part of the root to create the look of a crease.

All the roots are added using the same process. The biggest impact to your results is choosing the photos. Once you have good photos to work with, you’ll have no problem getting good results using this technique.

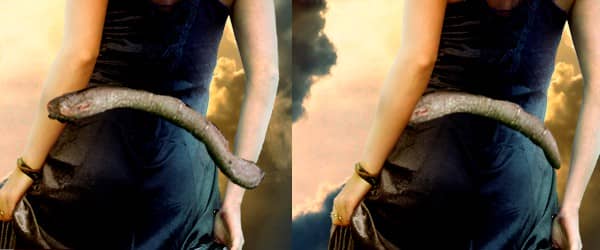
There is just one last detail to explain. Sometimes, to get a more realistic feeling you can add a shadow to the root that falls over the skin or the dress. Take a look to this picture:
32 comments on “Combine Photo Elements to Create a Surreal Photo Manipulation”
Hi. Where are the stock photos? There are broken images too
HI. are there any assets to go with this tutorial please, i don't see them anywhere. I love doing your tutorials they turnout so good. David Holmes
Unfortunately the author didn't provide any assets to this tutorial but you can typically find photos of the trees/roots/skies easily. For the model you can find lots over at DeviantART: http://www.deviantart.com/browse/all/resources/stockart/model/
Rally good, Amazing
That was an aweosome job! Congratulations!
Francesca Lelli
Muy bueno !
Pls i need the link of those pictures i'm practising digital arts
no point doing this tutorial without the sources
niccccccccccc
good
yeay so good
great tutorial
Wow so amazing,napakagaling po talaga,fantastic what a tutorial!!it helps me a lot i was so amazed!!
People should put nicer coments on this because I do not think they would like their work called crap or sloppy.
This looks AWSOME! It might be a little hard but I think I can do it.
Agreed.. the tutorial is quite crappy, not enough info for beginners, and more advanced users will know all that already.
Also extremely sloppy work on the picture, I wouldnt dare to view it in higher resolution.
Badly explained or for advanced people only (which wouldn't need it). Also extremely sloppy work at the bottom (grass).
I guess this picture looks extremely crappy in a decent resolution.
hahahahahahaha dats impressive work kip it up.
where are the photos that you used
yes!, there are not photos ! :/
Find your own pictures (;
不错,如果能提供素材看更好啦。
Pretty shitty explained... When I use the magic wand tool it always only selects little parts of the model, and I also don´t absolutely don`t know where to save this, or what happened to the layers I worked on before... And where the hell is the add layer mask button??
You should probably get acquainted with basic Photoshop tools first...
The tutorial is very well done, thank you.
waoooooo very nice
mind blowingggggggg.........
bravo. beautiful end result
Can you please give the source for the model and sky picture?
great tutorial
excelente :P