
Turn any photo into a dot grid artwork with these Photoshop actions. You'll get great results with dots that change size. They get larger in brighter areas and smaller in darker areas. Free download available.
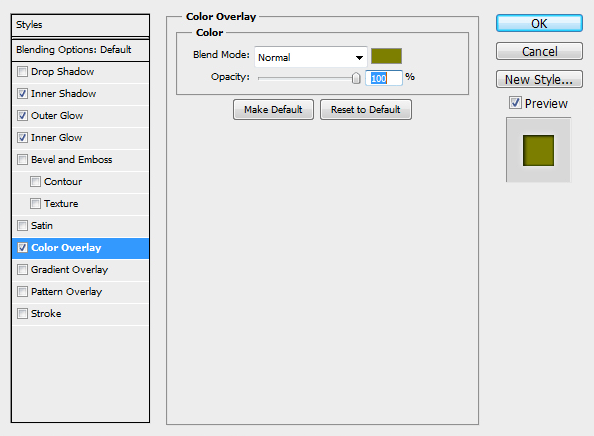
For variety, you can change the button color for each effigy by adding a Color Overlay layer style. To do this, select any one of the 7 Button layers that you want to edit then go to Layer > Layer Style > Color Overlay.
Step 8
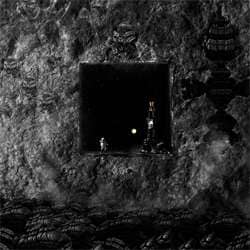
Open the file “Alien man 2” then make a selection of the central stone figure. To do this, select the Lasso tool and create a rough selection around the stone.
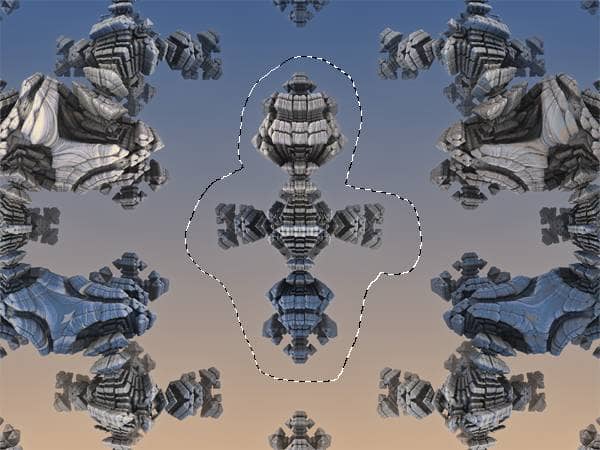
Next, select the Magic Wand tool and while holding down the Alt/Option key on your keyboard, click around the stone to deselect the areas.
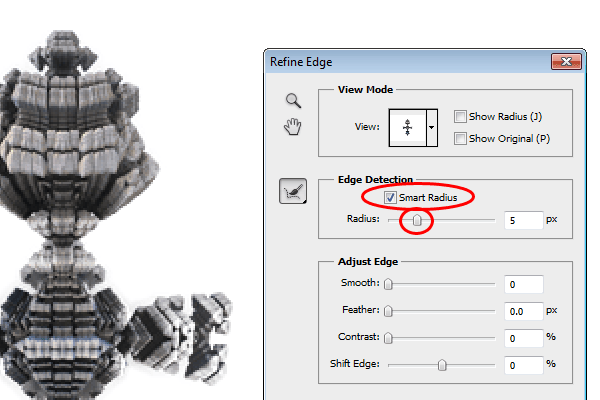
Finally, use the Refine Edge tool (Select > Refine Edge) to enhance the selection. Use the Smart Radius feature to enhance the selection.
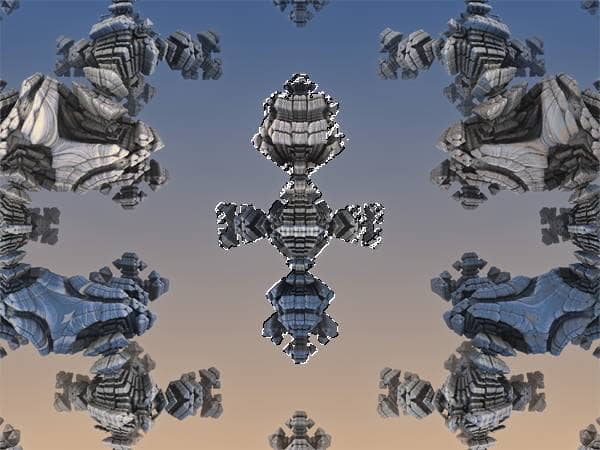
Copy (Ctrl/Cmd+C) the selected area then close the document. Go back to the original document and paste it. Photoshop will paste this image as a new layer.
Step 9
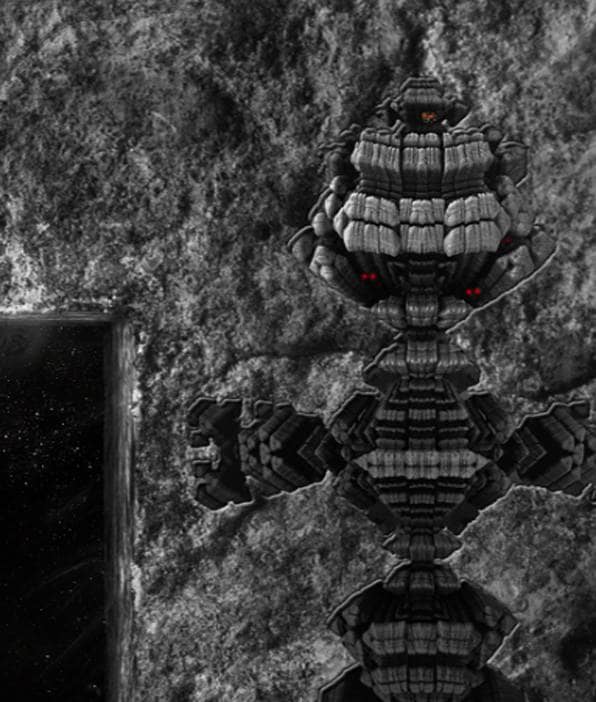
Using the Free Transform tool (Ctrl/Cmd+T or Edit > Free Transform), resize and position the stone like shown in the image below. Desaturate the layer (Ctrl/Cmd+Shift+U or Image > Adjustments > Desaturate).

Step 10
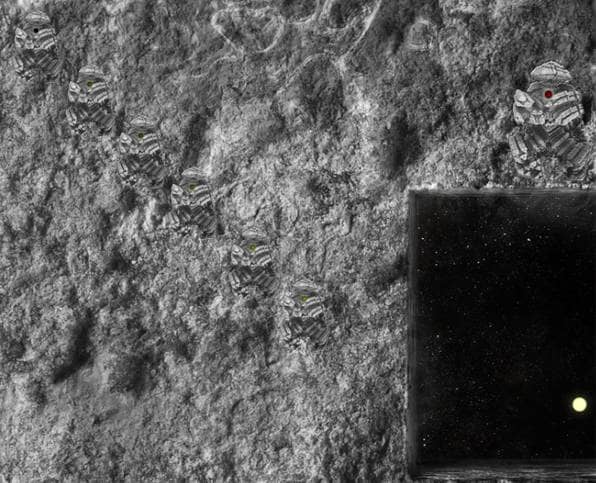
Create a new layer above the current layer then use the Brush tool to paint some bright red eyes to the dark areas of the stone figure. This will give the impression of creatures watching from the depths of the stone.
Step 11
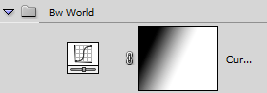
Add a new Curves adjustment layer (Layer > New Adjustment Layer > Curves). Apply a curve like shown in the image below (just click in the middle and drag down).

Step 12
Next, click on the layer mask of the Curves adjustment layer.
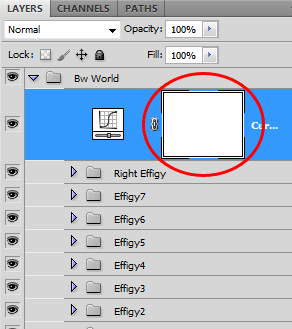
Use the Gradient tool to create a black to white gradient like shown below.
Step 13
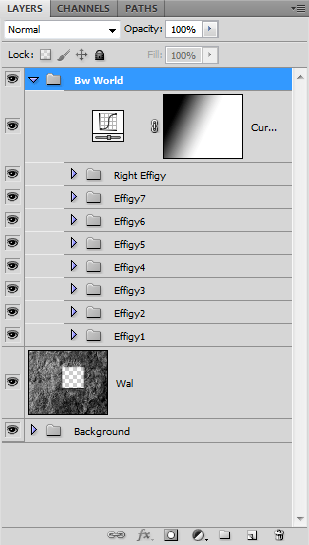
To keep our layers organized, group all the layers (except for the Wal layer and Background group) into a new group called “Bw World”.
Step 14
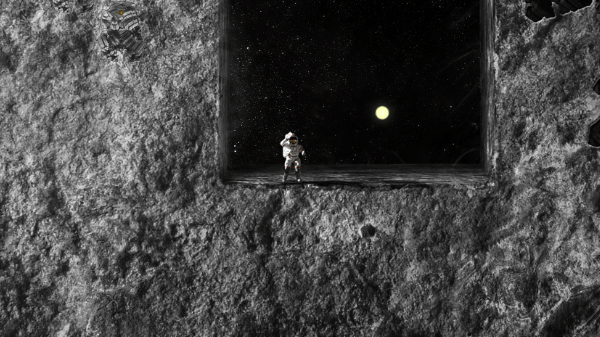
Now let’s add the other elements to the scene. Open the file “Cosmonaut 1” and create a selection of it. Copy and paste it to our document. Next, use the Free transform tool (Ctrl/Cmd+T or Edit > Free Transform) and place the cosmonaut like shown in the image below.
Step 15
Next, create a new layer and move this layer below the cosmonaut layer. You can move layers up and down quickly by pressing Ctrl/Cmd+[ or Ctrl/Cmd+].
3 comments on “Create a Sci-Fi Space Cave Scene in Photoshop”
None of these image links actually work now, unfortunately
Impressive Work...Love it.thanks for sharing!
Actually it is best tutorial.It is very helpful and important.Well explained, great article and really all is awesome !!