
Make skin look perfect in one-click with these AI-powered Photoshop actions.

I also photographed these pipes, cut them out, rotate them 45°, then placed them on the bottom left corner of the image.

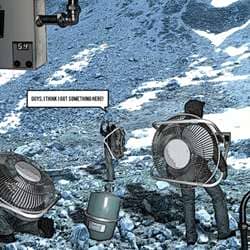
Step 11
Here’s a hot water tank that I photographed to be used in the project.

I placed it on the landscape near some rocks then I deleted the area around the rock.

Step 12
Finally, I cut out some of these copper pipes to put on the bottom right side of the image.

Step 13
Create a new layer on top of the other layers. Use the Rectangular Marquee tool to create borders like shown in the image below.:

Step 14
Now we are going to add some shadows. Realistic shadows are important because they show the light source; and there’s always a light source! So without shadows in the project, it won’t look real. Add shadows one by one. Start with the first model and duplicate it into a group. Then go to Layer > Merge Layer Set.

Create a selection of the merged layer by holding down the Ctrl button and clicking on the layer thumbnail. You’ll now have a selection of the model. Fill the selected area with a blue color shown below.

Use the Distort tool (Edit > Transform > Distort) to transform the shadow.

Here’s how the shadow should be transformed.

Step 15
Now reposition the layer with the shadow under the model. Then go to Filter > Blur > Gaussian Blur. Apply a slight blur of around 6 pixels then reduce the opacity of the layer.

Step 16
Repeat this to create a shadow for the tank.

Step 17
Now we will colorize the pipes and tubes. Start by making selections of the tube that you’d like to change the color for. Use the Hue/Saturation tool (Ctrl+U or Image > Adjustments > Hue/Saturation) to colorize the tubes. Make sure that the colorize option in the Hue/Saturation tool is checked.


For the digital display, I changed it from red to green by changing the hue without the colorize option checked.

Here’s the settings I used for the oxygen meter.

For the explosive tank, I used these settings to turn it from red to teal.

I also used these settings to change the color of the model.

Step 18
Next, I applied a Shadows/Highlights tool (Image > Adjustments > Shadows/Highlights) on all three of the models so that they blend in with the landscape.