
Turn any photo into a dot grid artwork with these Photoshop actions. You'll get great results with dots that change size. They get larger in brighter areas and smaller in darker areas. Free download available.

Step 40
Duplicate the first layer (the short key Cmd/Ctrl+ J) of a cliff and move it above all others in this group. Place it so that it became a continuation of the rock

Step 41
I also added a layer mask to it and removed several pieces that did not seem the same type of relief. Layer mask, which I dubbed I removed. Brush settings remain the same (Size: 80px. Hardness: 0% Opacity: 60% flow: 100%).

Step 42
The remaining three layers close gaps and give a smoother appearance rock. Duplicate three more times with the first layer of rock. Move them as shown in the figure.

Step 43
The principle of operation remains the same. I think it will not be difficult.
Eliminate unnecessary parts with a layer mask. If you need to recover, some portion of the image to switch the background color to white and you'll recover and not clean. Red shows how I placed a piece of landscape.


Step 44
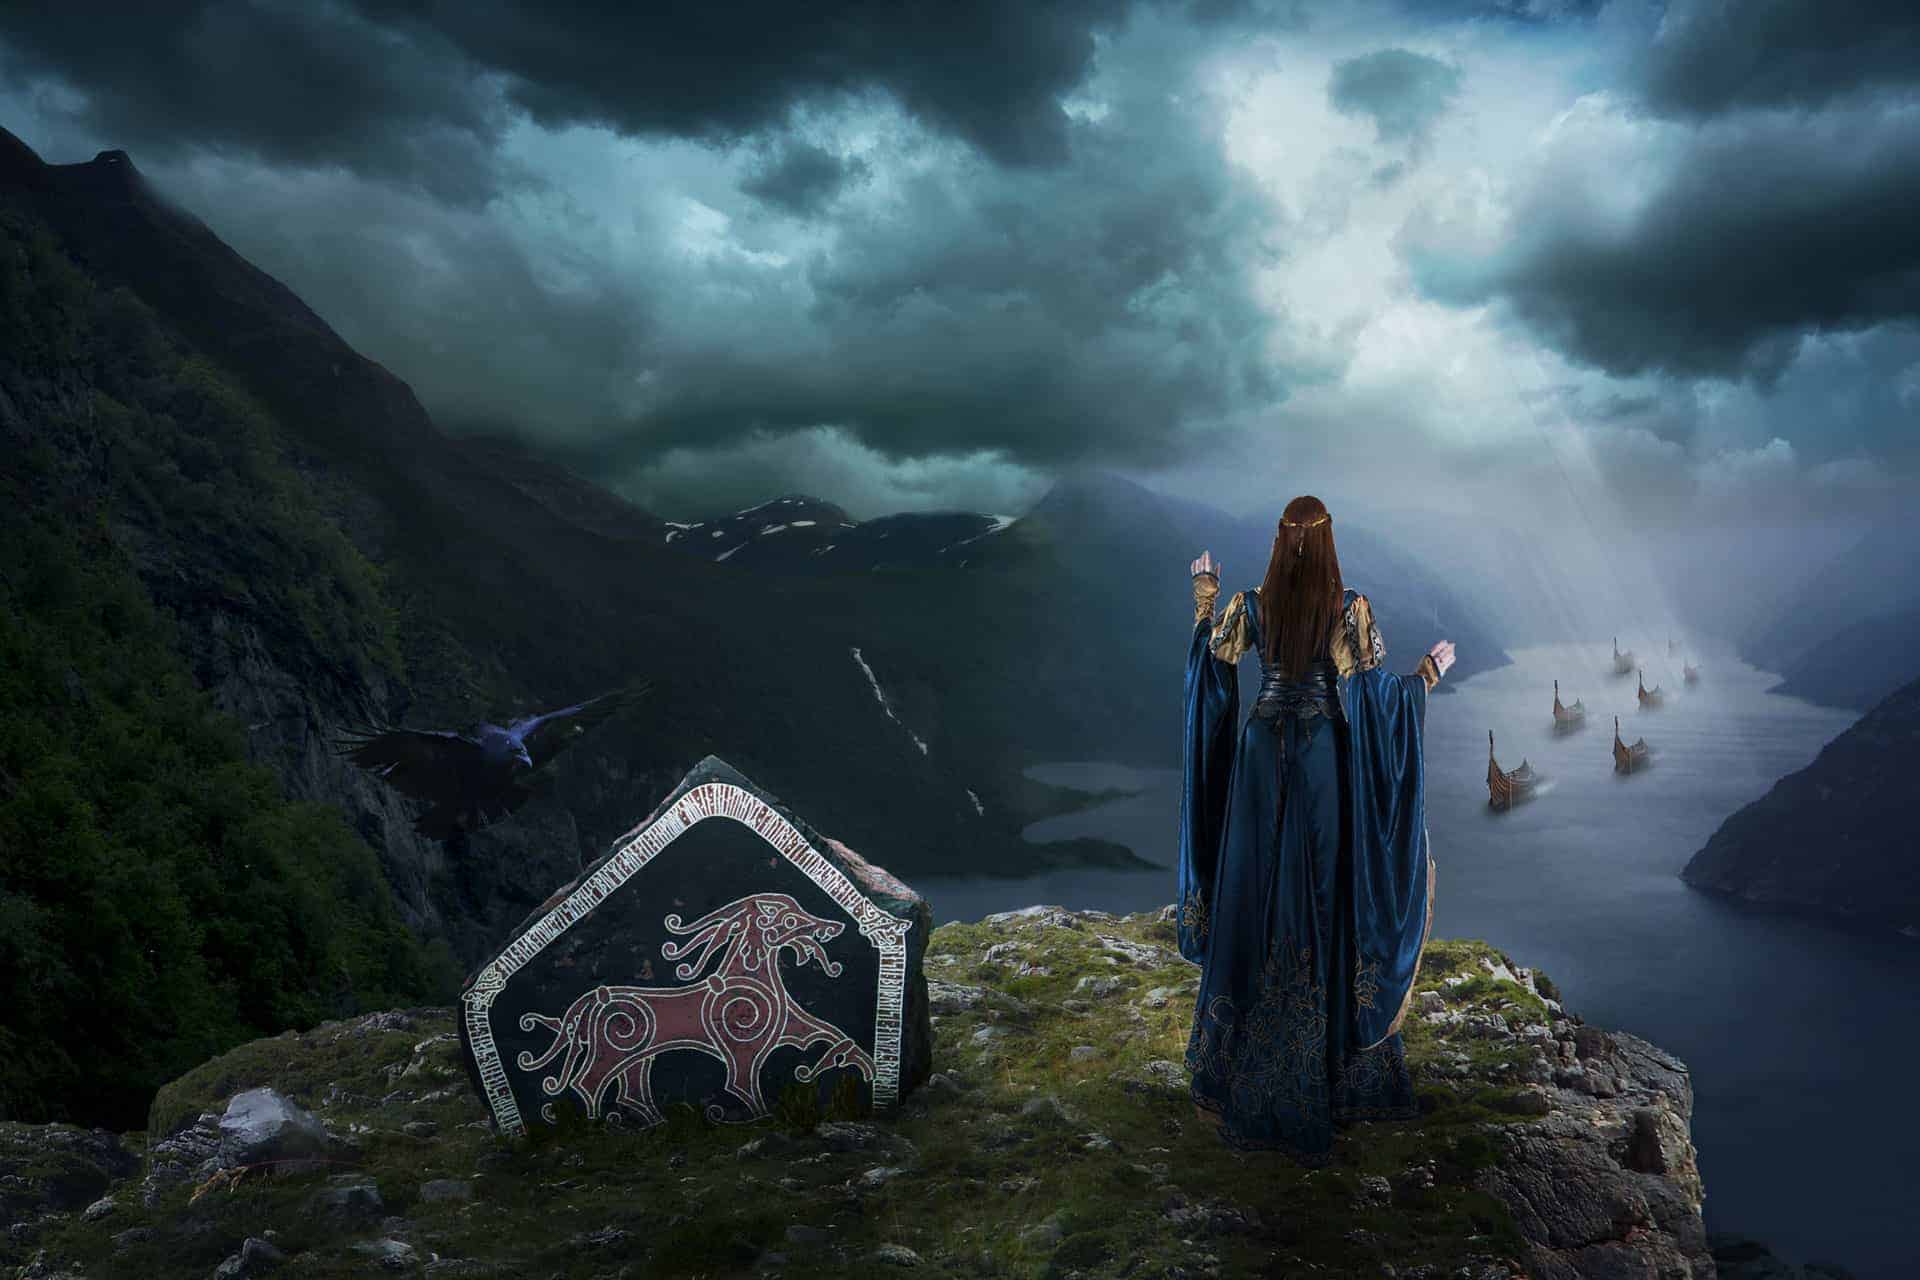
That's how I got the result.

Step 45
Now proceed to adding ships. Create a new group. Place it under the group by clicking on the icon of the group in the Layers palette, name it “Ships”. Place it under the group "promontory".

Step 46
Open the image of the ship. Go to File > Open or the short key Cmd /Ctrl+ O


Step 47
Select Quick Selection Tool (W) in toolbar and select the ship. Be careful when you select some items may not be highlight.

Step 48
Select Move Tool (V), grab a selected part of image, and drag it to the tab with our work.

Step 49
Now reduce the ship as shown in Figure. Go to Edit > Transform > Scale. After flip horizontal this fragment. Go to Edit > Transform > Flip Horizontal.

Step 50
Duplicate the layer with the ship 6 times (the short key Cmd /Ctrl+ J). Arrange them as shown, or you can come up with your own version.
Change the size of each ship, making each less. Remember, the farther the ship the less its size.

Step 51
Add a layer mask to the group of with ships. Select the Brush Tool (B) on the toolbar. Set it to the following settings: Size: 35px. Hardness: 0% Opacity: 30% flow: 100%. Remove the extra part. Remove the clear line of shadow ships. Change the settings of transparency brush and erase some of the ships that are the most in the fog and the smallest.
28 comments on “Create This Epic Manipulation of Ancient Scandinavians in Photoshop”
I appreciate you making this tutorial. The original stocks aren't there, but the concepts are good, and I followed most of them before changing it to my own art.
IMG_0238? Never said where that is...
cant get zip folder of pictures of fjords..so i am not able to continue with steps having those set of images..please help me in this.. and really great work..good job
please help me with the set of pictures of fjords used in this project.
A very smart approach to explain the things,like your step by step tutorial.
Hello Maria! Your photmanip is awesome but the link to the image at step 81 is broken and I can't complete mine :(
I have that problem, and here is parameters (i download the file)
Selective Color
COLOR YELLOW
* cian +43
* magenta +40
* yellow +100
* black 0
--------------
Color BLUE
* cian 0
* magenta 0
* yellow +14
* black 0
Hi! There will need to add an adjustment layer "Selective Color…" Go to Layer New Adjustment layer > Selective Color... or use icon on Layer panel. Excuse me, for an unfortunate mistake with the picture. Previously, it was. I hope you will be able to open this -
http://s019.radikal.ru/i622/1409/52/05d6a1b383ab.png.
If not, here are the settings for the adjustment layer:
1. Preset: Custom, Colors: Blues.
Settings for this color: Cyan:0, Magenta:0, Yellow:+14, Black:0.
2. Preset: Custom, Colors: Yellows.
Settings for this color: Cyan:+43, Magenta:+40, Yellow:+100, Black:0.
Thank you very much! I really appreciate it! Once again, forgive me!
i watch all the steps & read carefully to all of yours helping ideas, but i am just start the working on photoshop cs6 version & i have no idea for doing the work on photoshop... so who can help me for make one tour & travel web layout...??? i am waiting for the replies & thankyou maria for your best teaching way... i think you can help me very well
Thank you for this beautiful well detailed tutorial, and I have a lot of fun to make:
http://cartes-mireilled.eklablog.com/montage-epopee-scandinave-avec-photoshop-a108049570
IMG_0328 ??
IMG_0328 found thanks Maria Semelevich.
Thanks a lot.
awesome!! Thank you so much for your quick response!
Hi i could not find the step 5 picture in your links , i have all of them except that one ...
Is it still available ?
For step 5 :
http://polinife-stock.deviantart.com/art/norge-2-26163459
I have not been able to locate a few of the pictures I needed to download for this project. The Fjords link shows a photo that says 11 photos. I'm pretty new at this but I have no idea how to get the 11 photos. They seem to be in one photo?
Hi! I understand, but on the right side of the resource page is a great button "Download". Click on it and save the file to your computer. Then use program to unzip photos (for example WinRAR) in the corect folder. Then locate the file of the photo with the name "IMG_0328" and place it in your work. That's it! You can continue worked. Just the author made a presentation that be in his archive. This is an advertisement :) I checked that the archive is desired photo and he downloaded from the site. I hope I helped you.
i can't find the button you said!! where the Download button???
I can't find the picture used in step 13, the picture of fjord is not found from the resources given.
This image in the RAR archive. Download the complete archive of photos and there it's called IMG_0326
Go to the page with the resource Pictures of Fjords – xxmynightmarexx. Download an archive of photos and there you will find just the right photo. It is called IMG_0328
you can't found that image in here http://polinife-stock.deviantart.com/art/norge-2-26163459
thank you for inspirations!, i did your tutorial but with my own style :) http://ipanjadahz.deviantart.com/art/Dark-Avenger-453858141
Thank you very much! I am very pleased to hear that!
I am very glad that my work has inspired you! Good luck in your future works!
For step 5 :
http://polinife-stock.deviantart.com/art/norge-2-26163459
Thank you!
Thank you so much for this share - it is amazing
Greetings
Thank you very much! I am very pleased to hear that!
The work was great, but I hope useful. Soon in this site will still be my tutorial. Invite view them :)
Thanks for the great review!