
Luminar AI lets you turn your ideas into reality with powerful, intelligent AI. Download the photo editor and see how you can completely transform your photos in a few clicks.


Step 20
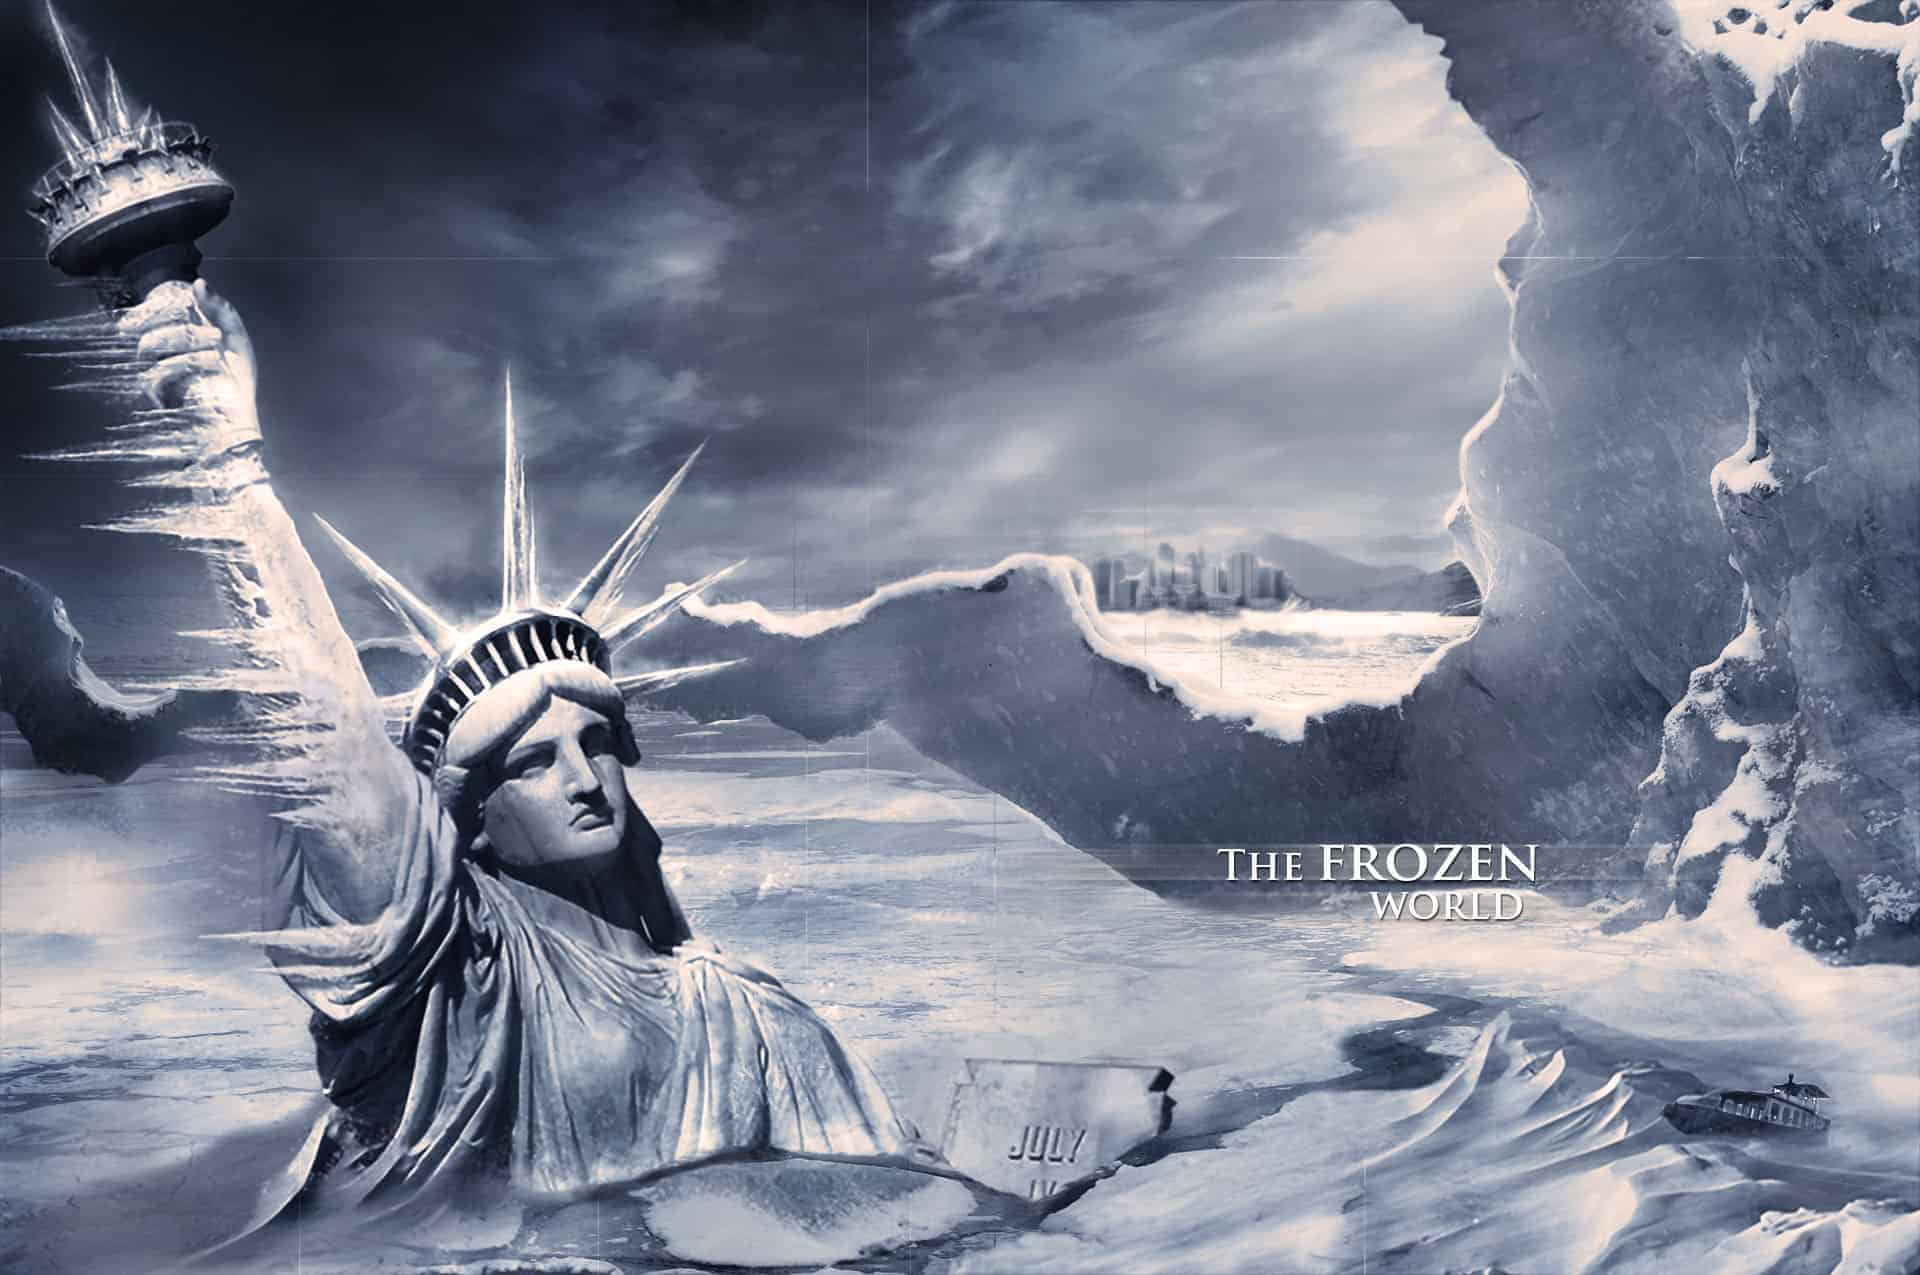
Open the same picture again, but now place it a bit to the right. Switch the blending mode to screen.


Use the Adjustment Layers shown below: Curves, Gradient Map (opacity about 25%) and Levels. Use this adjustment as a clipping mask.

Step 21
In this step we are still adding snow, so open the next picture and place it under the statue. Cover on the mask the unneeded parts.


Step 22
Now let's add some shadow to the statue. On a new layer, using the brush tool, create a shape like in the picture below and decrease it's opacity to 29%.


Step 23
At this point we have a good image but we need to focus on the small detail so I will add some snow at the statue's base. This is an easy procedure, just select the clone stamp tool and copy the snow from the right part. This must be done on a new layer under the one with the statue's shadow. Because of this the new created snow is going to be a bit dark. Use the Adjustment layers to correct that. You will find the presets below. (Hue/Saturation and Color Balance)


Now let's blend the snow: create a new layer on top of all and select the brush too. Paint on the snow with the colors you pick from the actual snow, by using the eyedropper tool. You can also use the clone stamp tool.

Step 24
We will now add some icicles. Get the Icicles stock file and start cutting out independent icicles. Using the pen tool cut a couple of icicles.

Step 25
Position the icicle on the hand and put that layer on Multiply and set the opacity to 50%

Duplicate the icicle layer (CTRL+J) and set the blending mode for the duplicated layer to Screen at 100% opacity.

Step 26
Group this two layers created at step 25 and duplicate the group a couple of times. Use Ctrl+T and make various transformations to the icicle until you have different size and shape icicles.

Arrange the icicles like in the image below.

Step 27
Duplicate some icicles and arrange them in a spiky formation to replace the fire.

Step 28
1) Cut another icicle from the Icicles stock photo and arrange it on the spike of the statue. 2) Set the blending mode to Screen. 3) Duplicate the this layer and leave the blending mode to Screen.
4 comments on “Create a Frozen Scene Inspired by "The Day After Tomorrow"”
Beautiful, creative and acutely enjoy able!
was keen to do this tutorial but some of the stock files are missing :(
FANTASTIC!!! :)
Wheres the Sky stock image??