
Luminar AI lets you turn your ideas into reality with powerful, intelligent AI. Download the photo editor and see how you can completely transform your photos in a few clicks.

Step 18
I used color #634739 to complete the hair drawing. Here is the result of this layer only and final result of model with all hair layers:

Step 19
Turn off original and fill layer. Press Cmd/Ctrl+Option/Alt+Shift+E to merge all transparent layers (extracted model and hair ones). Place her onto the pagan symbol and transform her to fit the direction of our image:

Step 20
Open wings stock. As it has transparent background so just use Move Tool to drag the wings into our piece and place them behind the model (set this layer under model one too):

Step 21
There are some small parts on the wings I don't like so I created a new layer with Clipping Mask and used Clone Tool to remove it:

Step 22
I found some details of the wing too sharp against the rest:

Create a new layer (Clipping Mask) and use Smudge Tool with Strength 34% to soften these details. Here are the parts I smudged and you can see the result below:

Step 23
To darken the wings I used a Curves layer:

On Curves layer mask I used brush with opacity and flow about 30-35% to reduce dark effects on some parts shown below:


Step 24
I want to make main light coming from the top right to bottom left to fit with the direction of the elements in our image. To make proper light on the wings following this direction, make a new layer (Clipping Mask), load the wings selection (as done with the pagan symbol). Go to Edit-Stroke and choose white color with 6 px:


Apply Gassian Blur with 20 px:

Add layer mask to this layer and use brush to reduce the light on the wings:


Step 25
I used same method to add more light to the wing contour, but with stroke 1 px, Gassian Blur 1 px and layer mask:


Step 26
Create a Gradient Map layer above the wings ones (but still under model layer).

Lower opacity of this Gradient Map layer to 50%. On Gradient Map layer mask use brush to erase the left side and reduce blue effect on the right:


Step 27
I used a Photo Filter layer for the image:


Step 28
Add a Curves layer to darken the scene:


Step 29
I used a Color Balance layer to enhance the red effect:


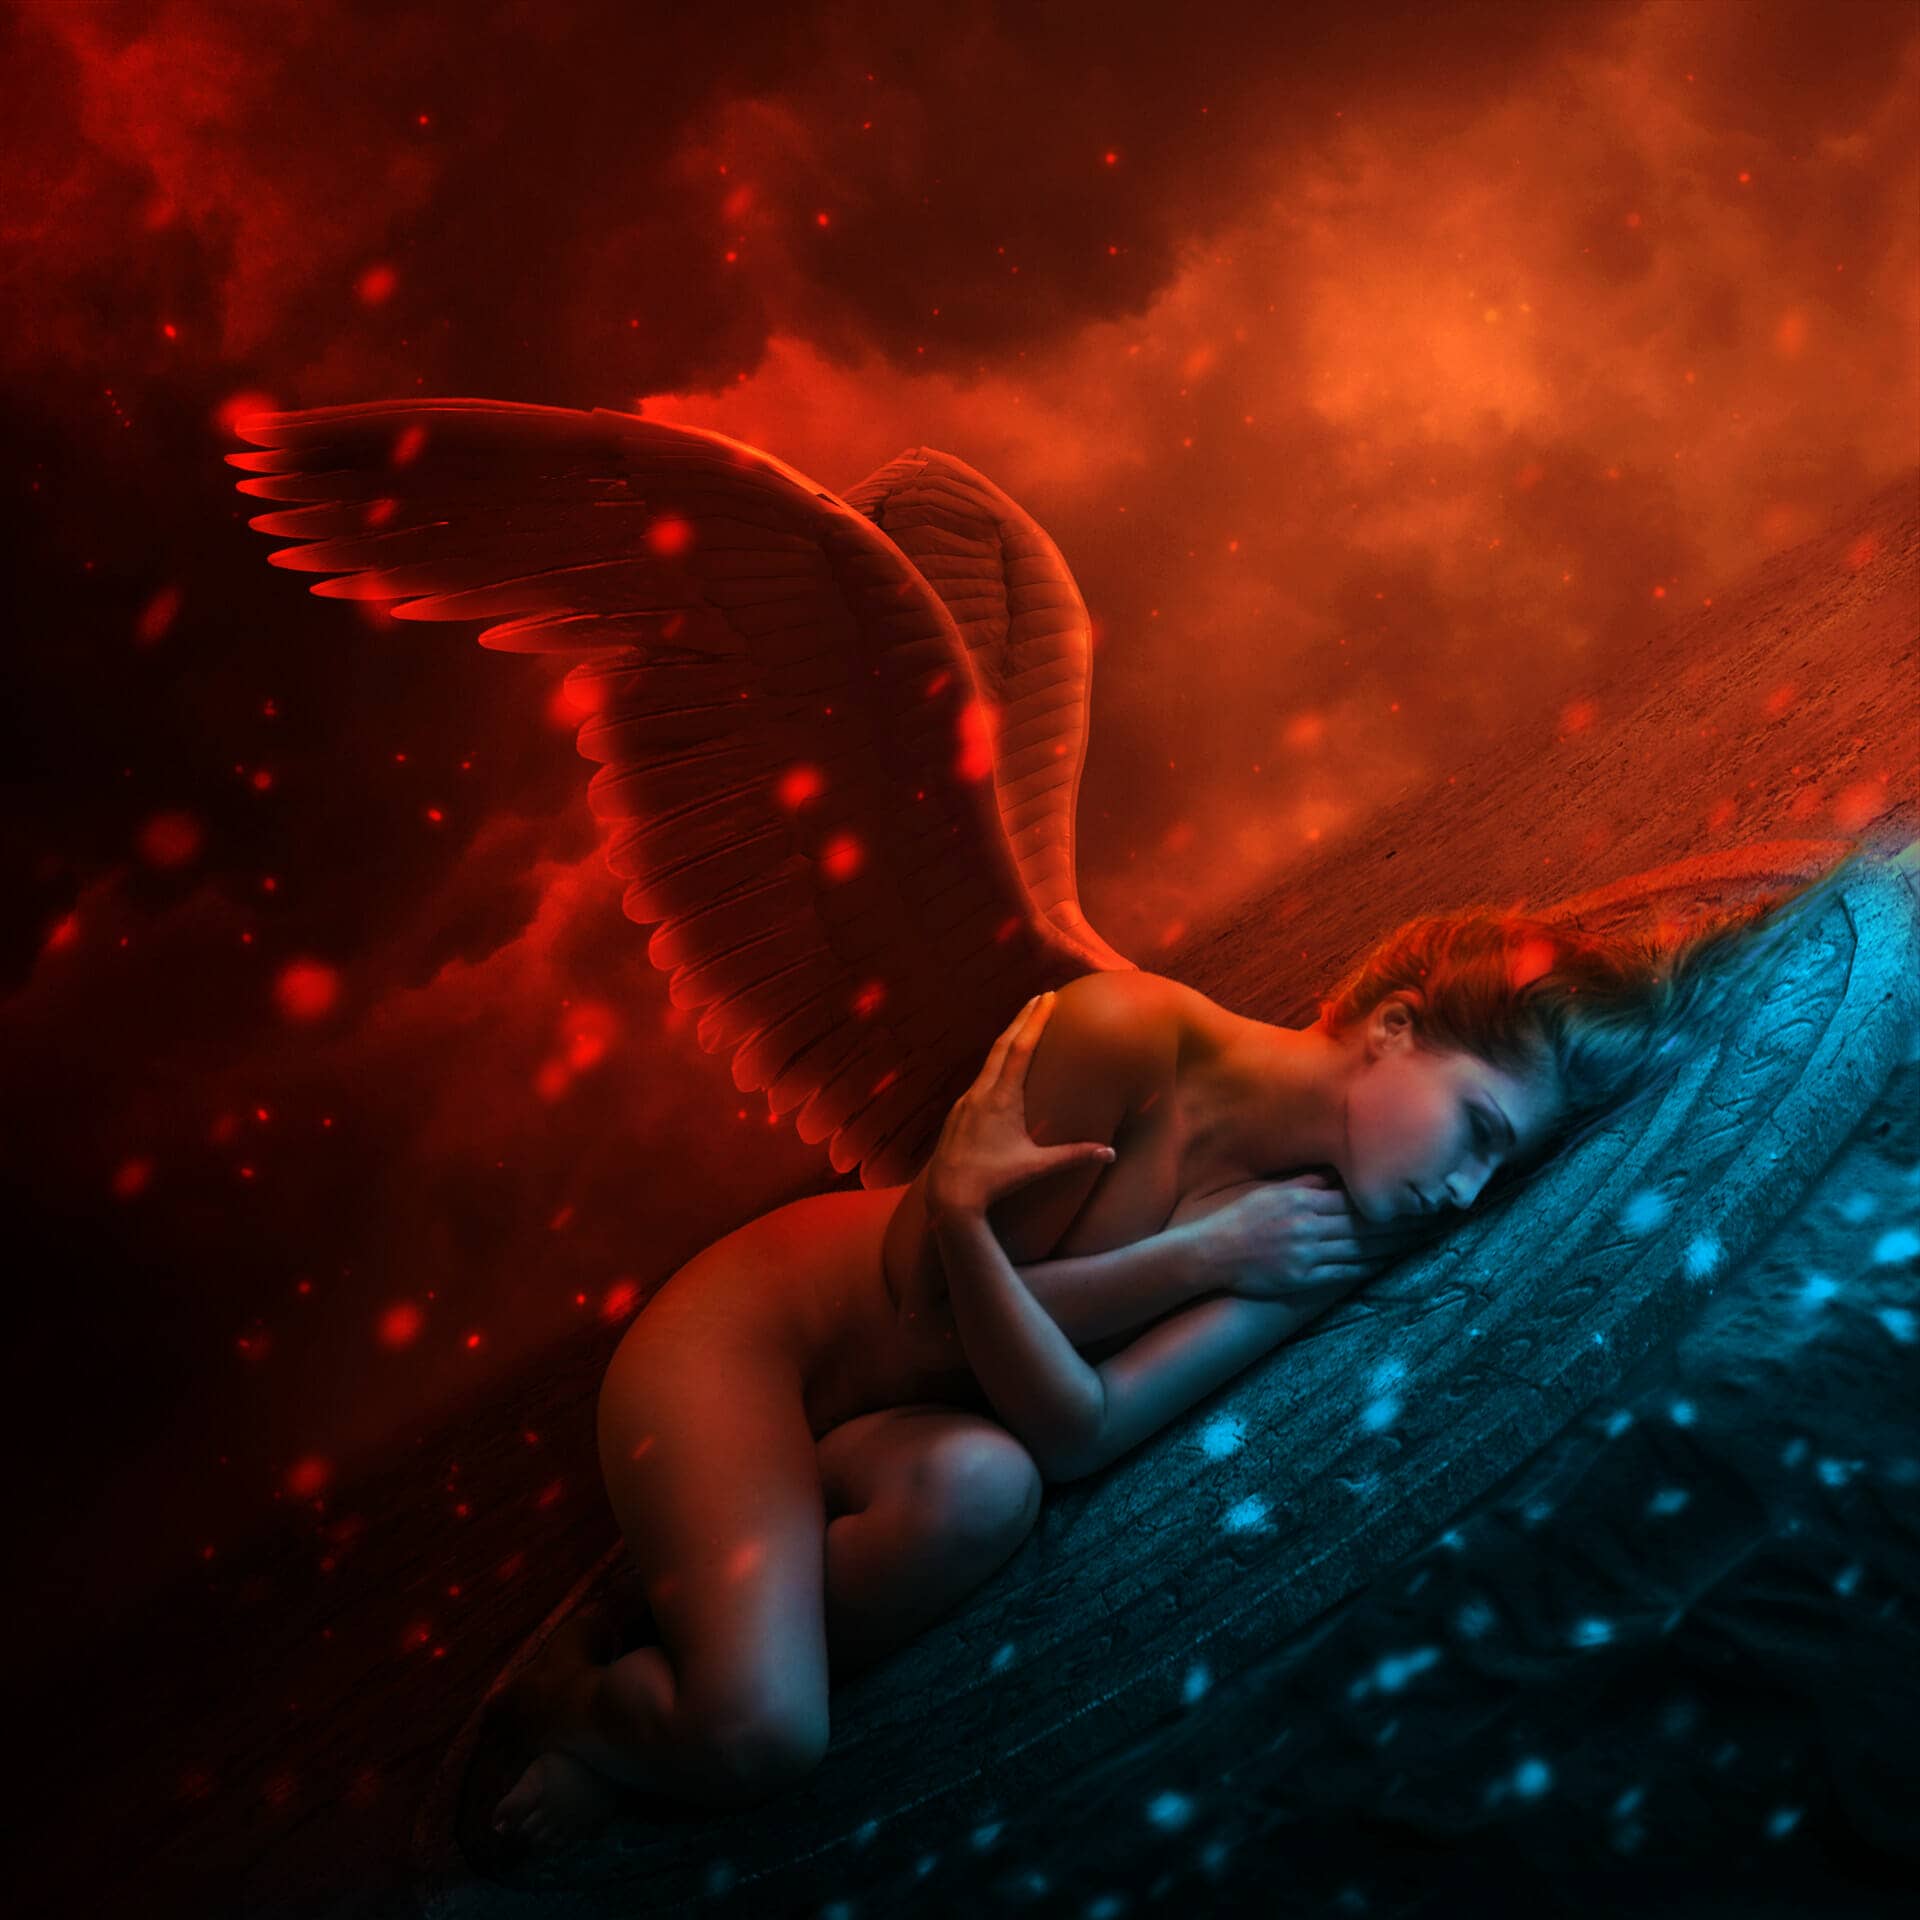
Step 30
It's time to take care of model. Make a new layer under model one and create shadow for her as done with the symbol, but with 90% opacity and apply Gassian Blur with 7 px:
10 comments on “Create an Intense Fallen Angel Composition in Photoshop”
This is a great tutorial. The desert and wings stock links don't work but I found other ones to use.
Awesome Post. Lighting is most beautiful. Thanks for the Post.
So Good Tutorial Photoshop
where can i download files required
Hey Jenny,
Could I use this tutorial and create a front cover for my bands album? Thanks :)!
Thank you for this great tutorial that I tried:
http://cartes-mireilled.eklablog.com/composition-d-un-ange-dechu-avec-photoshop-a106623770
please give me download options
Nice tutorial
I love your tuts Jenny!
Beautiful work and tutorial!