
Turn any photo into a dot grid artwork with these Photoshop actions. You'll get great results with dots that change size. They get larger in brighter areas and smaller in darker areas. Free download available.

I used layer mask to reduce opacity at the bottom of this shadow:

I named this layer "shadow 1".
Step 31
I used a new layer with soft black brush and opacity about 30%-50% to create more shadow under the model:


Step 32
To fix some details on model body I used a new layer with Clipping Mask and Clone Tool:


Step 33
To remove wound on model nose I used brush with color #8e5b52 (model skin tone) to paint there (on a new layer of course):

Step 34
To make model skin look smoother, I created a new layer and took soft brush with color #bf7f6f,, opacity and flow about 30% to paint on the face, especially cheeks, forehead, eyelids:

Don't overdo it as you can loose the details.
Step 35
Make a new layer with Clipping Mask, change the mode to Overlay 100% and fill with 50% gray:

Take Dodge and Burn with Midtones Range, Exposure about 15-20% to enhance some details of model face and hair. You can see how I applied this tool with Normal mode and result with Overlay mode:

Step 36
The model looks too bright compared with background. To darken her I used a Curves layer:

On Curves layer mask I reduced the dark effect on the model legs:


Step 37
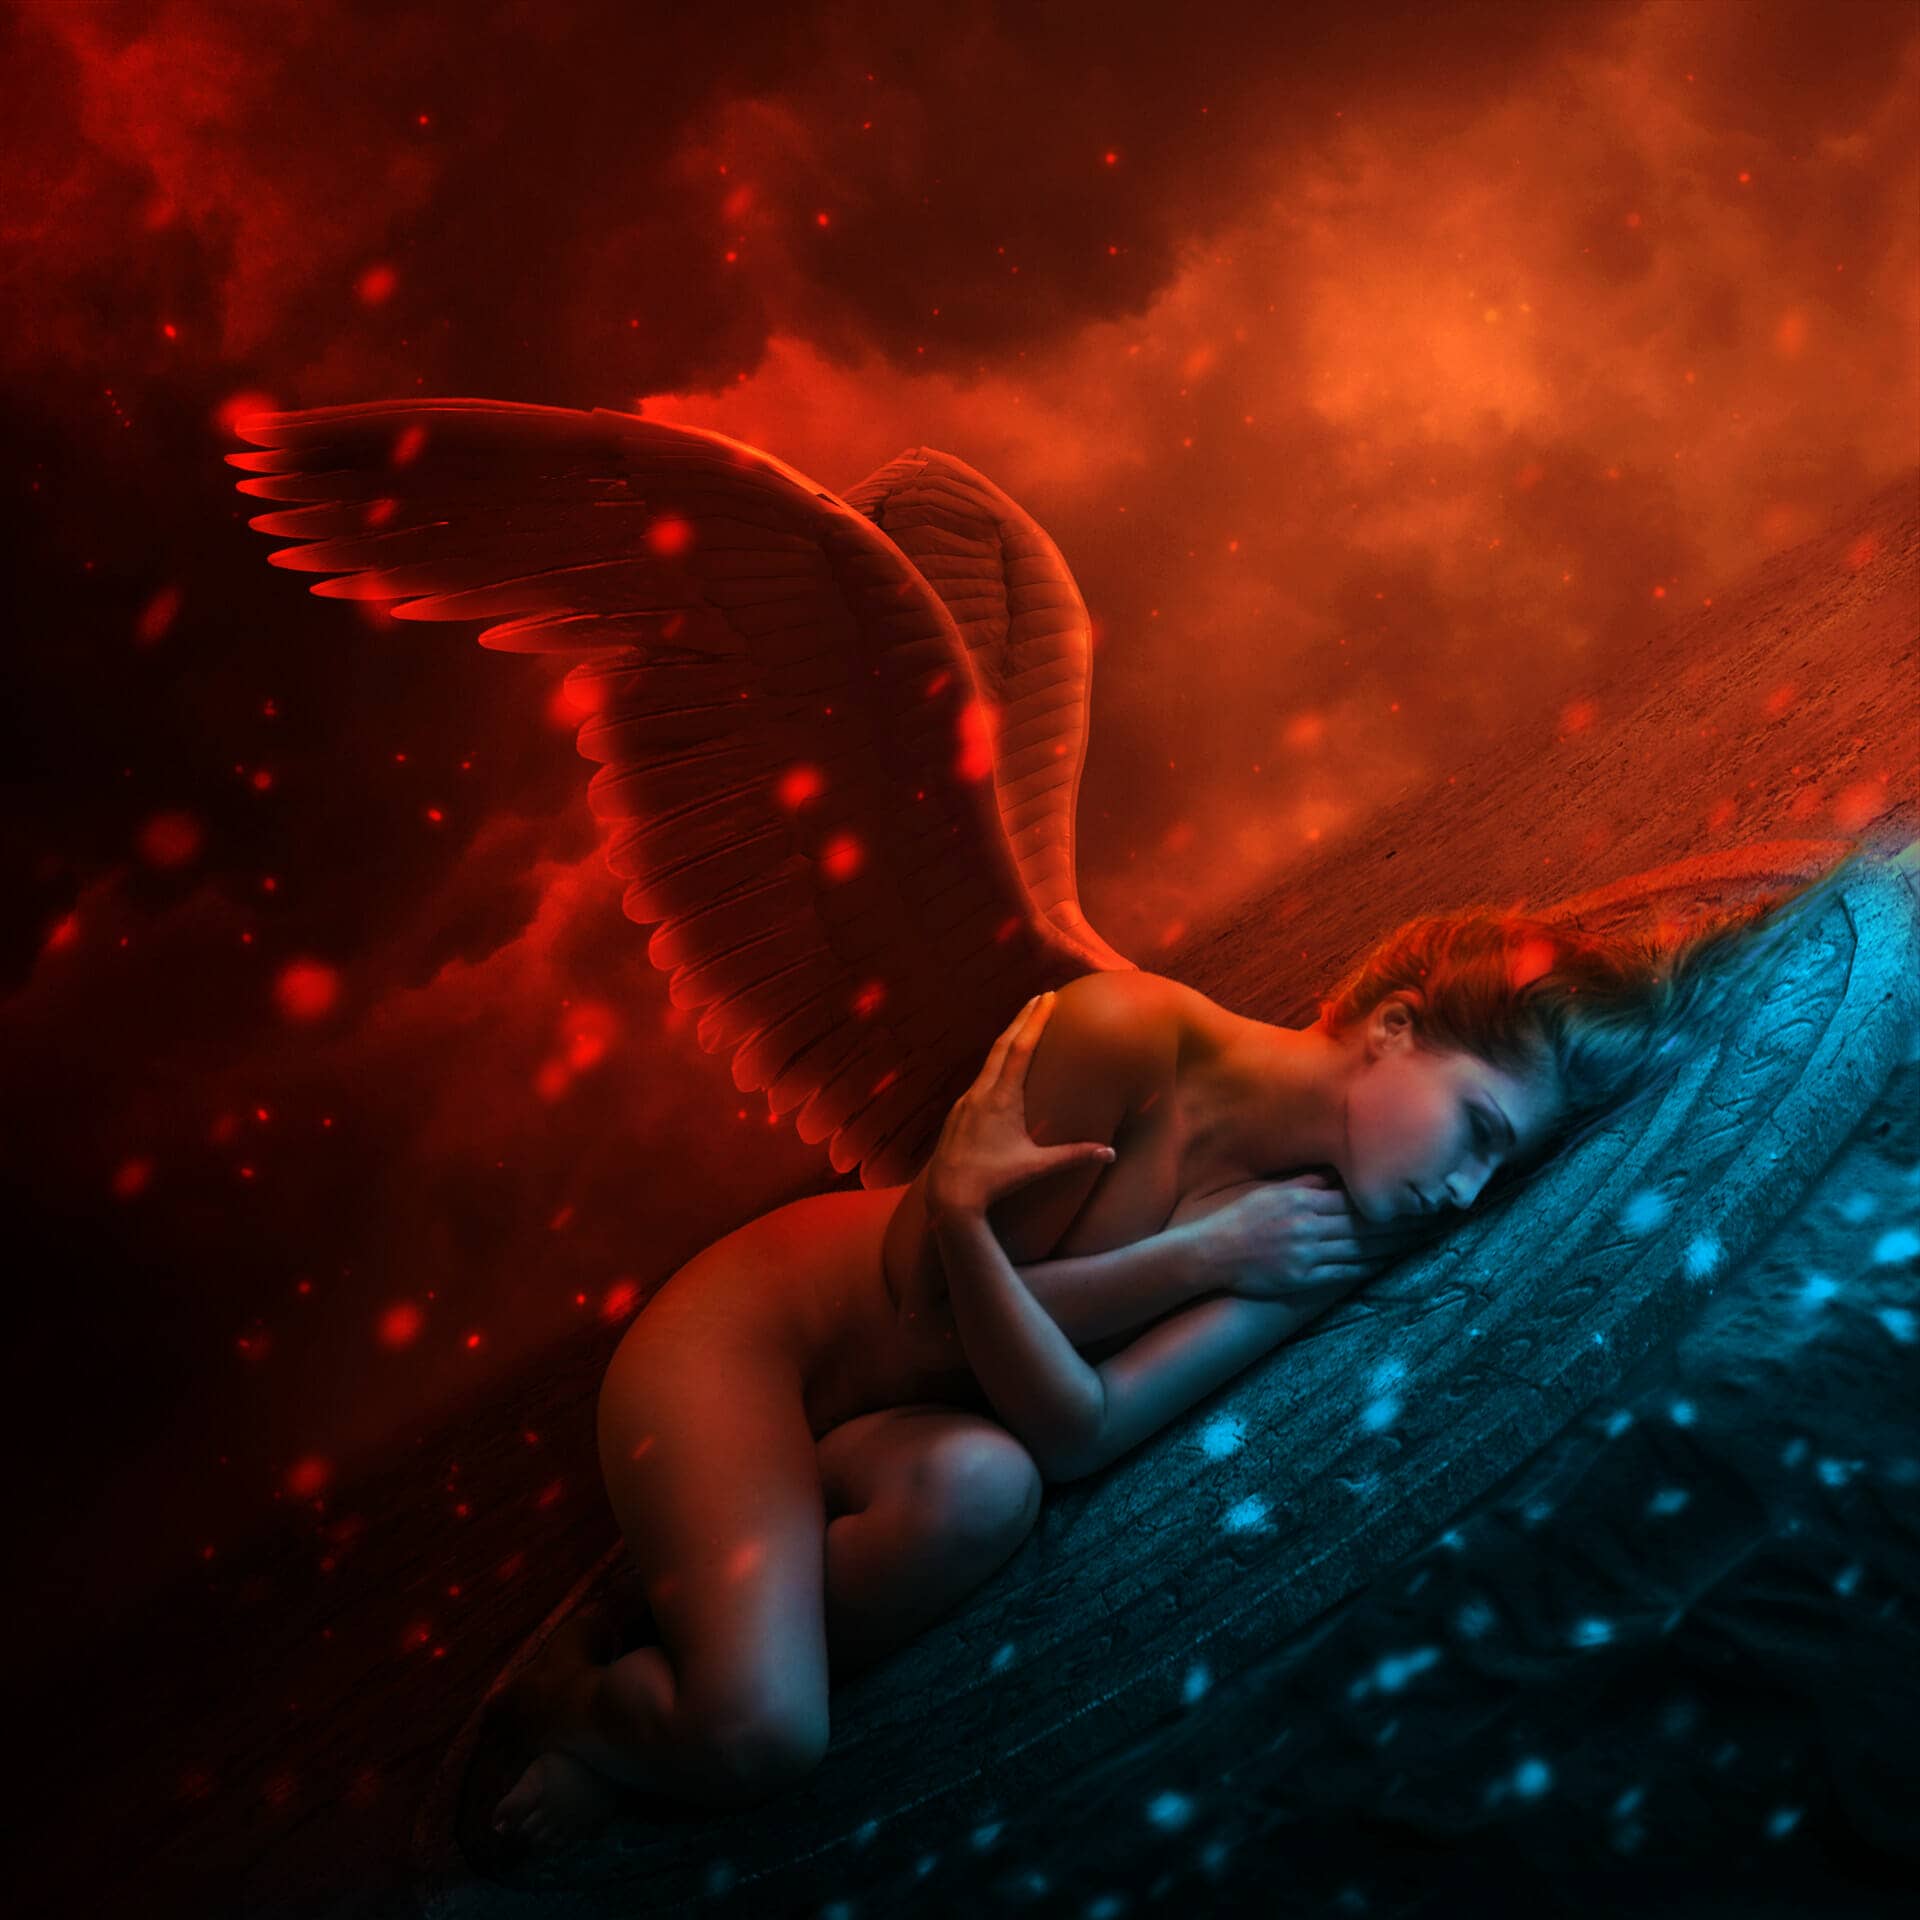
I used some layers to change the focus, light and contrast.
Make a new layer on the top, active Gradient Tool (G), choose Radial Gradient with default colors (black and white). Drag a line from top right to bottom left to define the light source:

Change the mode to Soft Light 100%:

Add layer mask to this one. Use brush to reduce the dark at the left of the desert:


Step 38
Add a Levels layer to increase the light:

On Levels layer mask I erased the model hip as I don't want it too bright:

Step 39
In this step we'll be adding some red color to the model. Double click model layer, choose Blending Options:

We have result:

Step 40
It's time to add some sparks to the pic. Create a new layer on the top and change brush color to #cb3c15 and size of 8 px. Press F5 to make settings for this brush:

Spot around the model and on background:

Apply Gassian Blur with 1 px:

Double click this layer, choose Outer Glow effect:


Use layer mask to blur some parts below:
10 comments on “Create an Intense Fallen Angel Composition in Photoshop”
This is a great tutorial. The desert and wings stock links don't work but I found other ones to use.
Awesome Post. Lighting is most beautiful. Thanks for the Post.
So Good Tutorial Photoshop
where can i download files required
Hey Jenny,
Could I use this tutorial and create a front cover for my bands album? Thanks :)!
Thank you for this great tutorial that I tried:
http://cartes-mireilled.eklablog.com/composition-d-un-ange-dechu-avec-photoshop-a106623770
please give me download options
Nice tutorial
I love your tuts Jenny!
Beautiful work and tutorial!