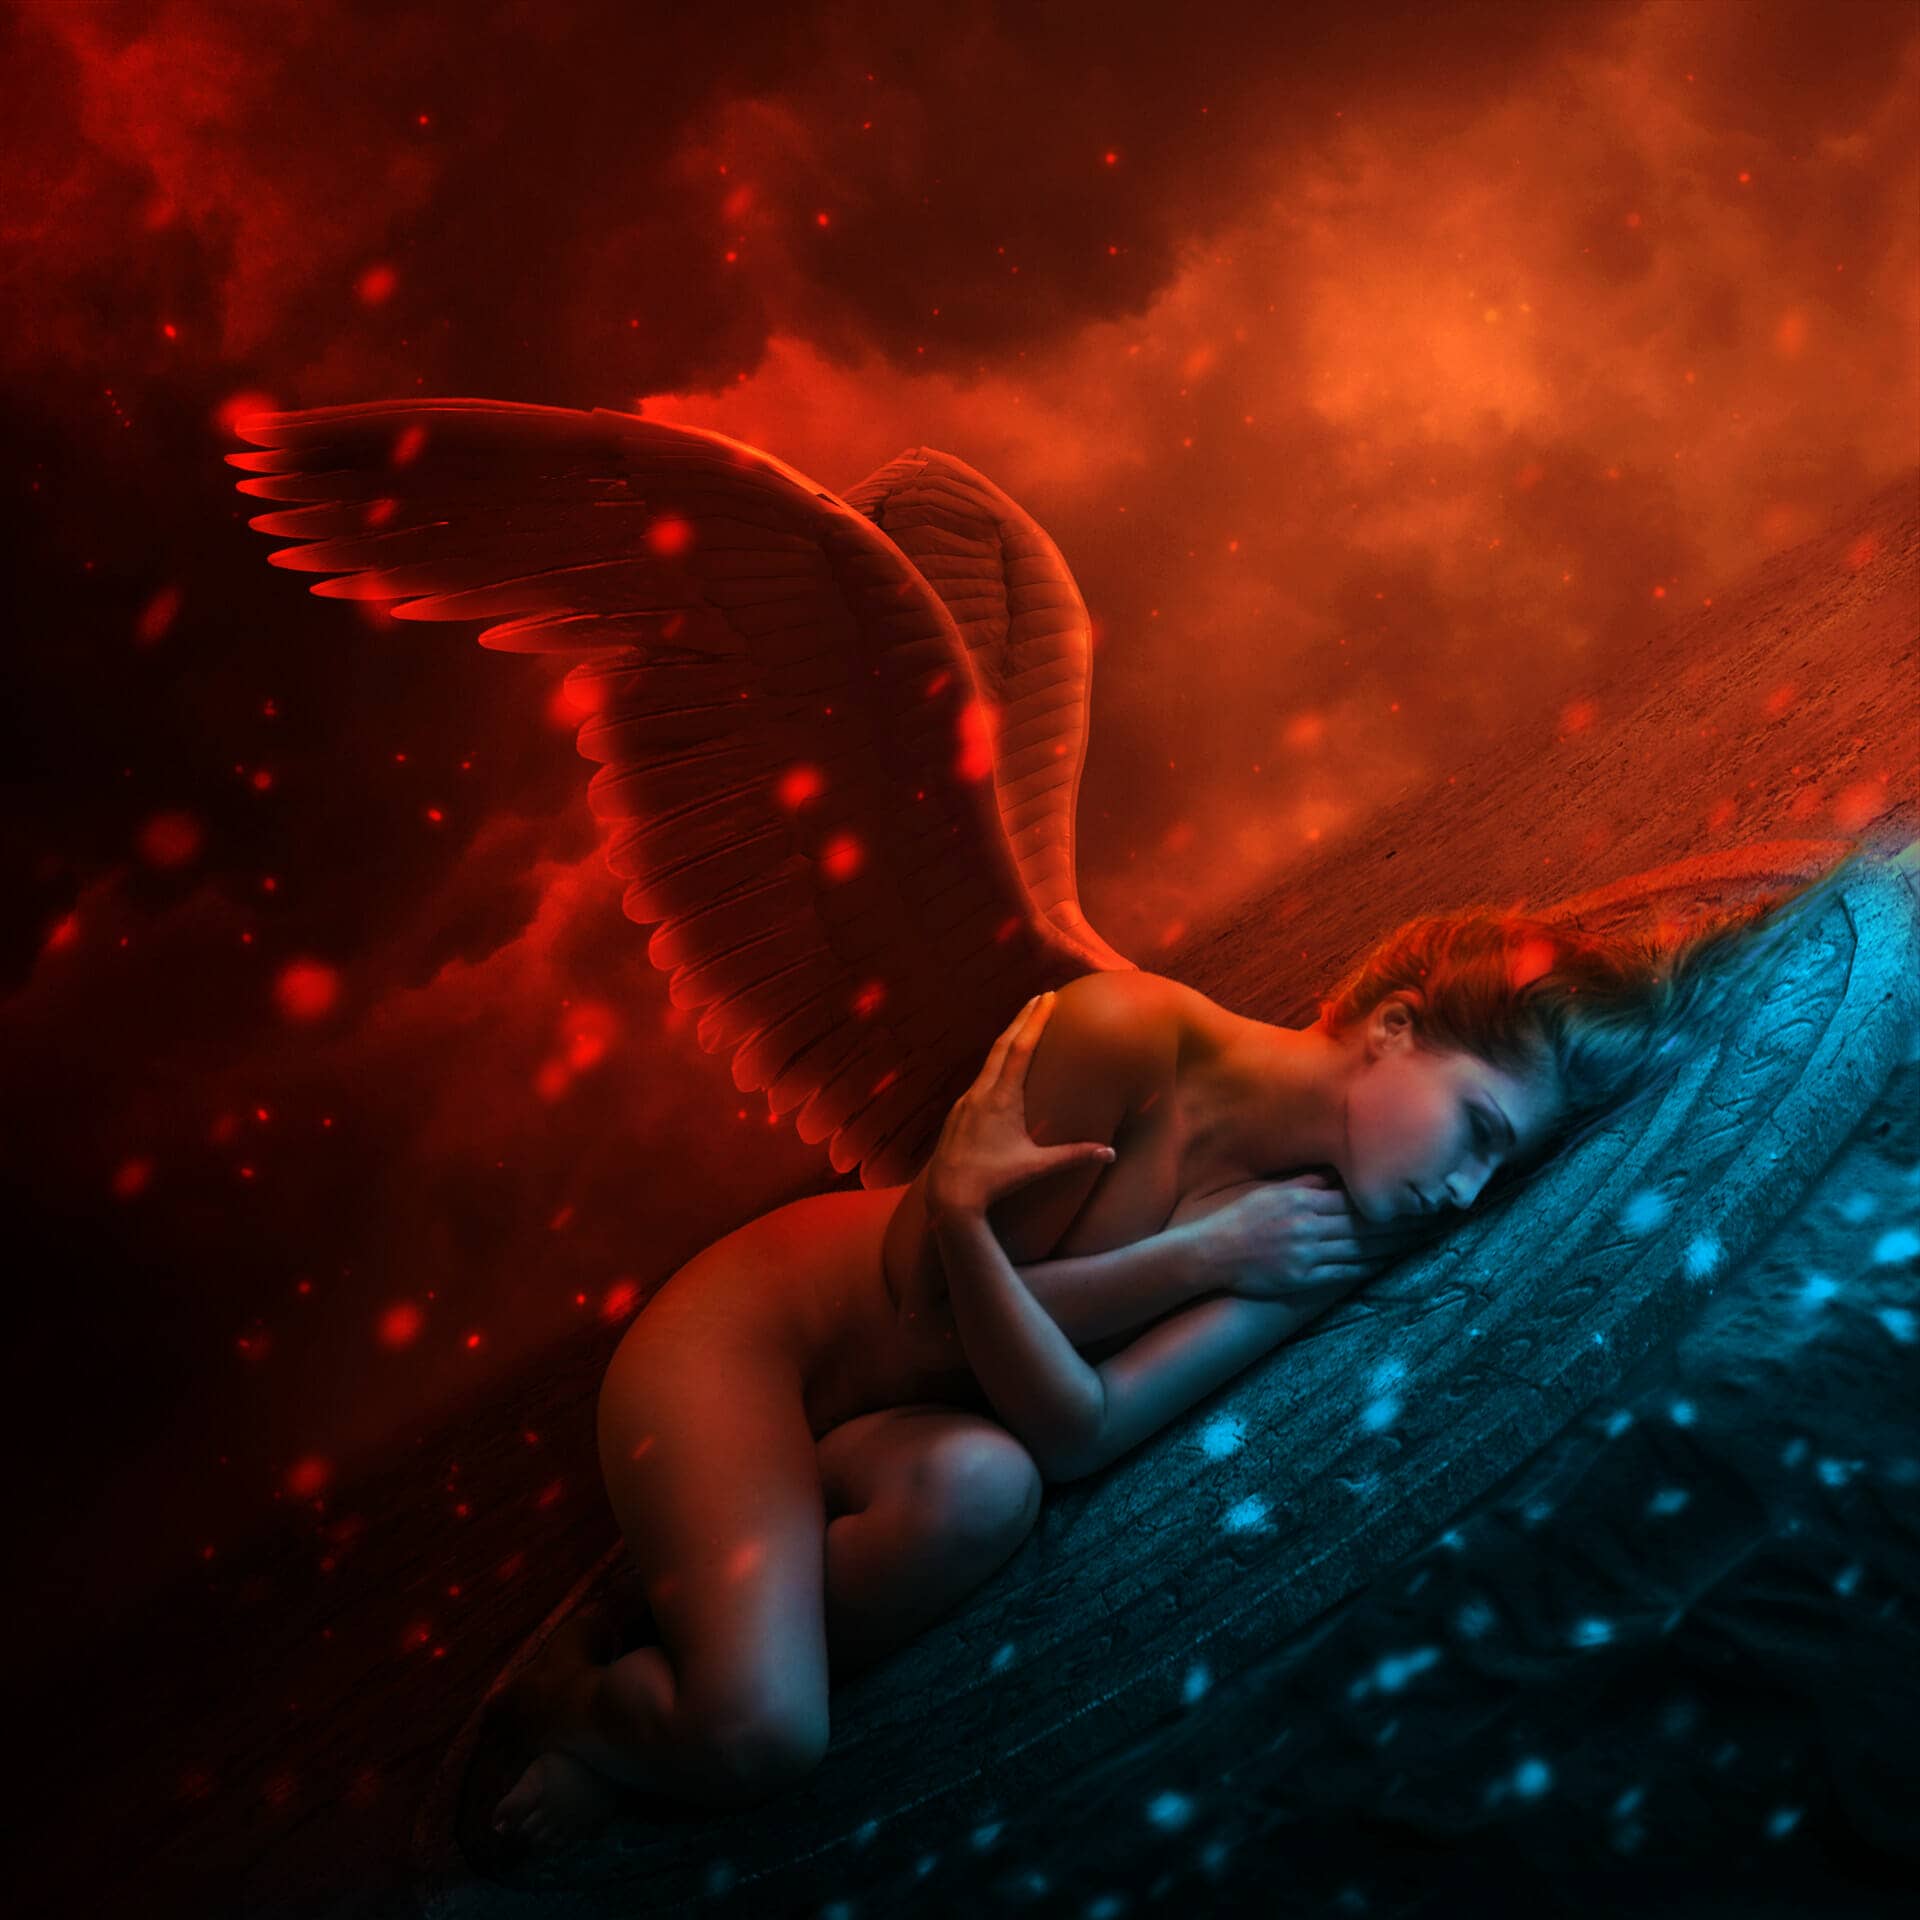

Make skin look perfect in one-click with these AI-powered Photoshop actions.

Step 41
Change the mode of this layer to Color Dodge 100%:

To make the effect look better, on this layer, press Cmd/Ctrl+G to make group for it. Change the mode of this group to Color Dodge 100% and name it "sparks 1". You can see that it is enhanced:

Step 42
I made a new layer within this group, used same brush and lower the size to 4-6 px to add more smaller sparks. Apply Outer glow effect with same settings with previous layer and use layer mask to remove any unwanted spark dots

Duplicate this layer and rotate it to place some spark dots on the ground:

Step 43
Make more sparks on the foreground with brush 10 px. I applied Outer Glow with same settings and Gassian Blur 3 px:

Step 44
I used this brush to paint over the pic:

Apply Outer Glow effect, Gassian Blur with 5 px and Motion Blur:

This is result:

Step 45
I used a brush 30 px to make bigger sparks. I added more settings for this brush :

The result after painting is shown in screenshot below:

I used layer mask to reduce the spark light:

Apply Motion Blur with same settings in previous step:

Step 46
I added a new layer, used brush 10 px, with Outer Glow and Motion Blur filter:

Use layer mask to reduce light on some sparks:

I used 7 layers for this spark effect and you can see the result below:


Step 47
In this step we'll make more sparks . Make a new layer on the top (above sparks 1 group). Use same brush with 15 px to paint on foreground:

With layer mask:

Apply Gassian Blur with 3 px and Motion Blur with same settings with sparks 1 group:

I named this layer "sparks 2".
Step 48
I used a Curves layer to darken and enhance these sparks:

Step 49
Now it's time for coloring. First we'll add some red to model body. Create a new layer on the top. Take soft brush with color #ff3700 to paint on the model hip and thigh then alter the mode to Color 30%:

Step 50
Make a new layer again and use same brush to paint behind model body to brighten this part. I lowered opacity of this layer to 20%:

Step 51
To add more red to model body I used a new layer and chose color #8a2f16 for brush. Paint on model face, shoulder, neck and hip and put the mode as Soft Light 100%:
10 comments on “Create an Intense Fallen Angel Composition in Photoshop”
This is a great tutorial. The desert and wings stock links don't work but I found other ones to use.
Awesome Post. Lighting is most beautiful. Thanks for the Post.
So Good Tutorial Photoshop
where can i download files required
Hey Jenny,
Could I use this tutorial and create a front cover for my bands album? Thanks :)!
Thank you for this great tutorial that I tried:
http://cartes-mireilled.eklablog.com/composition-d-un-ange-dechu-avec-photoshop-a106623770
please give me download options
Nice tutorial
I love your tuts Jenny!
Beautiful work and tutorial!