Luminar AI lets you turn your ideas into reality with powerful, intelligent AI. Download the photo editor and see how you can completely transform your photos in a few clicks.
- Vignette amount: -100
- Midpoint: +50
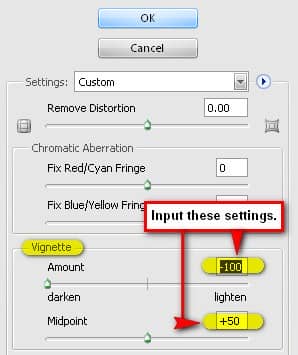
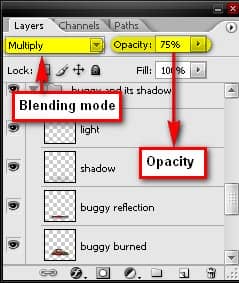
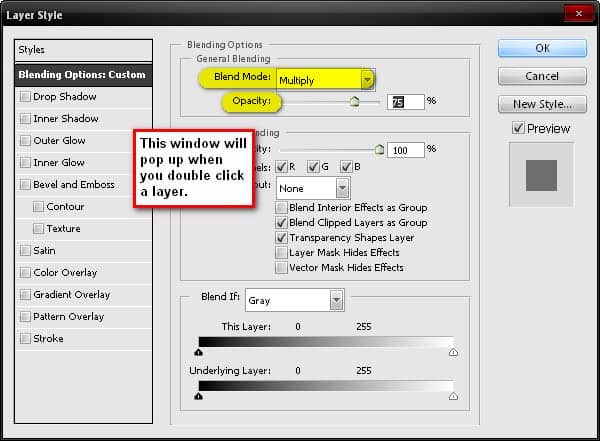
Now that that’s done drag the vignette to our canvas using the Move tool (V) and put it on top of all the layers that we’ve created, and then set its Blending mode to Multiply and its Opacity to 75%.
Note: The Blending mode can be found in the Layer window, the Opacity tab is just beside it. You may also access the Blending mode by double clicking on the layer that you want the Blending mode changed.
Step 6 - Adding the Texture
Now we will be adding our texture to give the image a distinct feel and color. Open “Paper Texture 1” and drag it to our image using the Move tool (V). Once it is on our canvas, activate the Transform tool to resize it to fit our canvas.
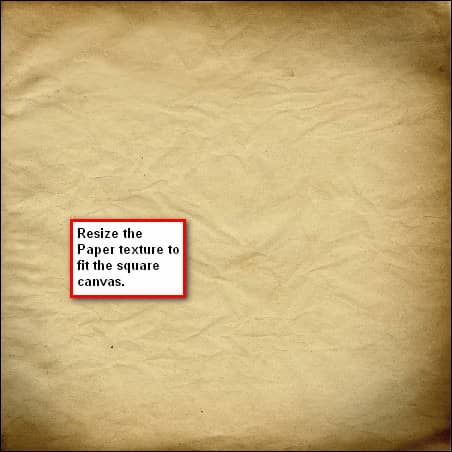
Now let’s change its blending mode; input these settings:
- Blending mode: Soft light
- Opacity: 20%
After you’ve done that, you’d notice that there are some unwanted lines on the sky which resulted from the texture that we’ve added. We’ll need to remove that and in order to do so; we’ll need the Clone Stamp tool (S). Activate the tool and input these settings:
- Brush size: 300px
- Hardness: 0%
- Opacity: 100%
- Flow: 100%
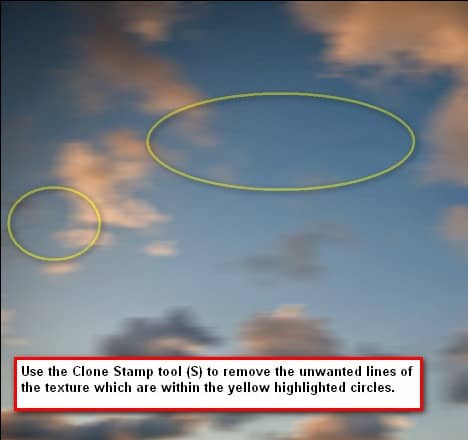
See the image below for the result of using the Clone Stamp tool.
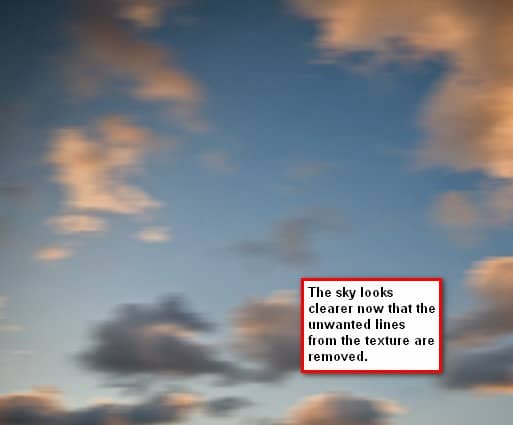
Step 7 - Retouch the image
In this step, we will be giving the image a retouch. We will recolor it, and make it more breathtaking. Click on the “Create new fill layer or adjustment layer”.
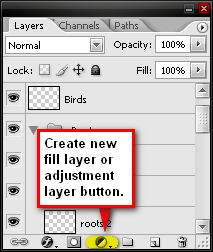
Upon clicking that button pick Solid Color from the menu. Opening the Solid Color from the menu opens the Color Picker box. Upon opening, input these values on the “#” box.
- #: 000326
When the box closes, change the Blending mode to “Exclusion” and set the Opacity to 40%. Create another Solid color adjustment layer and then input this value on the “#” box.
- #: ef851e
Change the Blending mode to “Soft Light” and the Opacity to 20% when the box closes. Now let’s create a Gradient Map adjustment layer. Click on “Create new fill layer or adjustment layer” button and choose Gradient Map from the contextual menu.
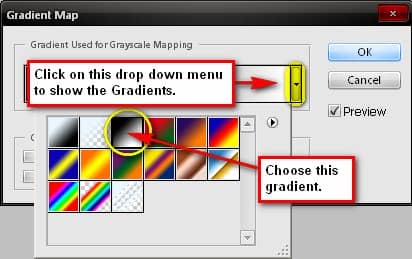
Press OK and once it appears on the Laye r window, change its Blending mode to Luminosity, while leave the Opacity unchanged. Next, let’s create a Color Balance adjustment layer. Once the Color Balance box opens, input these values, respectively:


3 comments on “How to Create A Long Exposure Sunset Image Using Photoshop”
Perfect
Gr8
WoooW !!
This is fantastic not only the image but the processes. Totally awesome. Thanks very much !!!!