

Make your artwork look like they're from an alternate universe. These Cyberpunk presets work with Photoshop (via the Camera Raw filter) and Lightroom. Download all 788 presets for 90% off.
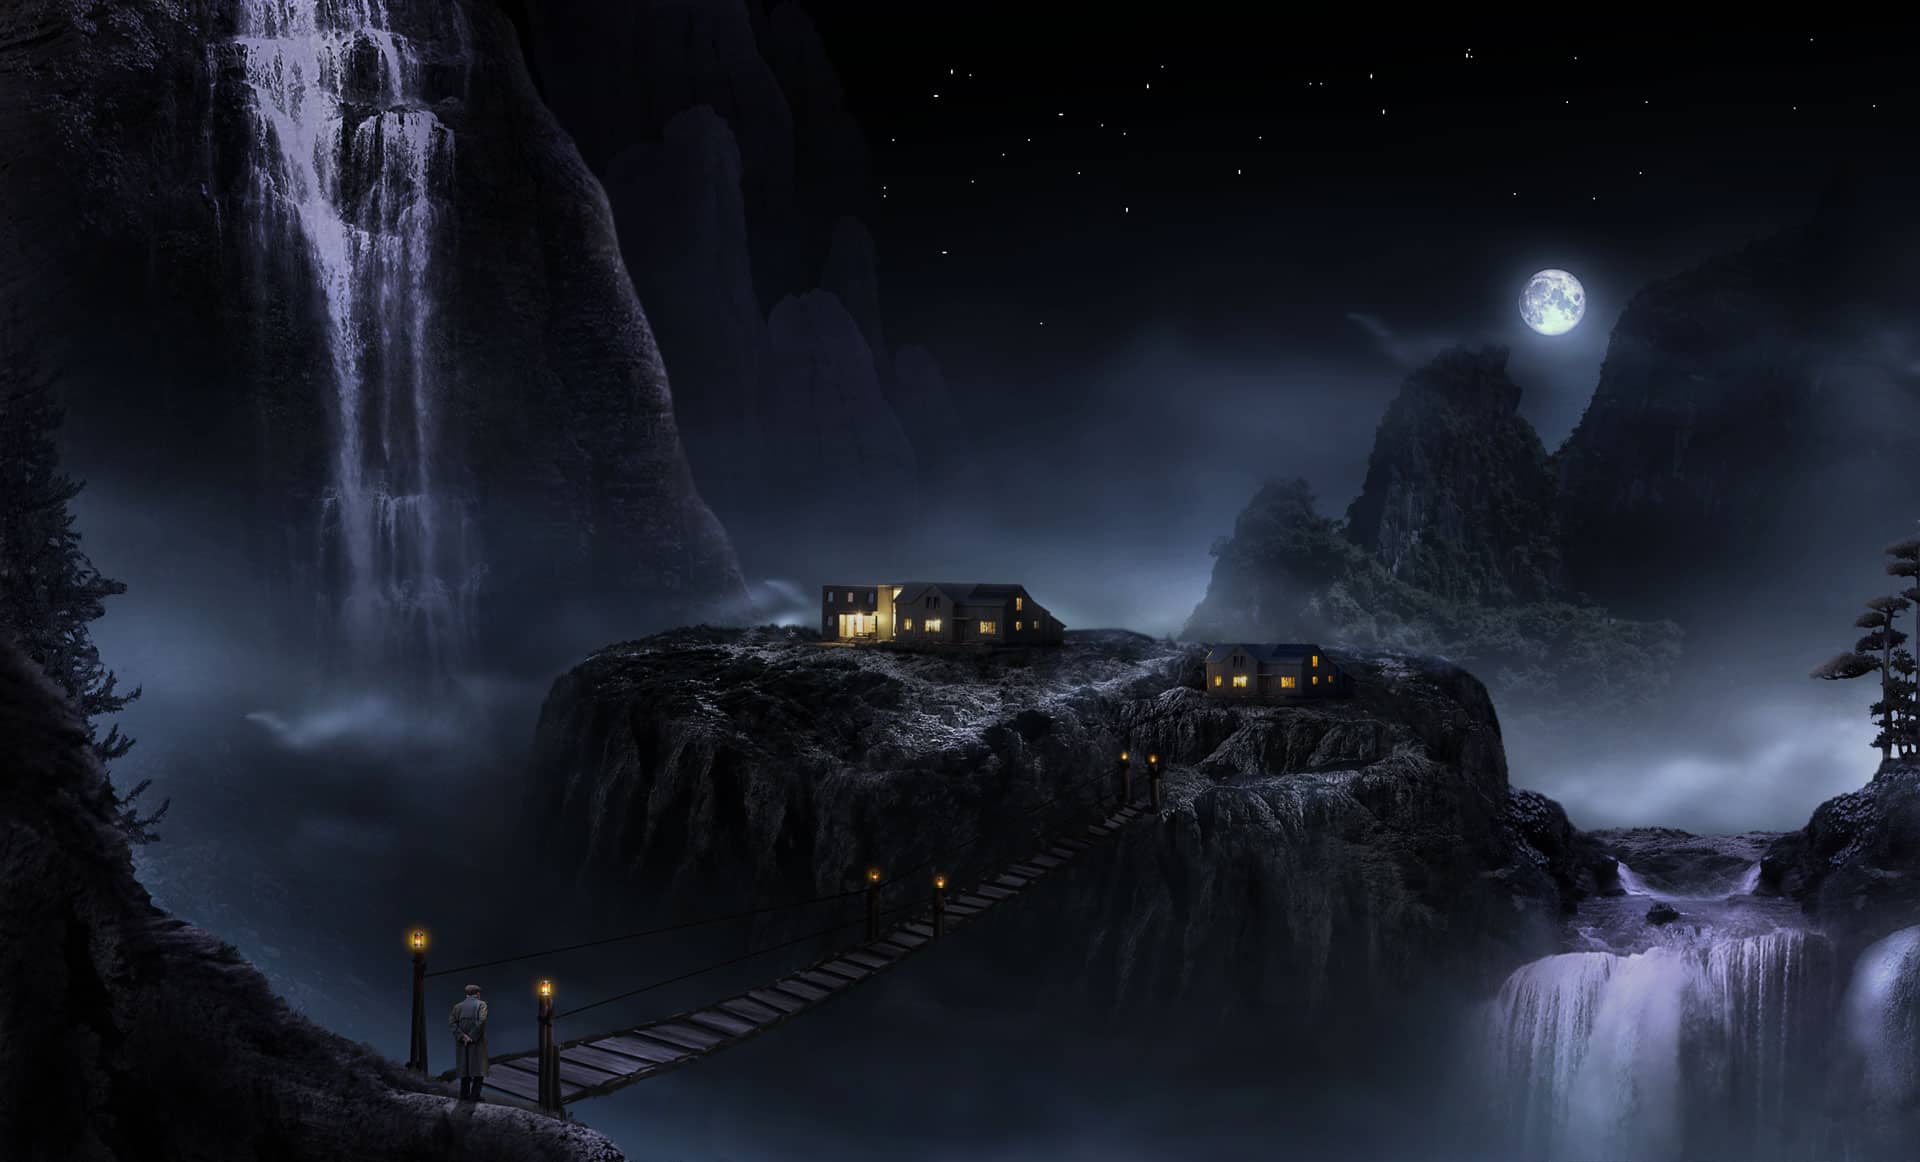
Here is the result.

Duplicate the hue/saturation layer and set the duplicate to multiply at 100% opacity. Select all the background layers and hit Ctrl+G to group them in one folder. I named this folder BG.

Step 17
Now select the middle rock layer and give it a layer mask. Mask areas on the bottom of the rock to make it look like being covered in the mist.

Step 18
Next, give this rock layer a hue/saturation layer with a clipping mask. Set the value of the hue/saturation as the one below:

Set the hue/saturation layer to soft light blending at 100% opacity. Here is the result.

Duplicate the hue/saturation layer two times. Make sure that the two duplicates still have clipping masks on it. Next set the two duplicate to normal blending at 100% opacity.


Step 19
Give the other new adjustment layers with a clipping mask to the middle rock. This time, we will give it brightness/contrast and photo filter with values shown below:


Set the two layers to normal at 100% opacity. Select all the middle rock layers and hit Ctrl+G to group them in one folder. I named this folder middle rock. Here is the result:

Step 20
In this step, we will add foreground rock to the scene. We will use an almost similar way on how we create the middle rock in the previous layers. Open the stock image, cut out the part needed, and add the cut out into the main document. Scale its size as needed.

Add another rock to the main document.

Mask the second cut out to make it well blended. Select all the foreground rock layers and merge them (Ctrl+E). I named this layer foreground rock.

Step 21
What we should do next is to fix the edges of the rock. It still has hard edges. Give this layer a layer mask. We will mask the edges of the rock. Take the brush tool and choose the 27 spatter brush in the brush picker.

Mask the edges by stroking the spatter brush with black color.

Step 22
We need to change the color of the foreground rock. To do this we will give it two adjustment layers with clipping masks. First give it hue/saturation.

Duplicate the hue/saturation layer two times. Set the original layer to soft light at 100% opacity and the two duplicates to normal at 100% opacity.

Finally, give it a photo filter layer with a clipping mask. Set this layer to normal at 1005 opacity. Select all the foreground rocks and group them in one folder. I named this folder foreground rock.

Here is the result.

Step 23
In this step we, we are still working on the foreground layer. We will give it some shadow. To do this purpose, create a new layer above the photo filter layer by hitting the short keys Shift+Ctrl+N on the keyboard. Make sure to give this new layer a clipping mask.

Take a very soft round brush set to 15-20% opacity. On this layer, stroke the brush on the selected areas with black to give it shadow.


Step 24
Create a new layer above the shadow layer with a clipping mask. Set blending option to soft light and check the Fill with Soft Light-neutral-color (50% gray) to fill the new layer with color of 50% gray.

27 comments on “How to Create a Marvellous Night Landscape with Waterfalls”
the download link won't work
Thanks Zach! It's fixed now
Very awesome tut here. Sometimes I wanna make my images a little more "fantasy", but I always feel like I lack the creativity.
stunning
i am triying to remove background
Great article! Thank you!
thank you
I was unable to get the 2 waterfalls as my security wont let me and the Rock6 was not sure which one you wanted...really want to learn this but am having issues ~ thank you
wooooooooooooowwwww awesome
awesome and unique collection of sequence photography i love it.
Thank for sharing.
sorry, i didnt get step 16...i hit -100 on HS but the color changed to totally black n white! whats wrong?
this is what we call it "creative mind"
This is amazing! I'm going to try it out soon! Thanks Dek.
AWESOME.PERIOD
You did an excellent job of step by step tutorial with pics which helped me understand why and the reason for each.
Thanks ;)
I like your tutorial a lot!
But, sorry if it sounds dumb, how do i copy-paste the cut out into the main document (step 3)? It doesn´t work with ctrl+c/ctrl+v...
firstly select the cut out (hold-press Ctrl and click the thumbnail of the cut out layer. when it is selected, hit Ctrl+C and then be active on the main document, paste (ctrl+v) the layer on it.
very good tutorial I love your technique
thanks for share
Excelente tutorial, el modelo nolo encuentro, saludos desde España
Hola malissimo,
Aquí lo puedes encontrar: http://photoshopworld.ru/lessons/507/old_man.jpg
Un saludo desde Francia
___
Btw, thank you for this tutorial. This is impressive. And I learnt new useful techniques.
how do you get of masking??????????
If you see red than press Q to get out of quick mask. If you dont see red, just click on the left thumbnail of your layer... the left one not the right thumbnail.
pathi thane sollirukinga
This is a magnificent masterpiece. Excellent explanation. Thank you very much.
Duuuuuuuuuuhhhhhhhhhhhh!!!!!!!!!!!!!!!!!! Mwanangu jembe unatisha kinoma
I like yer tut... good