
Download Lightroom presets and LUTs, absolutely free. Use the presets to add creativity and style to your photos.
![image021[4]](https://cdn.photoshoptutorials.ws/wp-content/uploads/migrated-images/image0214.jpg?strip=all&lossy=1&quality=70&webp=70&avif=70&w=1920&ssl=1 "image021[4]")
- #: fff7bf
![image022[4]](https://cdn.photoshoptutorials.ws/wp-content/uploads/migrated-images/image0224.jpg?strip=all&lossy=1&quality=70&webp=70&avif=70&w=1920&ssl=1 "image022[4]")
![image023[4]](https://cdn.photoshoptutorials.ws/wp-content/uploads/migrated-images/image0234.jpg?strip=all&lossy=1&quality=70&webp=70&avif=70&w=1920&ssl=1 "image023[4]")
![image024[4]](https://cdn.photoshoptutorials.ws/wp-content/uploads/migrated-images/image0244.jpg?strip=all&lossy=1&quality=70&webp=70&avif=70&w=1920&ssl=1 "image024[4]")
- Brush size: 1500 px
- Hardness: 0%
- Opacity: 25%
- Flow: 100%
- #: 000000
![image025[4]](https://cdn.photoshoptutorials.ws/wp-content/uploads/migrated-images/image0254.jpg?strip=all&lossy=1&quality=70&webp=70&avif=70&w=1920&ssl=1 "image025[4]")
![image026[4]](https://cdn.photoshoptutorials.ws/wp-content/uploads/migrated-images/image0264.jpg?strip=all&lossy=1&quality=70&webp=70&avif=70&w=1920&ssl=1 "image026[4]")
![image027[4]](https://cdn.photoshoptutorials.ws/wp-content/uploads/migrated-images/image0274.jpg?strip=all&lossy=1&quality=70&webp=70&avif=70&w=1920&ssl=1 "image027[4]")
- Brush size: 1200px
- Hardness: 0%
- Opacity: 25%
- Flow: 100%
- #: 000000
![image028[4]](https://cdn.photoshoptutorials.ws/wp-content/uploads/migrated-images/image0284.jpg?strip=all&lossy=1&quality=70&webp=70&avif=70&w=1920&ssl=1 "image028[4]")
![image029[4]](https://cdn.photoshoptutorials.ws/wp-content/uploads/migrated-images/image0294.jpg?strip=all&lossy=1&quality=70&webp=70&avif=70&w=1920&ssl=1 "image029[4]")
![image030[4]](https://cdn.photoshoptutorials.ws/wp-content/uploads/migrated-images/image0304.jpg?strip=all&lossy=1&quality=70&webp=70&avif=70&w=1920&ssl=1 "image030[4]")
![image031[4]](https://cdn.photoshoptutorials.ws/wp-content/uploads/migrated-images/image0314.jpg?strip=all&lossy=1&quality=70&webp=70&avif=70&w=1920&ssl=1 "image031[4]")
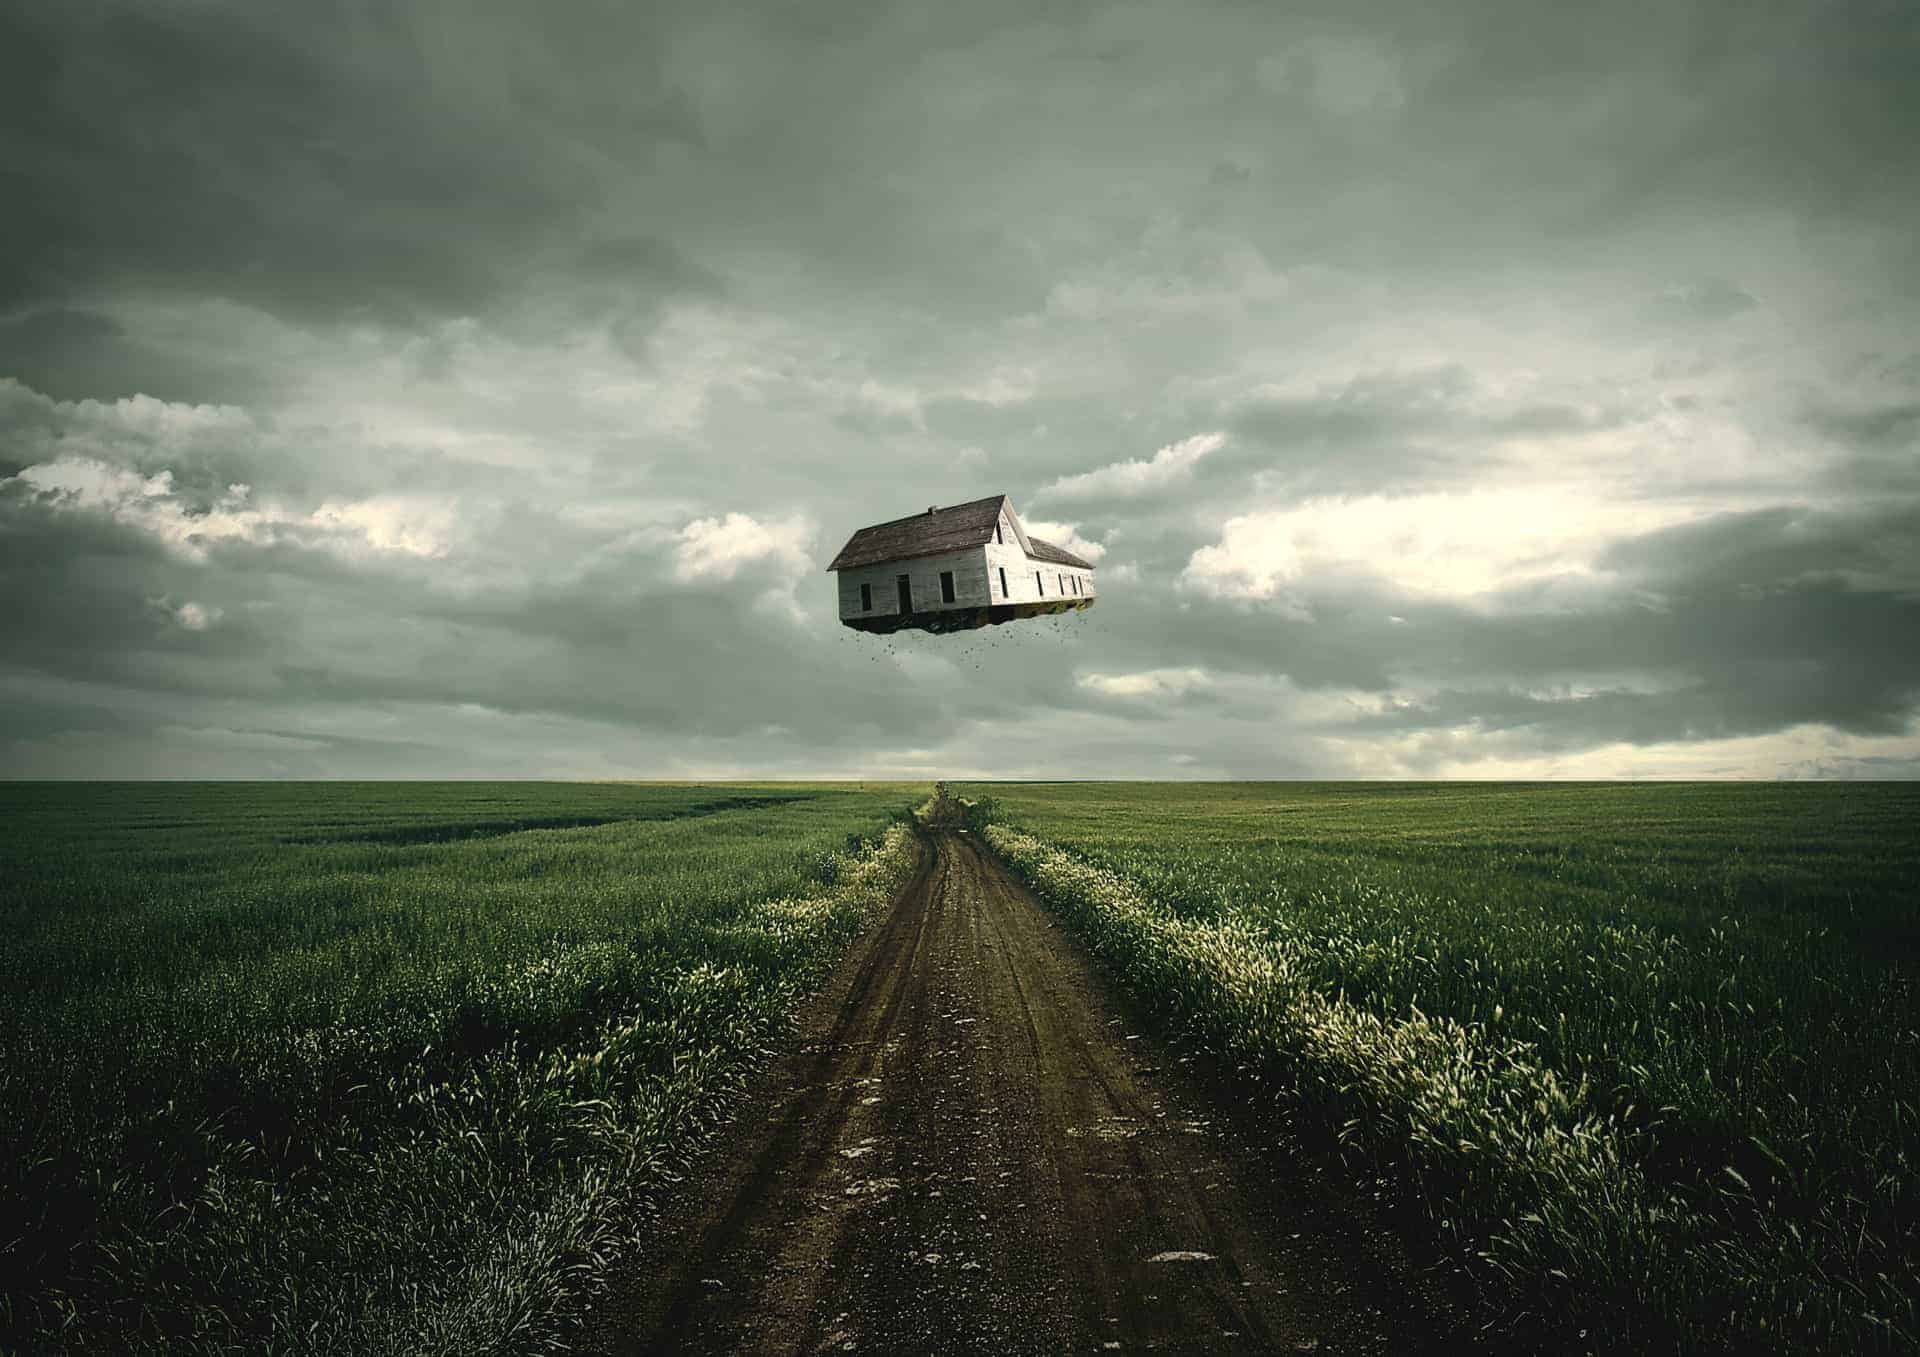
Step 3: Create the Floating House
In this layer, we will be creating the Floating house on top of this vast field. To start, let’s open the stock image: 1293783_39442557. Once open, activate the Magnetic Lasso Tool. We will need this to create a selection area around the house. The Magnetic Lasso tool can be found here:![image032[4]](https://cdn.photoshoptutorials.ws/wp-content/uploads/migrated-images/image0324.jpg?strip=all&lossy=1&quality=70&webp=70&avif=70&w=1920&ssl=1 "image032[4]")
![image033[4]](https://cdn.photoshoptutorials.ws/wp-content/uploads/migrated-images/image0334.jpg?strip=all&lossy=1&quality=70&webp=70&avif=70&w=1920&ssl=1 "image033[4]")
![image034[4]](https://cdn.photoshoptutorials.ws/wp-content/uploads/migrated-images/image0344.jpg?strip=all&lossy=1&quality=70&webp=70&avif=70&w=1920&ssl=1 "image034[4]")
![image035[4]](https://cdn.photoshoptutorials.ws/wp-content/uploads/migrated-images/image0354.jpg?strip=all&lossy=1&quality=70&webp=70&avif=70&w=1920&ssl=1 "image035[4]")
![image036[4]](https://cdn.photoshoptutorials.ws/wp-content/uploads/migrated-images/image0364.jpg?strip=all&lossy=1&quality=70&webp=70&avif=70&w=1920&ssl=1 "image036[4]")
![image037[4]](https://cdn.photoshoptutorials.ws/wp-content/uploads/migrated-images/image0374.jpg?strip=all&lossy=1&quality=70&webp=70&avif=70&w=1920&ssl=1 "image037[4]")
![image038[4]](https://cdn.photoshoptutorials.ws/wp-content/uploads/migrated-images/image0384.jpg?strip=all&lossy=1&quality=70&webp=70&avif=70&w=1920&ssl=1 "image038[4]")
![image039[4]](https://cdn.photoshoptutorials.ws/wp-content/uploads/migrated-images/image0394.jpg?strip=all&lossy=1&quality=70&webp=70&avif=70&w=1920&ssl=1 "image039[4]")
![image040[4]](https://cdn.photoshoptutorials.ws/wp-content/uploads/migrated-images/image0404.jpg?strip=all&lossy=1&quality=70&webp=70&avif=70&w=1920&ssl=1 "image040[4]")
![image041[4]](https://cdn.photoshoptutorials.ws/wp-content/uploads/migrated-images/image0414.jpg?strip=all&lossy=1&quality=70&webp=70&avif=70&w=1920&ssl=1 "image041[4]")
- Brush: 125px
- Hardness: 0%
- Range: Midtones
- Exposure: 25%
![image042[4]](https://cdn.photoshoptutorials.ws/wp-content/uploads/migrated-images/image0424.jpg?strip=all&lossy=1&quality=70&webp=70&avif=70&w=1920&ssl=1 "image042[4]")
![image043[4]](https://cdn.photoshoptutorials.ws/wp-content/uploads/migrated-images/image0434.jpg?strip=all&lossy=1&quality=70&webp=70&avif=70&w=1920&ssl=1 "image043[4]")
![image044[4]](https://cdn.photoshoptutorials.ws/wp-content/uploads/migrated-images/image0444.jpg?strip=all&lossy=1&quality=70&webp=70&avif=70&w=1920&ssl=1 "image044[4]")
Step 4: Add the ground beneath the house
Now, we will make the floating house more realistic by adding the uprooted ground beneath it. To start, open the stock image: “Little Island” by mindCollision stock. Activate the Magnetic Lasso Tool (L) and use it to select a certain part of the rock. See image below:![image045[4]](https://cdn.photoshoptutorials.ws/wp-content/uploads/migrated-images/image0454.jpg?strip=all&lossy=1&quality=70&webp=70&avif=70&w=1920&ssl=1 "image045[4]")
![image046[4]](https://cdn.photoshoptutorials.ws/wp-content/uploads/migrated-images/image0464.jpg?strip=all&lossy=1&quality=70&webp=70&avif=70&w=1920&ssl=1 "image046[4]")
![image047[4]](https://cdn.photoshoptutorials.ws/wp-content/uploads/migrated-images/image0474.jpg?strip=all&lossy=1&quality=70&webp=70&avif=70&w=1920&ssl=1 "image047[4]")
![image048[4]](https://cdn.photoshoptutorials.ws/wp-content/uploads/migrated-images/image0484.jpg?strip=all&lossy=1&quality=70&webp=70&avif=70&w=1920&ssl=1 "image048[4]")
5 comments on “How to Create a Surreal Traveling House Photo Manipulation in Photoshop”
Cool concept! Thanks for the tut!
Cool! It gave me a good idea what to do next! Want more of this!!!! :-)
did you see the man's face in the field
genius..what else can i say
I really like the flying house good job.