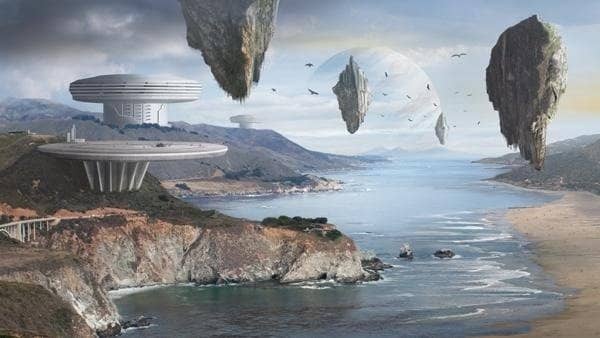
Make your artwork look like they're from an alternate universe. These Cyberpunk presets work with Photoshop (via the Camera Raw filter) and Lightroom. Download all 788 presets for 90% off.
![img(116)[3] img(116)[3]](https://cdn.photoshoptutorials.ws/6a20526f3a0d_12CCA/img1163.jpg?strip=all&lossy=1&quality=70&webp=70&avif=70&w=1920&ssl=1)
Flip it horizontally.
![img(117)[3] img(117)[3]](https://cdn.photoshoptutorials.ws/6a20526f3a0d_12CCA/img1173.jpg?strip=all&lossy=1&quality=70&webp=70&avif=70&w=1920&ssl=1)
![img(118)[3] img(118)[3]](https://cdn.photoshoptutorials.ws/6a20526f3a0d_12CCA/img1183.jpg?strip=all&lossy=1&quality=70&webp=70&avif=70&w=1920&ssl=1)
Resize the mountain. I stretched it extremely to match the perspective of the scene.
![img(119)[3] img(119)[3]](https://cdn.photoshoptutorials.ws/6a20526f3a0d_12CCA/img1193.jpg?strip=all&lossy=1&quality=70&webp=70&avif=70&w=1920&ssl=1)
Clean up the edges.
![img(120)[3] img(120)[3]](https://cdn.photoshoptutorials.ws/6a20526f3a0d_12CCA/img1203.jpg?strip=all&lossy=1&quality=70&webp=70&avif=70&w=1920&ssl=1)
Open up mountain2 stock image. Select and copy.
![img(121)[3] img(121)[3]](https://cdn.photoshoptutorials.ws/6a20526f3a0d_12CCA/img1213.jpg?strip=all&lossy=1&quality=70&webp=70&avif=70&w=1920&ssl=1)
Resize. Stretch it slightly.
![img(122)[3] img(122)[3]](https://cdn.photoshoptutorials.ws/6a20526f3a0d_12CCA/img1223.jpg?strip=all&lossy=1&quality=70&webp=70&avif=70&w=1920&ssl=1)
![img(123)[3] img(123)[3]](https://cdn.photoshoptutorials.ws/6a20526f3a0d_12CCA/img1233.jpg?strip=all&lossy=1&quality=70&webp=70&avif=70&w=1920&ssl=1)
I trimmed the edge of the mountain. Select and erase.
![img(124)[3] img(124)[3]](https://cdn.photoshoptutorials.ws/6a20526f3a0d_12CCA/img1243.jpg?strip=all&lossy=1&quality=70&webp=70&avif=70&w=1920&ssl=1)
Clear the water edge using a mask.
![img(125)[3] img(125)[3]](https://cdn.photoshoptutorials.ws/6a20526f3a0d_12CCA/img1253.jpg?strip=all&lossy=1&quality=70&webp=70&avif=70&w=1920&ssl=1)
Stamp out any unwanted details using the Clone Stamp Tool.
![img(126)[3] img(126)[3]](https://cdn.photoshoptutorials.ws/6a20526f3a0d_12CCA/img1263.jpg?strip=all&lossy=1&quality=70&webp=70&avif=70&w=1920&ssl=1)
![img(127)[3] img(127)[3]](https://cdn.photoshoptutorials.ws/6a20526f3a0d_12CCA/img1273.jpg?strip=all&lossy=1&quality=70&webp=70&avif=70&w=1920&ssl=1)
We need color correct the image. Notice the color mountains in the background plate, the lighting and saturation of colors. Keep an eye on the surrounding environment and adjust the colors and lighting according to it.
![img(128)[3] img(128)[3]](https://cdn.photoshoptutorials.ws/6a20526f3a0d_12CCA/img1283.jpg?strip=all&lossy=1&quality=70&webp=70&avif=70&w=1920&ssl=1)
![img(129)[3] img(129)[3]](https://cdn.photoshoptutorials.ws/6a20526f3a0d_12CCA/img1293.jpg?strip=all&lossy=1&quality=70&webp=70&avif=70&w=1920&ssl=1)
![img(130)[3] img(130)[3]](https://cdn.photoshoptutorials.ws/6a20526f3a0d_12CCA/img1303.jpg?strip=all&lossy=1&quality=70&webp=70&avif=70&w=1920&ssl=1)
Add Color Overlay.
![img(131)[3] img(131)[3]](https://cdn.photoshoptutorials.ws/6a20526f3a0d_12CCA/img1313.jpg?strip=all&lossy=1&quality=70&webp=70&avif=70&w=1920&ssl=1)
I painted some reflections and highlights. Pick a small round brush and sample color tones from the mountain and paint. Vary the brush opacity to keep it a bit random. Since I have a Wacom tablet I have the shape dynamics on and enabled pen pressure settings to paint the fine details.
![img(132)[3] img(132)[3]](https://cdn.photoshoptutorials.ws/6a20526f3a0d_12CCA/img1323.jpg?strip=all&lossy=1&quality=70&webp=70&avif=70&w=1920&ssl=1)
![img(133)[3] img(133)[3]](https://cdn.photoshoptutorials.ws/6a20526f3a0d_12CCA/img1333.jpg?strip=all&lossy=1&quality=70&webp=70&avif=70&w=1920&ssl=1)
Step 7: Adding the Beach
Open up the Beach stock image. Copy a piece out of it. Paste into the main file.
![img(134)[3] img(134)[3]](https://cdn.photoshoptutorials.ws/6a20526f3a0d_12CCA/img1343.jpg?strip=all&lossy=1&quality=70&webp=70&avif=70&w=1920&ssl=1)
![img(135)[3] img(135)[3]](https://cdn.photoshoptutorials.ws/6a20526f3a0d_12CCA/img1353.jpg?strip=all&lossy=1&quality=70&webp=70&avif=70&w=1920&ssl=1)
Reposition it. Squeeze it down to match it to perspective of the scene.
![img(136)[3] img(136)[3]](https://cdn.photoshoptutorials.ws/6a20526f3a0d_12CCA/img1363.jpg?strip=all&lossy=1&quality=70&webp=70&avif=70&w=1920&ssl=1)
Use a mask to merge the layer with the background and to create a smooth integration.
![img(137)[3] img(137)[3]](https://cdn.photoshoptutorials.ws/6a20526f3a0d_12CCA/img1373.jpg?strip=all&lossy=1&quality=70&webp=70&avif=70&w=1920&ssl=1)
Stamp out the people from the image using Clone Stamp Tool.
![img(138)[3] img(138)[3]](https://cdn.photoshoptutorials.ws/6a20526f3a0d_12CCA/img1383.jpg?strip=all&lossy=1&quality=70&webp=70&avif=70&w=1920&ssl=1)
Close the gap between the mountain and beach. I sampled colors from the beach to paint out the gap.
![img(139)[3] img(139)[3]](https://cdn.photoshoptutorials.ws/6a20526f3a0d_12CCA/img1393.jpg?strip=all&lossy=1&quality=70&webp=70&avif=70&w=1920&ssl=1)
Remove the junk from the bottom side of the beach. I copied a patch from the original beach image and pasted above the trees. Again I squeezed it down horizontally. Use the brush tool to paint minor parts which are not covered by the patch.
![img(140)[3] img(140)[3]](https://cdn.photoshoptutorials.ws/6a20526f3a0d_12CCA/img1403.jpg?strip=all&lossy=1&quality=70&webp=70&avif=70&w=1920&ssl=1)
![img(141)[3] img(141)[3]](https://cdn.photoshoptutorials.ws/6a20526f3a0d_12CCA/img1413.jpg?strip=all&lossy=1&quality=70&webp=70&avif=70&w=1920&ssl=1)
Here is the result.
![img(142)[3] img(142)[3]](https://cdn.photoshoptutorials.ws/6a20526f3a0d_12CCA/img1423.jpg?strip=all&lossy=1&quality=70&webp=70&avif=70&w=1920&ssl=1)
The water in the image is very saturated. Lower the saturation to match it with the background water.
![img(143)[3] img(143)[3]](https://cdn.photoshoptutorials.ws/6a20526f3a0d_12CCA/img1433.jpg?strip=all&lossy=1&quality=70&webp=70&avif=70&w=1920&ssl=1)
Make a Quick Mask selection. Press "Q" to enter grab the brush tool and block the saturated area and return to normal mode. Invert the selection
![img(144)[3] img(144)[3]](https://cdn.photoshoptutorials.ws/6a20526f3a0d_12CCA/img1443.jpg?strip=all&lossy=1&quality=70&webp=70&avif=70&w=1920&ssl=1)
Load the Hue/Saturation box, lower the saturation. Use Color Balance if necessary. Make sure it blends well with the existing water in the background.
![img(145)[3] img(145)[3]](https://cdn.photoshoptutorials.ws/6a20526f3a0d_12CCA/img1453.jpg?strip=all&lossy=1&quality=70&webp=70&avif=70&w=1920&ssl=1)
Add some haze with a lighter color soft brush above the mountain.
![img(146)[3] img(146)[3]](https://cdn.photoshoptutorials.ws/6a20526f3a0d_12CCA/img1463.jpg?strip=all&lossy=1&quality=70&webp=70&avif=70&w=1920&ssl=1)
Step 8: Adding the Planet
Open up the planet image. Cut out the planet with Elliptical Marquee Tool.


3 comments on “How to Create an Amazing Futuristic Matte Painting in Photoshop”
bhai or koie matte painting ka file send kar
its gud
its gggg,ooo,dddd.THANK U.