Luminar AI lets you turn your ideas into reality with powerful, intelligent AI. Download the photo editor and see how you can completely transform your photos in a few clicks.
- Brush size: 500 px
- Hardness: 0%
- Opacity: 100%
- Flow: 100%
Use the Eraser on the region shown on the image below:
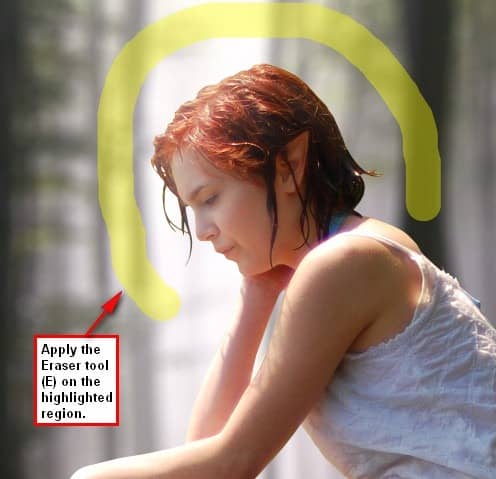
Now that that’s done, group the layers that you had just created and then name the group to Elf.
Step 4 - Add water lilies
In this step, we will be adding water lilies on the surface of the water. To start, let’s open the stock image: Water lilies. Upon opening, activate the Polygonal Lasso tool (L) because we would need to cut one lily from the image. See image below:
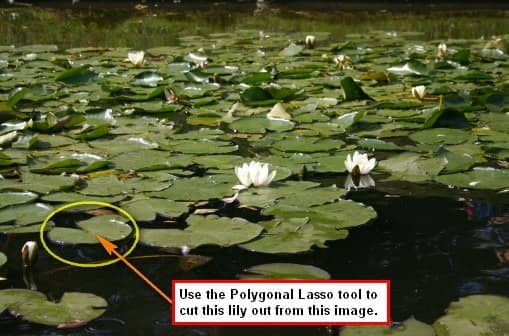
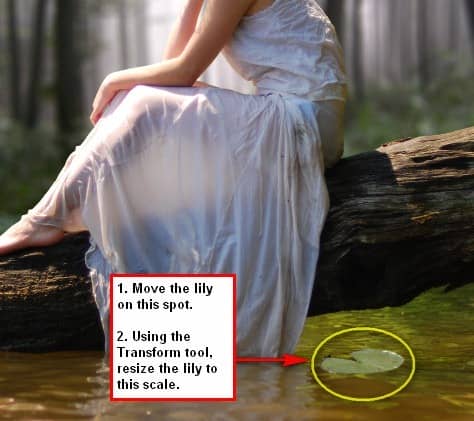
Now after cutting that, let’s proceed to moving it to our canvas. Use the Move tool (V) once again to transfer it to our canvas. Upon moving, rename the lily’s layer to lily 1 and then activate the Transform tool (Ctrl/Cmd + T) and resize the lily as seen on the image below.
After that, we would need to blur the edges of the lily to make it look more authentic. Activate the Blur tool by pressing R.

Once activated, use the following values:
- Brush size: 30px
- Mode: Normal
- Strength: 100%
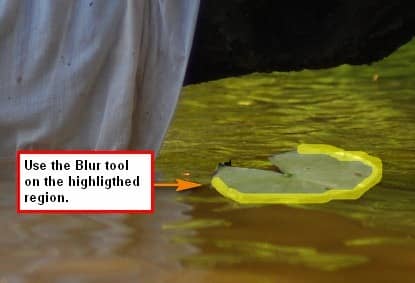
Now we’re going to add more lilies to the image. To do that, click on the layer: lily 1 or our original lily layer and then hit Ctrl/Cmd + J to duplicate it. After that you’d notice that a new layer has appeared with the name of lily 1 copy. Activate the Transform tool and resize this image as seen below:
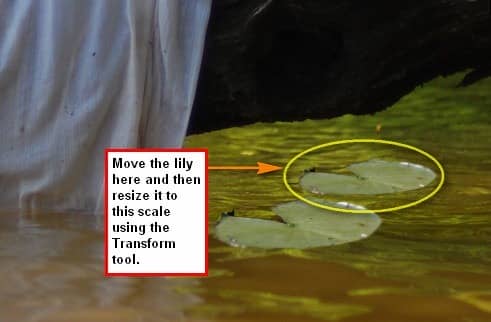
To give it depth, let’s change the Opacity of that layer. To do that, reduce its Opacity to 70% from the Layer window.

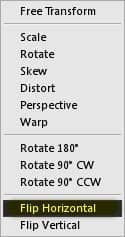
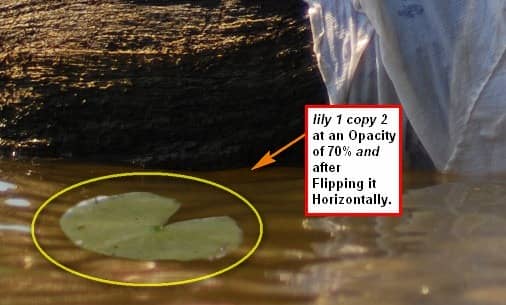
Duplicate lily 1 again then activate the Transform tool. This time we won’t be scaling it, we would still retain the same size but we would be changing its position. Upon activation of the Transform tool, right click anywhere on the image and then hit Flip Horizontal.
After flipping it horizontally, change its Opacity to 70%.
Duplicate lily 1 once again (lily 1 copy 3) and then activate the Transform tool. Resize and position it similar to the image below:

Note: To change the position of the layers, just click on a layer and then drag it to the desired position.
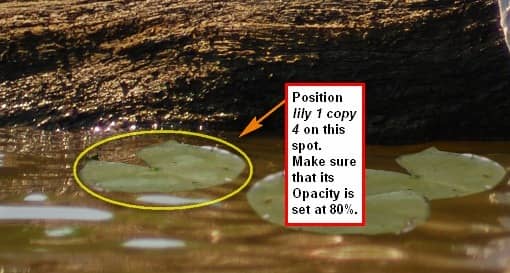
Duplicate lily 1 one final time (lily 1 copy 4); reduce its Opacity to 80% and then position it to the spot indicated in the image below:
Now we will be adding the water lily flowers. Open the stock image: Water lilies once again.


One comment on “Magical Forest Photo”
excellent