Download Lightroom presets and LUTs, absolutely free. Use the presets to add creativity and style to your photos.
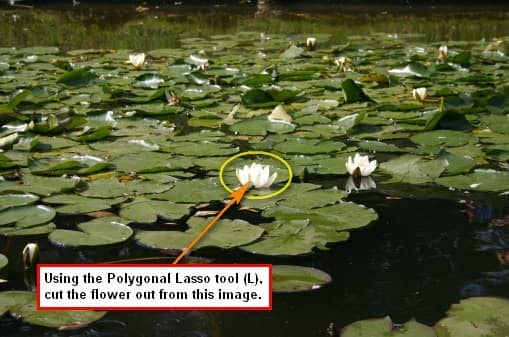
Move the image that you selected with the Polygonal Lasso tool to our canvas and then rename it to Lily 2.When it is on our canvas; let’s change its Brightness/Contrast to blend in with the image. To do that, select the layer lily 2 and then go to Image > Adjustments > Brightness/Contrast, when it opens input the following values:
- Brightness: -63
- Contrast: -52
After that resize and scale it to the size shown on the image below:
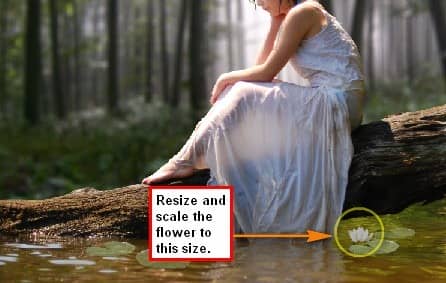
Next, let’s add more lily flowers. To do that, we will do the technique we used earlier with the lilies – duplication and opacity reduction. First, click on lily 2 and then hit Ctrl/Cmd + J to duplicate it. The result will be a new layer with the name: lily 2 copy. When this appears, reduce its Opacity to 80% and then resize the new layer and position it as seen on the image below:
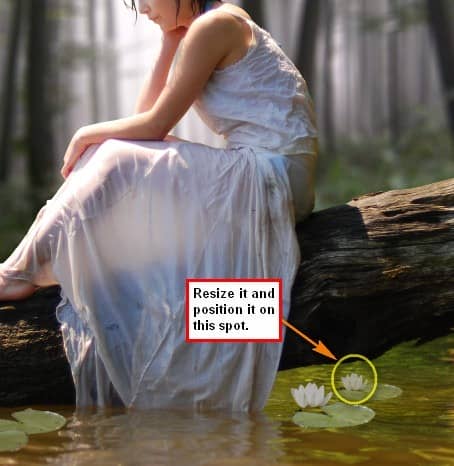
Duplicate lily 2 once again (lily 2 copy 2), but this time, change its Brightness to +40 because the sun is shining brightly on the part where we will be putting it. After you do that, activate the Transform tool and reposition the image according to the image below:
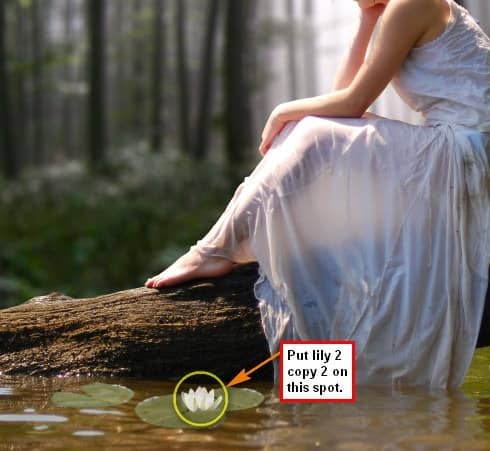
When you’re done, select all these layers and group them. Name the group to water lilies.
Step 5 - Create a Vignette
In this step, we will learn how to create a vignette which will help enhance the focus on our subject. To start, go to the Menu bar and click on File > New and use the same settings we used to create our canvas. (Refer to Step 1). Take note, the background contents should be white.
- Once it has been created, go to Filter > Distort > Lens Correction. Find the tab Vignette and use these settings:
- Vignette amount: -100
- Midpoint: +50
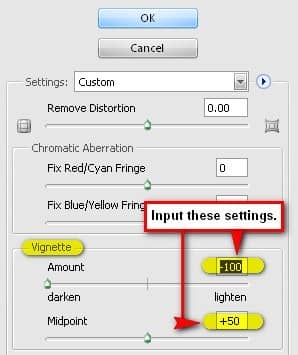
Now that that’s done drag the vignette to our canvas using the Move tool (V) and put it on top of all the layers that we’ve created, and then set the following:
- Blending mode: Multiply
- Opacity to 100%
After that click on the vignette layer that we’ve just created and then duplicate it (Ctrl/Cmd + J). We duplicated it to create two vignettes, each at 100% on a Multiply blending mode. The result of the vignette should be similar to the image below:
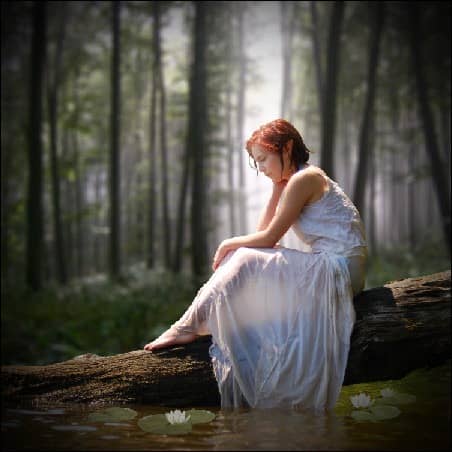
Step 6 - Add the magical lights
In this step, we would be adding magical creatures that produce light. In some fantasy stories, these creatures are called Wisps. Anyway, let’s start by creating a new layer above the vignette layers. To create a new layer again, just press Ctrl/Cmd + Shift + N and then name this new layer: wisps. Now activate the Brush tool (B) and then let’s open the downloaded brush pack: kuschelirmel star brushes. To open that, you should have the Brush tool activated. After activation, right click anywhere on the canvas to show the Brush menu. Refer to the images below:


One comment on “Magical Forest Photo”
excellent