Make skin look perfect in one-click with these AI-powered Photoshop actions.
- Brush size: 1000 px
- Hardness: 15%
- Opacity: 100%
- Flow: 100%
Note: To reduce the Hardness, right click on the image while the Eraser tool (E) is activated, then you’d see the Hardness scale, which is at default – 100%, just move the slider to the left to get 0%.

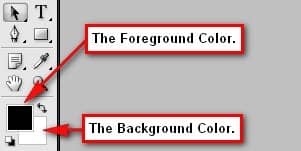
We would also need to change the color of the Brush to white. There are many ways to change the brush’s color, but for now, we will be learning how to change it instantly from black to white and vice versa. From the tools menu, you’d notice a black box and a white box.


Now to interchange these colors, simply left-click on the canvas and then press X and you’d notice that the two colors are changing positions. i.e. Black becomes the background color and the White color becomes the Foreground color. Now, let’s set the Foreground color to White. Activate the Brush tool (B) and paint white over the region shown on the image below:


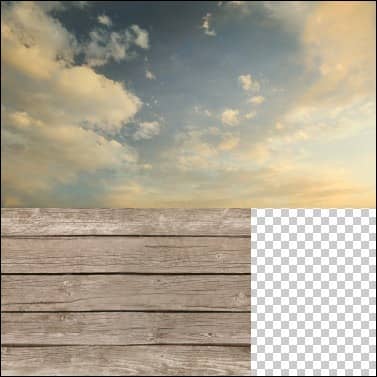
Now that the sky is done, let’s add the table texture. Open the stock image: Tileable Wood Texture and activate the Move tool (V) and then drag this image to our canvas.

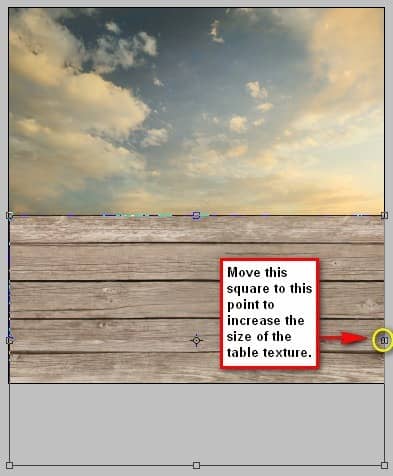
We would need to resize that, so activate the Transform tool (Ctrl/Cmd + T) and increase the size of the image as seen below:

When you’re done, let’s group these layers by clicking on all the layers that we have clicked and pressing Ctrl/Cmd + G. After doing that, you’d notice that all the layers are now inside the group. Let’s rename this group to Background. To rename a group, simply click on the words “group 1” (etc) and a text box would appear and you may now rename it.


Step 3 - Create the book
In this step we would be adding the book on our canvas, so to start, let’s open Book 2. Now, on this image, it would be quite difficult in selecting a part of the image, since we can’t use the Rectangular Marquee tool (M) on accurately selecting the book. So what we’re going to use is the Polygonal Lasso Tool (L). To activate the Polygonal Lasso Tool (L), follow the instructions on the image below:

To use the Polygonal Lasso tool (L) you simply have to left-click on a point on the book’s surface and then drag your mouse carefully around the book until you reach the point where you began. When you’re done, a selection area would appear on the places you dragged your mouse onto.


15 comments on “Make a Story Book Come to Life in Photoshop”
Thanks a lot! Your tutorial is very useful. Your approach is very helpful to into all the details =) Here is my version http://milanaserk.deviantart.com/art/Once-Upon-a-Time-482135725?ga_submit_new=10%253A1410641999
suche a good tutoriel
doy!
awsome tutorial
thank u. very much
Please add the links again.. I want to try this!
Thank you for posting a tutorial that actually works. Not only that, I learned a few things.
Once again, thank you.
i am make a book
Beautiful tutorial and I want to try but stock links broken?
Yes the stock links seem broken. That is the downsides of using free stock photos; they can sometimes disappear without any warning.
most links of stock were died, who can give me links??
Thx
Thanks for letting me know! I've updated the links including the long road picture. There was one picture that I couldn't find the link for but it's just a cloud picture that's easily found somewhere else.
Great tutorial! I really love it! I only have one problem... It seems the image of the long road is not available anymore :( Any chance you know where to find it or maybe mail it to me? I can't find any other good images to use as replacement. Thx
used this tutorial for my Lotr fan art http://d24w6bsrhbeh9d.cloudfront.net/photo/6009214_700b.jpg
OMG ! , i saw it ... it was amazing , a really great masterpiece ^_^ ..... keep up the great work !