

Download Lightroom presets and LUTs, absolutely free. Use the presets to add creativity and style to your photos.
Step 6: Blend the layer using the Soft Light mode
Before we fix the contrast of the texture, change the blending mode to Soft Light. This will give us a live preview of the effect while we're adjusting the contrast.

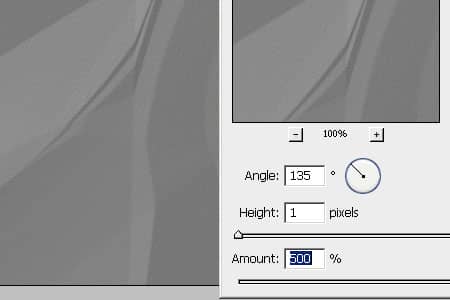
Step 7: Adjust the depth using the Brightness/Contrast adjustment
By increasing the contrast of the wrinkle texture, the wrinkles will look stronger and become more visible. Choose Image> Adjustments> Brightness/Contrast to open the Brightness/Contrast adjustment tool. If you're using Photoshop CS3, checkmark Use Legacy because the new algorithm in Photoshop CS3 isn't able to add enough contrast to the texture. Slide the contrast slider towards to right to increase the contrast. As you're adjusting the contrast, look at the image behind it to see a live preview of the effect.

Step 8: Distort the photo using the Displace filter
Before we distort the layer, it is a good idea to keep the original image as the "Background" layer so that you have it as a reference when you open the file back in the future. Select the Background layer and press Ctrl+J to duplicate the layer or choose Layer> Duplicate Layer.
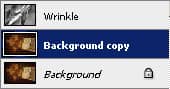
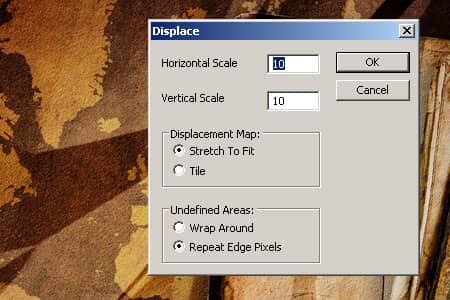
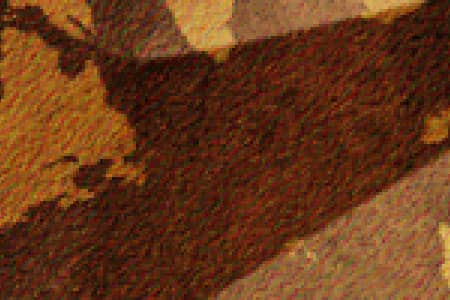
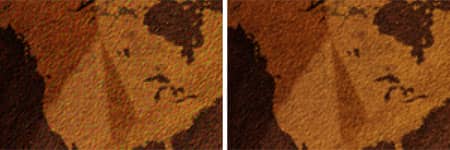
With the new Background copy layer selected, open the Displace filter by going to Filter> Distort> Displace. Use the default settings for now and click OK. A window will appear where you can select the bump map texture. Open the Photoshop file we saved earlier in step 4 and click OK. The photo should now be distorted to better match the wrinkle texture. To get the right settings, you'll need to do do this by trial and error; undo and redo the Displace filter with different horizontal and vertical scale settings. Usually the default settings of Horizontal Scale: 10 and Vertical Scale 10: creates good results but depending on your image, you may need to undo and use different settings.
Before and after applying the Displace filter

Step 9: Remove the chroma noise
By step 8, you probably thought you were done. But if you look closely, you'll notice excessive chroma noise (grainy color artifacts) that wasn't there in the original photo. To fix this, simply select the Wrinkle layer and desaturate by pressing Shift+Ctrl+U or choosing Image> Adjustments> Desaturate.
Before and after desaturating the Wrinkle layer
Step 7: Remove the grainy texture (optional)
The wrinkle texture also contains a grainy texture that adds to the look of natural paper. But if you want the photo to look smooth without the paper texture, continue with this tutorial.
One comment on “Wrinkled Photo”
thanks this was very helpful :)