

Make skin look perfect in one-click with these AI-powered Photoshop actions.
Step 13
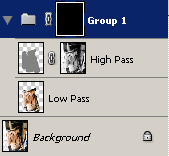
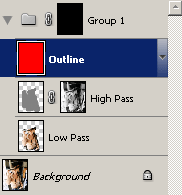
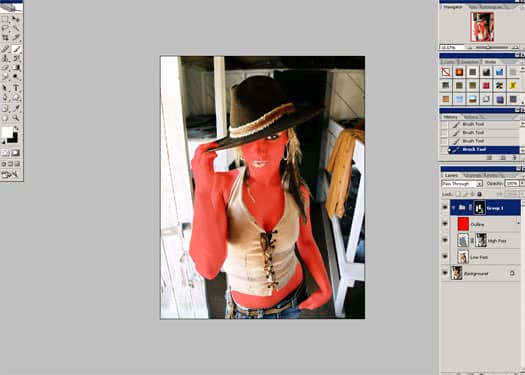
You should now see back the image the way it originally was without the smooth skin effect. We will be painting the layer mask over the skin. But because this effect is subtle, it may be difficult to see where we have painted over. So before we paint the layer mask, add a new layer above the High Pass layer and fill it with the color red. Then, change the opacity of the red layer to 50%.
Step 14
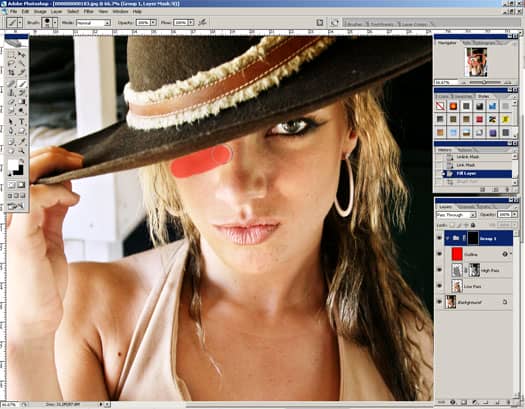
Select back the Group layer mask by clicking on the black thumbnail in the layers palette. Select the brush tool and paint over the skin to make the smooth skin effect visible over those areas that you paint. To change the setting of the brush, right mouse click anywhere and the Brush settings will appear. Start with large diameter and a hardness about 50. Then, fill in the tiny spots with a smaller brush. You don't have to be too precise with this step. Minor flaws will not be noticeable.
Tip: To quickly change the brush size, press the [ key to decrease the brush size and the ] key to increase the brush size.
Step 15
Delete the red fill layer when you're done.
Final Results
Rollover the images to see the before and after effect. It may take awhile for the images to load.


19 comments on “Airbrushing - Natural Smooth Skin”
I am not clear on step 14. Thought I got it to work and it just paints my background layer red.
Check your layer setup - it should look like the image in step 13. Before you paint, make sure that you select the layer group's layer mask (click on the black thumbnail).
Awesome … Thank you so much, it really helps me a lot.
Nice tutorial on skin retouching through airbrushing. It makes the face so appealing and attractive. It increases my knowledge. Thank you for sharing.
Hi, I'm stuck at Step 10, I think I'm using a different version of Photoshop and I don't have a filter>other menu (CS6), can anyone help? Thanks!
This is an awesome tutorial! it's really helped me figure out what looks way too airbrushed and what looks pretty natural while still deleting blemishes. Thanks for posting!
STEP 14 IS FLAWED! I created a new red layer, filled it in, changed the opacity, click the group mask, went to go paint THEN NOTHING !!! WHAT DID I DO WRONG!!!! THE BRUSH WONT PAINT! YOUR INSTRUCTIONS ARE FLAWED
I got stuck on step 14, obviously the tutorial misses the fine details because after i click on the Group Mask and try to paint, it doesnt turn red. and it has no effect while BRUSHING. Please HELP
hello sir,
i have many photos , that have not even skin tone there is major difference between face & hand or face & leg .etc
will you please suggest how can i solve this problem in photoshop...?
Thank you
hi, I was wondering, at the end of the dodging and burning part on the video, it suddenly changed and goes to a thing where there are loads of different colour effects and lightings that you can choose from. Could you please tell me how you did it because I really would like to do something simular to my own photo, thanks a lot!
Hi! After finishing everything I clicked the smart object 'original' once more then after that I cannot return to my finished images with 'dodging & burning' layer. Kinda stucked on the 'original'. How is that happening? Thanks.
thank u so much ,,it helps me a lot
This is an awful tutorial. I felt like I was going to rip my hair out. Definitely finding a new tutorial...
This is really helpful and so easy to understand for anyone.Thanks you!
i cannot understand step 7
Thanks work Magically, http://sarki2gumel.deviantart.com/art/Transformed2-351049073?ga_submit_new=10%253A1359357797
I'm using the brush tool and have followed the steps up to here but when I try and use the brush nothing changes in the picture, even when at 100% I can't see a difference, and when I put a red layer on above the high pass it is very very faint. Why is this and how do I fix it?
Step 7 - I cannot find the "apply image" tool in PSE 10 to do this step. Please help.
It's under Image-->Apply Image
Right under Duplicate in the Duplicate Section of the Image tab