

Turn any photo into a dot grid artwork with these Photoshop actions. You'll get great results with dots that change size. They get larger in brighter areas and smaller in darker areas. Free download available.
Power Tip: If you need to edit the filler texture image or if you don't like how it looks within the letter, you can still change it! Just choose the Move Tool (V) & drag over with your texture layer selected. Also, if you need to resize the texture image select Edit>Transform to resize it.
Step 7
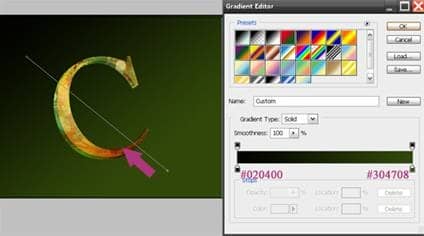
Now, select the Background layer & fill with a Gradient Tool (G). I used Linear Gradient & the colors for the two stops are as prescribed in the screenshot. Drag the gradient tool diagonally from bottom to top.
Step 8
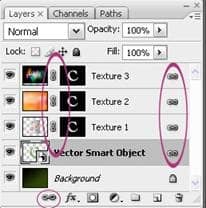
Pressing down Shift key select all the layers in the Layer Palette except the background layer & Link all of them. Also make sure to link the Layer Mask thumbnails with their corresponding layer thumbnails by clicking once between them.
{articlead}
Step 9
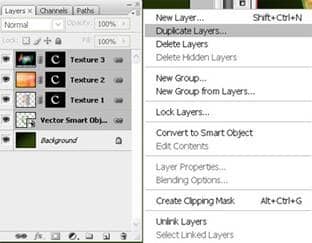
Now, we will do the reflection of our letter “C”. For that, select all the linked layers & duplicate them.
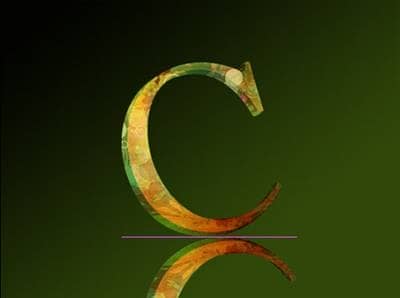
Step10
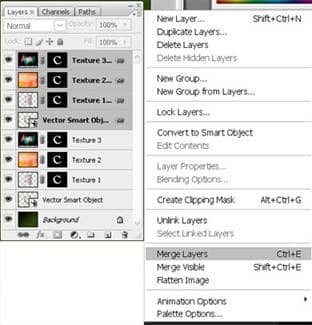
Merge all the duplicated layers & name it Reflection.
Step 11
On the Reflection layer, go to Edit>Transform>Flip Vertical & place it beneath the letter “C”. Adjust its perspective if the need be.
Step 12
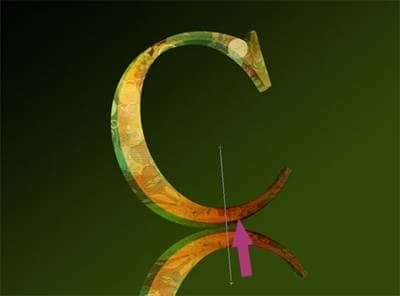
The next step is to add a layer mask to the duplicate layer. To do this simply click on the add layer mask button in the layers palette.

Now pick the Gradient Tool (G) and draw a gradient (black to white) in the direction from bottom to mid top.
Finally just reduce the opacity of the duplicate layer and you are all done. I reduced the opacity to 20% , there is no golden rule about the opacity % , just play with the opacity setting & choose the one that suits your image.
Step 13
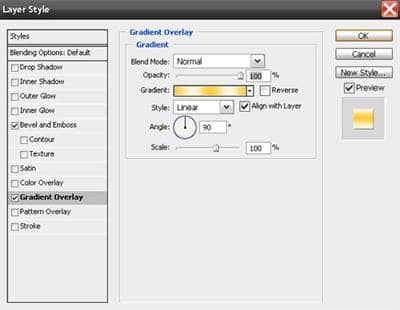
Finally, with the Type Tool, I wrote the words “for creativity” with the settings as shown in the Character Palette.
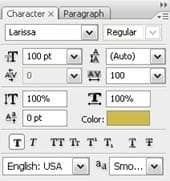
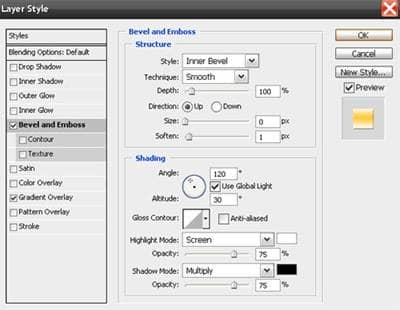
The font used is Larissa & can be downloaded from here. I also rotated the words a bit via Edit>Transform. Then I applied the layer style, as shown in the screenshots below.
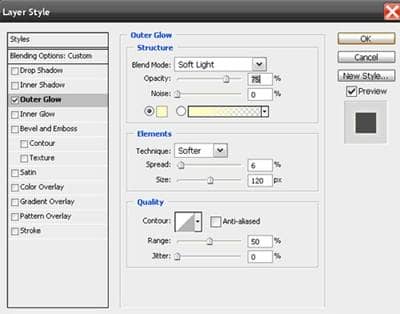
Step 14
To add a bit of finishing touch, I added Outer Glow to the Vector Smart Object layer, as shown.
And, that’s how my Layers palette in end & final image looks like.
17 comments on “3D Textured Text Effect”
I really like this product because its aimed
hi
hi i am vishal rana i am graffics designer in surat.i have used photoshop, illustrater,coral & flaceCS3 so your have requerment in your company.i have complite my education T.Y B.COM complite.
I wanted to thank you for posting this tutorial, I had a lot of fun learning.
This is what my image turned out like http://s747.photobucket.com/user/Sensaki610/media/Anyone/merci002f_zps93221ff8.png.html
One note the link on Page 2 "another texture pack" no longer exists, however I was able to use a similar image here http://joorteloog.deviantart.com/art/numbing-blow-160234146
I am retired and Photoshop and other Adobe apps are a hooby.
Thanks again John.
thanks for tutorial. i'm still a bit confused about how much PS distinctive in comparison with AI on the fly objects customization
i like
now its simple before
Thank you so much.
Np
hi
Naren
ojha
Thank you so much it was very helpful everyone!
thanks very much for this tut - it was really helpful and clear!
I thought this was for photoshop. I don't have illustrator
:(
Ayyo
Here is very good.
Can anybody help me out pls...
How can i place or Overlape any image on this 3D Art...??
As in this they do some flowers & leaves on the 3D image of "C"...
You can fill option.. :)