Download Lightroom presets and LUTs, absolutely free. Use the presets to add creativity and style to your photos.
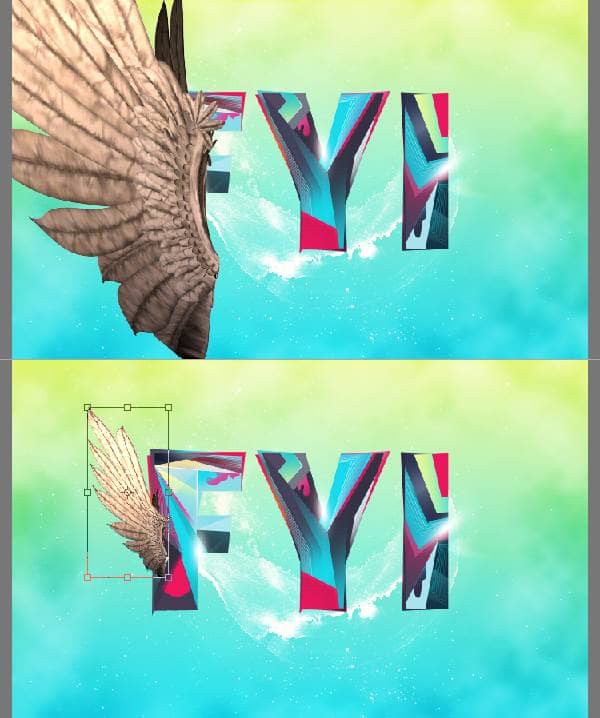
Let's spice up the composition quickly by adding wings to the text. Drop in the wing stock image. Resize and reposition it.
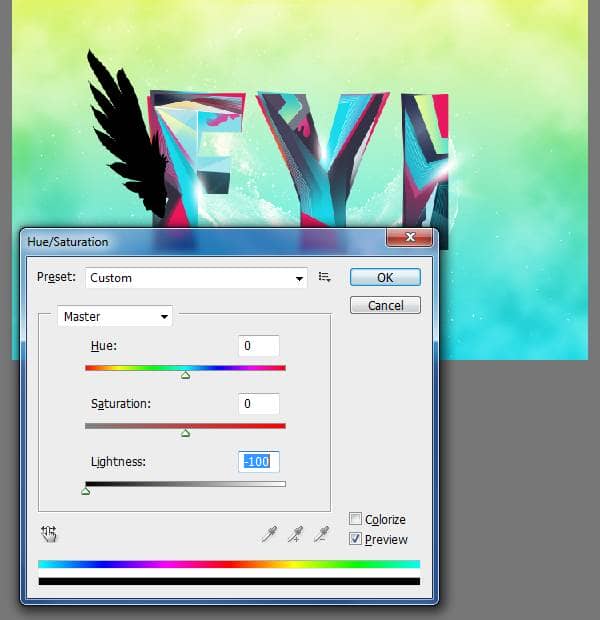
We don't need any color information in the wing. We need only the form of the wing. So press Ctrl+U to open the Hue/Saturation box. Bring down the lightness all the way to -100.
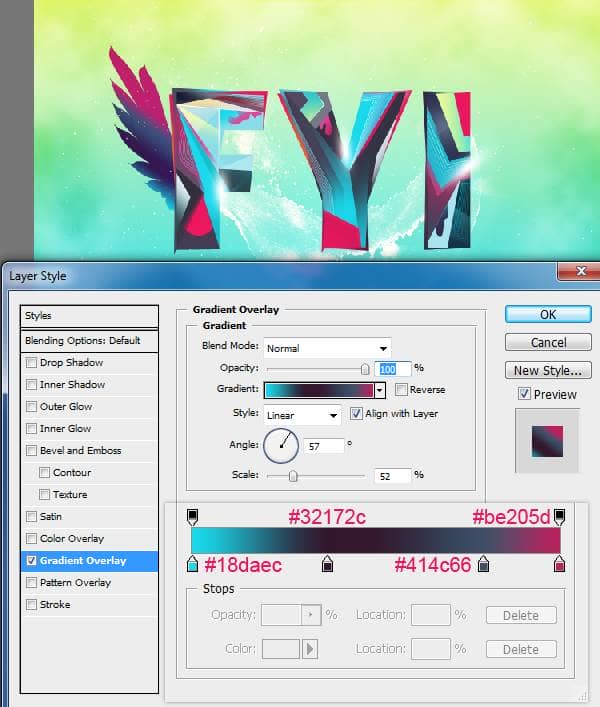
Apply Gradient using the Layer Styles box. You may use the below settings.
Duplicate the wing and flip it horizontally. Before flipping it you need to merge down the effect, create a blank layer above the duplicated wing and select both layers, hit Ctrl+E.

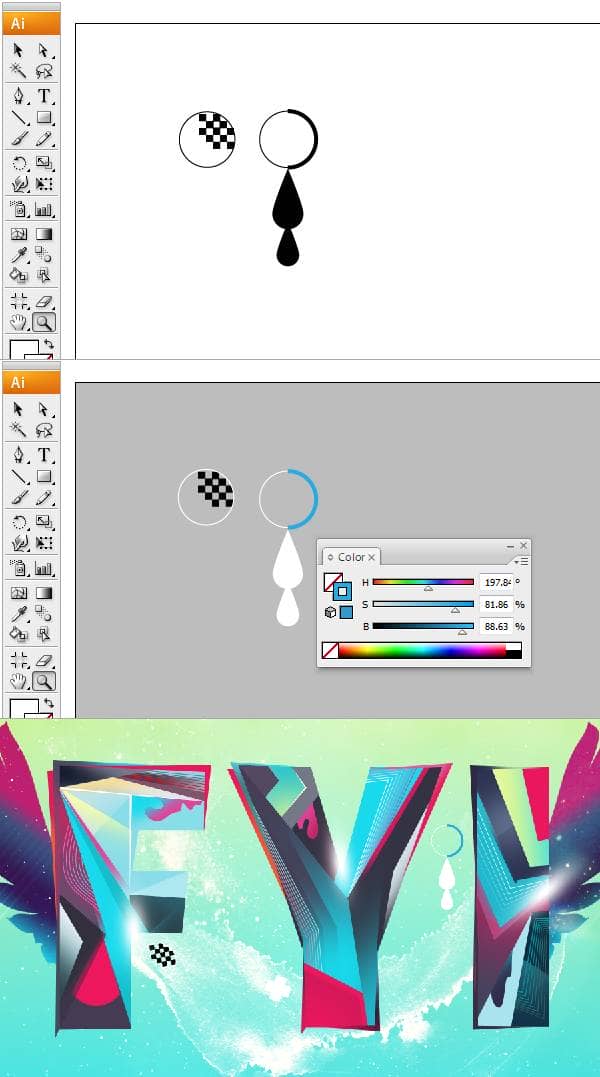
We have little more work in Illustrator. Most of the time I prefer to create my own design elements rather than using brushes. This will give the work some character and signature. Here I created two simple elements in Illustrator. Then I recolored them.
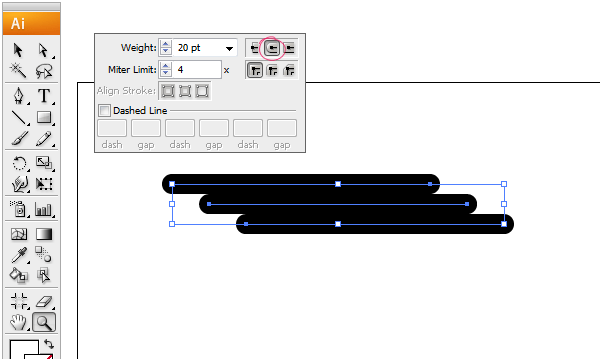
Now we are going to create a brush in illustrator. Use the Line Tool to create the lines. Set the stroke weight to 20 points. Stack them in the below manner with no gap between the lines.
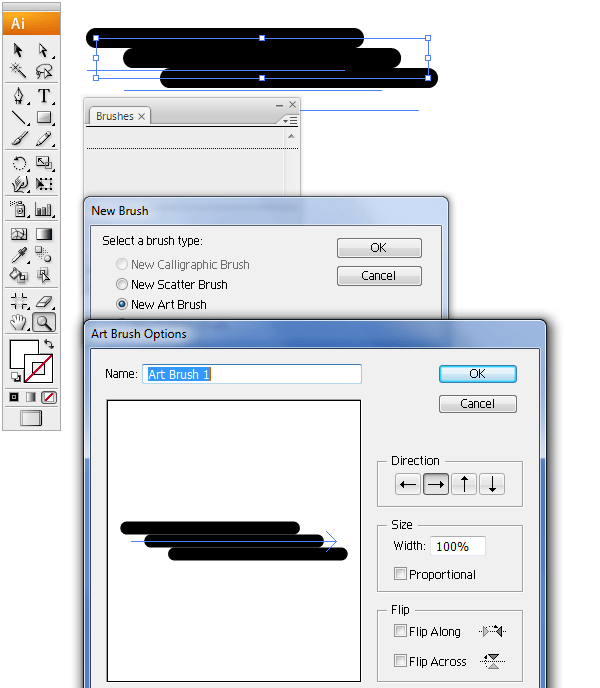
Open the Brushes Palette (F5). Select all the lines and drag them into the palette. In the subsequent dialogue box choose New Art Brush and press Ok. This will give you Brush Option box and confirm it to finish the process.
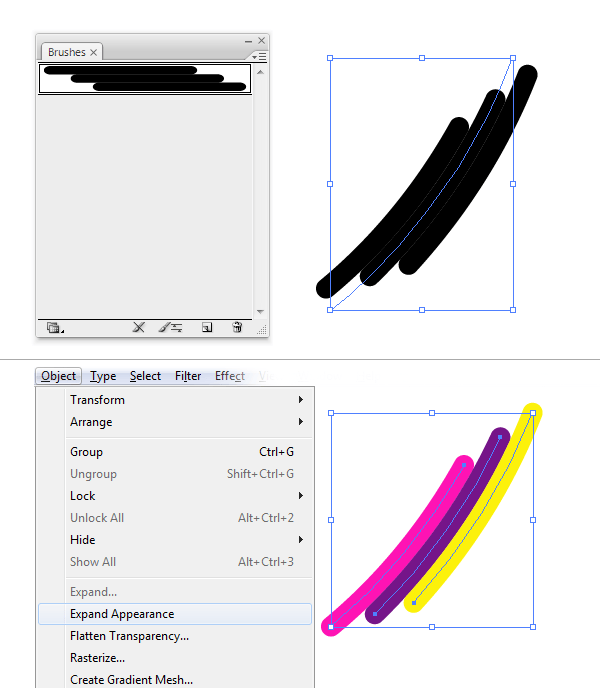
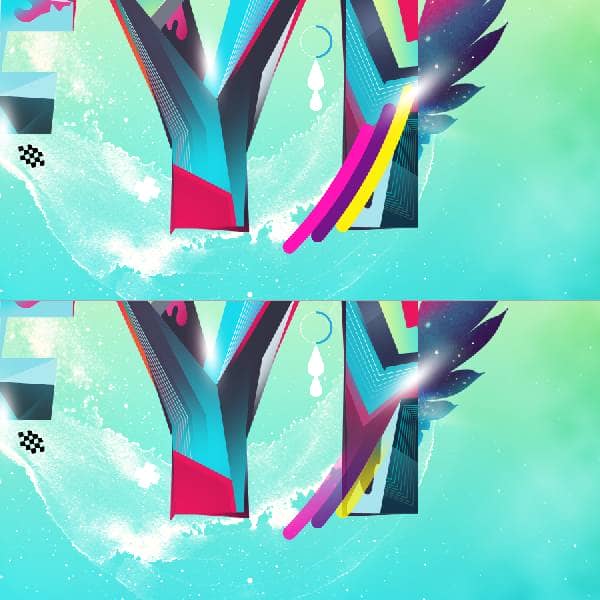
Let's put our brush to use. Create a curve using the Pen Tool. Select the line and apply our new brush to it. That's fine. Now expand the stroke, choose Object>Expand Appearance. Now the strokes are separated, ungroup them. Recolor them using the Colors palette.
Bring it as Smart Object. Here I place it above "I". Then mixed it smoothly using mask.
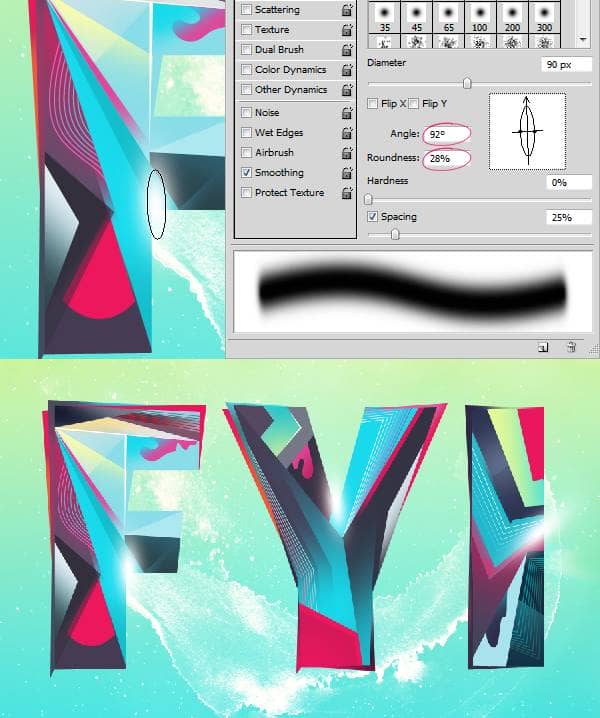
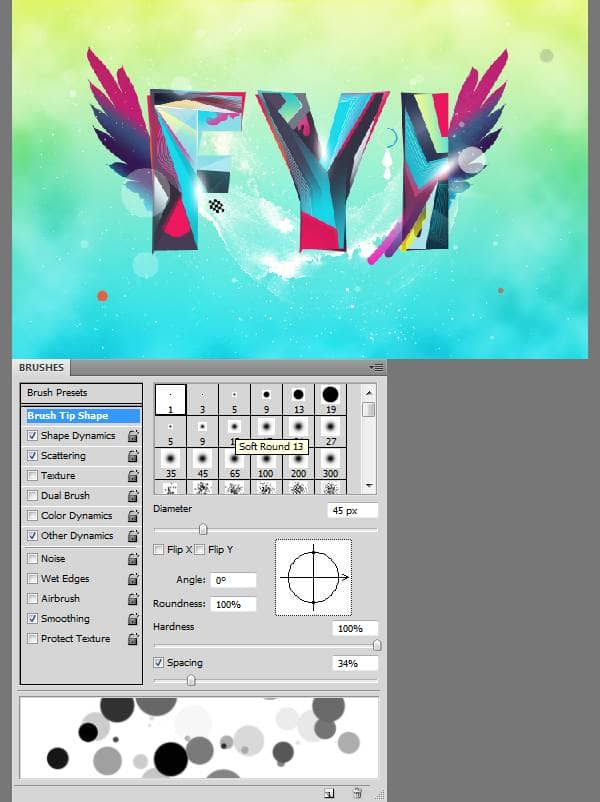
Give the composition a bit more extra depth. Pick the round brush with 100% hardness. Play with Scattering and Color Dynamics settings. And spray some particles. Keep it minimal and subtle.
Now create a custom butterfly brush. As I mentioned earlier this will give it a personal touch. First load the butterfly stock image into Photoshop. Isolate the butterfly from the background using Color Range command. Go to Select>Color Range. Pick the background color to make a selection.


21 comments on “How to Create a Colorful Text Design in Photoshop”
Really nice work and thanks for the PSD file.
Only few artists share their tricks of the trade. You're one passionate artist that believes in "share your blessing" motto. :-)
It's truly a great and helpful piece of information. I am happy that you shared this helpful information with us. Please stay us informed like this. Thank you for sharing.
Its not my first time to pay a visit this website, i am visiting this site dailly and get good data from here every day.
It's truly a great and helpful piece of info. I'm happy that you just shared this helpful information with us. Please keep us informed like this. Thank you for sharing.
AMAZING!!
Download link not working... 404 Error .
Fixed thanks!
... Honestly This should be named "how to collect textures to create a design" because nothing named design over here
oh my god what the patient artist
thank you for your article!
its very help full
i learned some more tips and tricks from it
:D
I really appreciate your struggle in this tutorial...!! lovely text effect.. so shared it..
It's amazing!
Hi,
how can i apply line tool on the duplicate layer??
should I rasterize vector mask..because i cant simply draw the lines and they goes to new layers when i draw them..
This is wow.
Thank you so much
Hey, I'm starting learning Photoshop lately :)
but I'm stuck at step one hhhh
I don't know what is " illustrator " , but when I try to write the letters in Photoshop then try to create outlines it doesn't work :(
so, can anyone help me please :) ??
Thanks in advanced.
only illustrator can do ths work...
It's a whole other program. sorry dude.
This is wow.
Thank you so much for creating vivid tutorials for free. :)
very bad
thank you so much! This was exactly what I was looking for.
page of the wings is not