
Download Lightroom presets and LUTs, absolutely free. Use the presets to add creativity and style to your photos.
Here are some useful tips that ca improve your tutorial.
1. Separate the images
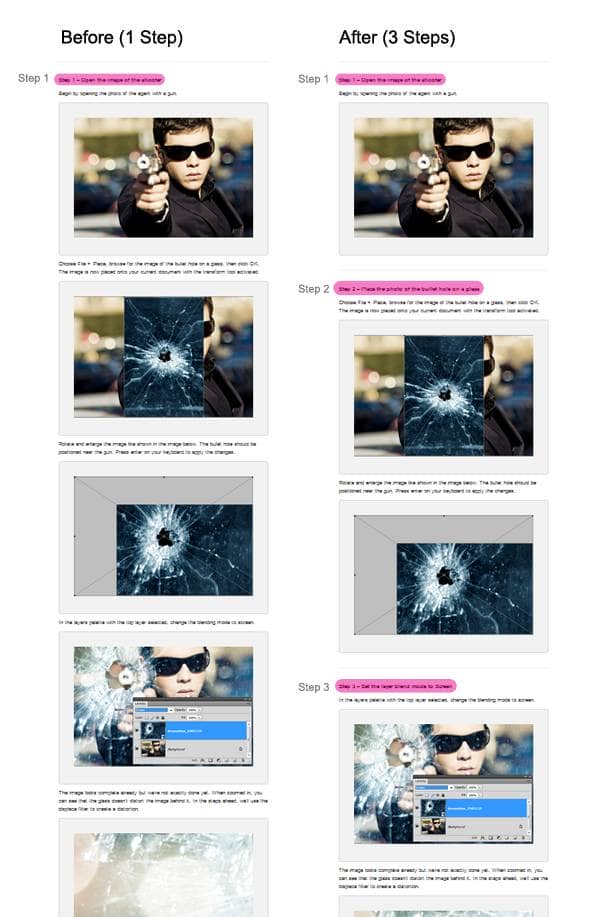
Instead of creating a huge paragraph of instructions and one large screenshot, separate them into smaller ones and place the instructions in-between the images. This will make the tutorial easier to read and less confusing for the readers.
2. Use more “Steps”
As you’re writing the tutorial, don’t forget to insert steps. You should insert a step whenever you’re:
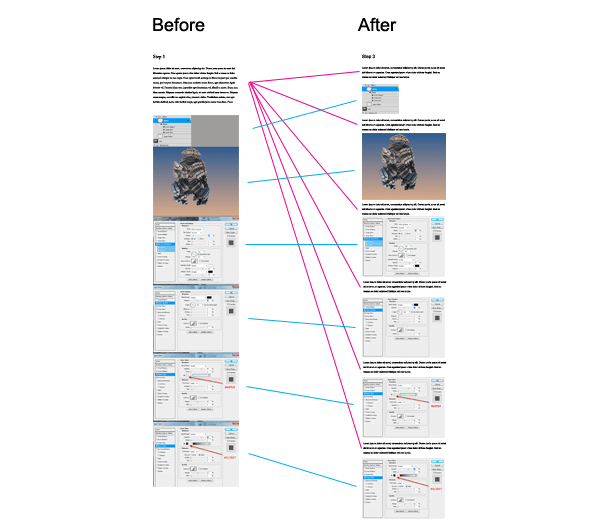
In the example below, we’ve divided 1 long step into 3 easier steps.
3. Show them how
Our top tip for better tutorials is to show them how. Make sure you tell them how you did it – not just what you did. Avoid using “I”s if possible.
You’re welcome to use your own judgment to decide what to explain in detail for your tutorial. The image below shows you a few ways to improve your instructions.

4. Use Non-Destructive Editing Techniques
A large portion of your tutorials earning is based on the technique you use. While we understand that you may be comfortable with using traditional techniques, we highly recommend you explore adjustment layers, smart objects, and smart filters. As new versions of Photoshop come out, Adobe has put more focus on these editing techniques and it is becoming crucial that you learn and use these techniques in your tutorial. Non-destructive editing techniques keep your PSD minimal, save you time, and make our readers happy.
The best way to practice non-destructive editing is to make your image in any way you like then remake it using non-destructive editing techniques. Learn more at https://help.adobe.com/en_US/photoshop/cs/using/WSB3154840-1191-47b7-BA5B-2BD8371C31D8a.html
Tip: A common misconception about Photoshop is that non-destructive editing is only about keeping a backup layer. This used to be true in older versions of Photoshop (ex. Photoshop 7), but it has been an outdated practice. Try using Smart Objects instead of making multiple copies of the same layer.
Here are some example PSD that demonstrate how you can use non-destructive editing techniques to minimize the amount of layers and reduce your filesize.
One comment on “Tutorial Writing Tips”
wow! Have nice work.