
Make skin look perfect in one-click with these AI-powered Photoshop actions.
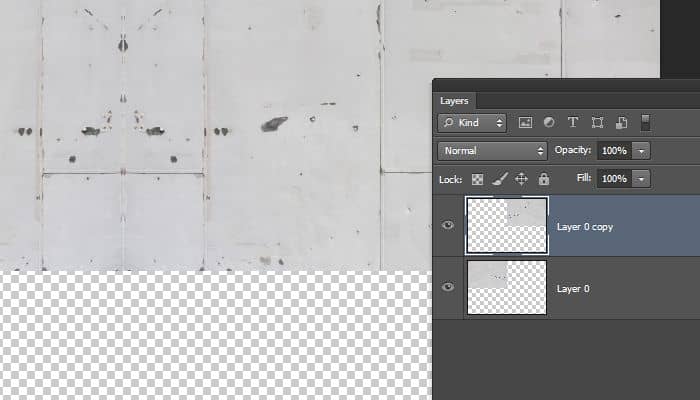
Merge the layers (Ctrl/Cmd+E) then duplicate the merged layers (Ctrl/Cmd+J). With the new layer selected, go to Edit > Transform > Flip Vertical. Use the Move tool to move the image to the bottom edge. Press Ctrl/Cmd+E to merge the two layers.

Step 7
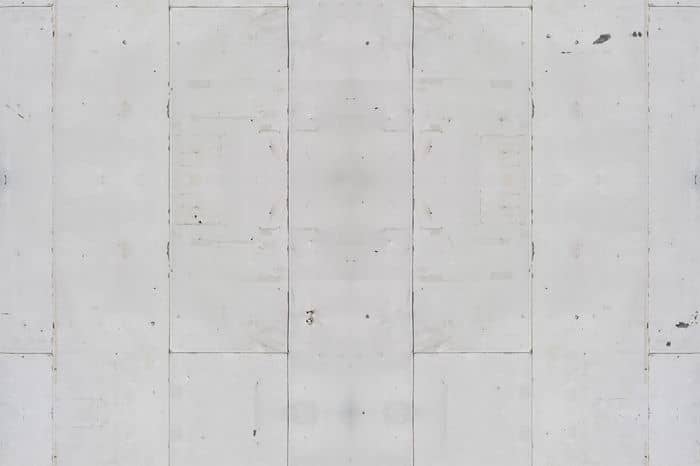
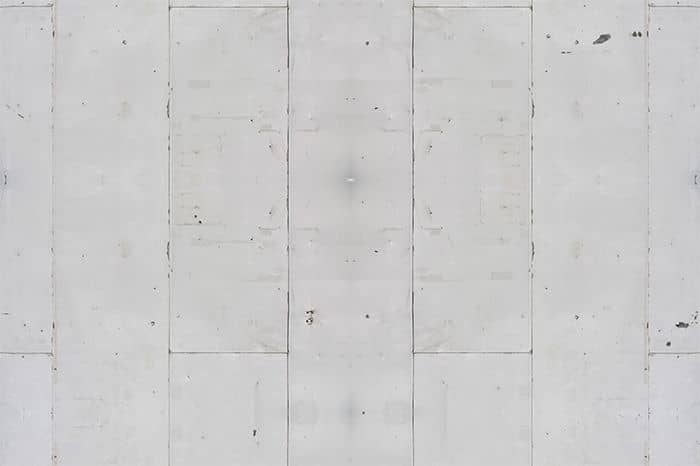
Here’s what our image looks like. This is our seamless texture but you can see many repeating patterns near the center of the photo.
Use the Spot Healing Brush tool to remove some of these repeating patterns.


Step 8
If your texture looks good, you’re done! You can use the Offset tool (Filter > Other > Offset) to offset your image before saving.
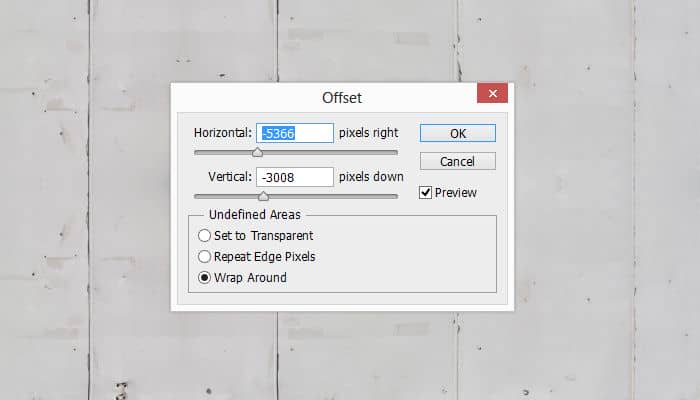
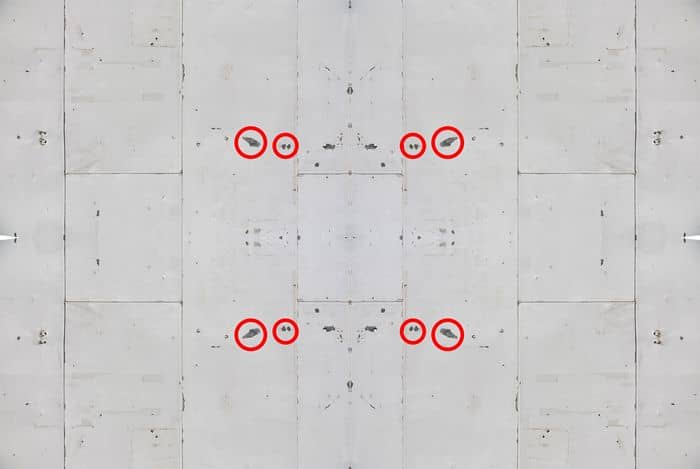
After offsetting the image, you may notice more repeating patterns that you can remove with the healint brush tool. Here’s what the image looks like after being offset. You can also use the Content-Aware Move Tool (new feature in Photoshop CS6) to move other distinctive parts to other areas (set the mode to Move in the options bar).

Step 9
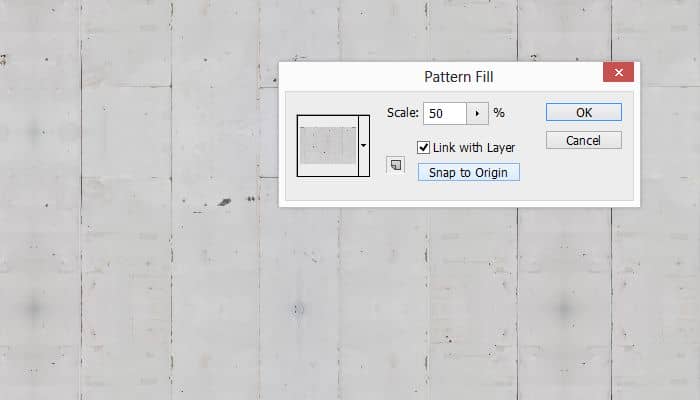
To preview your pattern, turn the image into a pattern by going to Edit > Define Pattern. Next, add a Pattern adjustment layer (Layer > New Fill Layer > Pattern), lower the scale setting, then drag anywhere on the screen to reposition the pattern. Delete this layer when you’re done previewing.
Final Results


7 comments on “Quick Tip: Easily Create Seamless Photo Textures You can Tile”
Hey Denny,
thanks for your tutorial. It seems really nice! I am relatively new to photoshop and currently learning/using CS5 and I cannot find the Adaptive Wide Angle Filter that you used in Step 3. My Google research told me it's a new thing in CS6 :(!!
Is there any way to do the same thing in CS5?
Thank you!!!
Unfortunately that filter is only in Photoshop CS6 or CC :(
You can try adding some guides and using the transform tools to skew it but it might not work on every image.
Best tutorial for tiling/seamless textures I've seen so far!
Not so interesting.
this was really cool guys, keep doing it
Cool trick and good results.
It looks awesome in your photo, but the problem is lighting. Because your photo is flat, you don't run into this problem. Try it with a texture that's more 3D and you will see the lighting get flipped.
There are GIMP plugins that can do this like "make seamless" or "texturizer" but they don't enlarge your texture like this way. In the 3D world, there's a lot more texture making programs but too expensive for the casual designers.
TLDR; This tutorial is best for flat surfaces. On 3D surfaces with sharp shadows/light, it won't work. But nonetheless, this is the best I've seen for flat surfaces.
Great comment! Thanks for the tip!