
Make your artwork look like they're from an alternate universe. These Cyberpunk presets work with Photoshop (via the Camera Raw filter) and Lightroom. Download all 788 presets for 90% off.
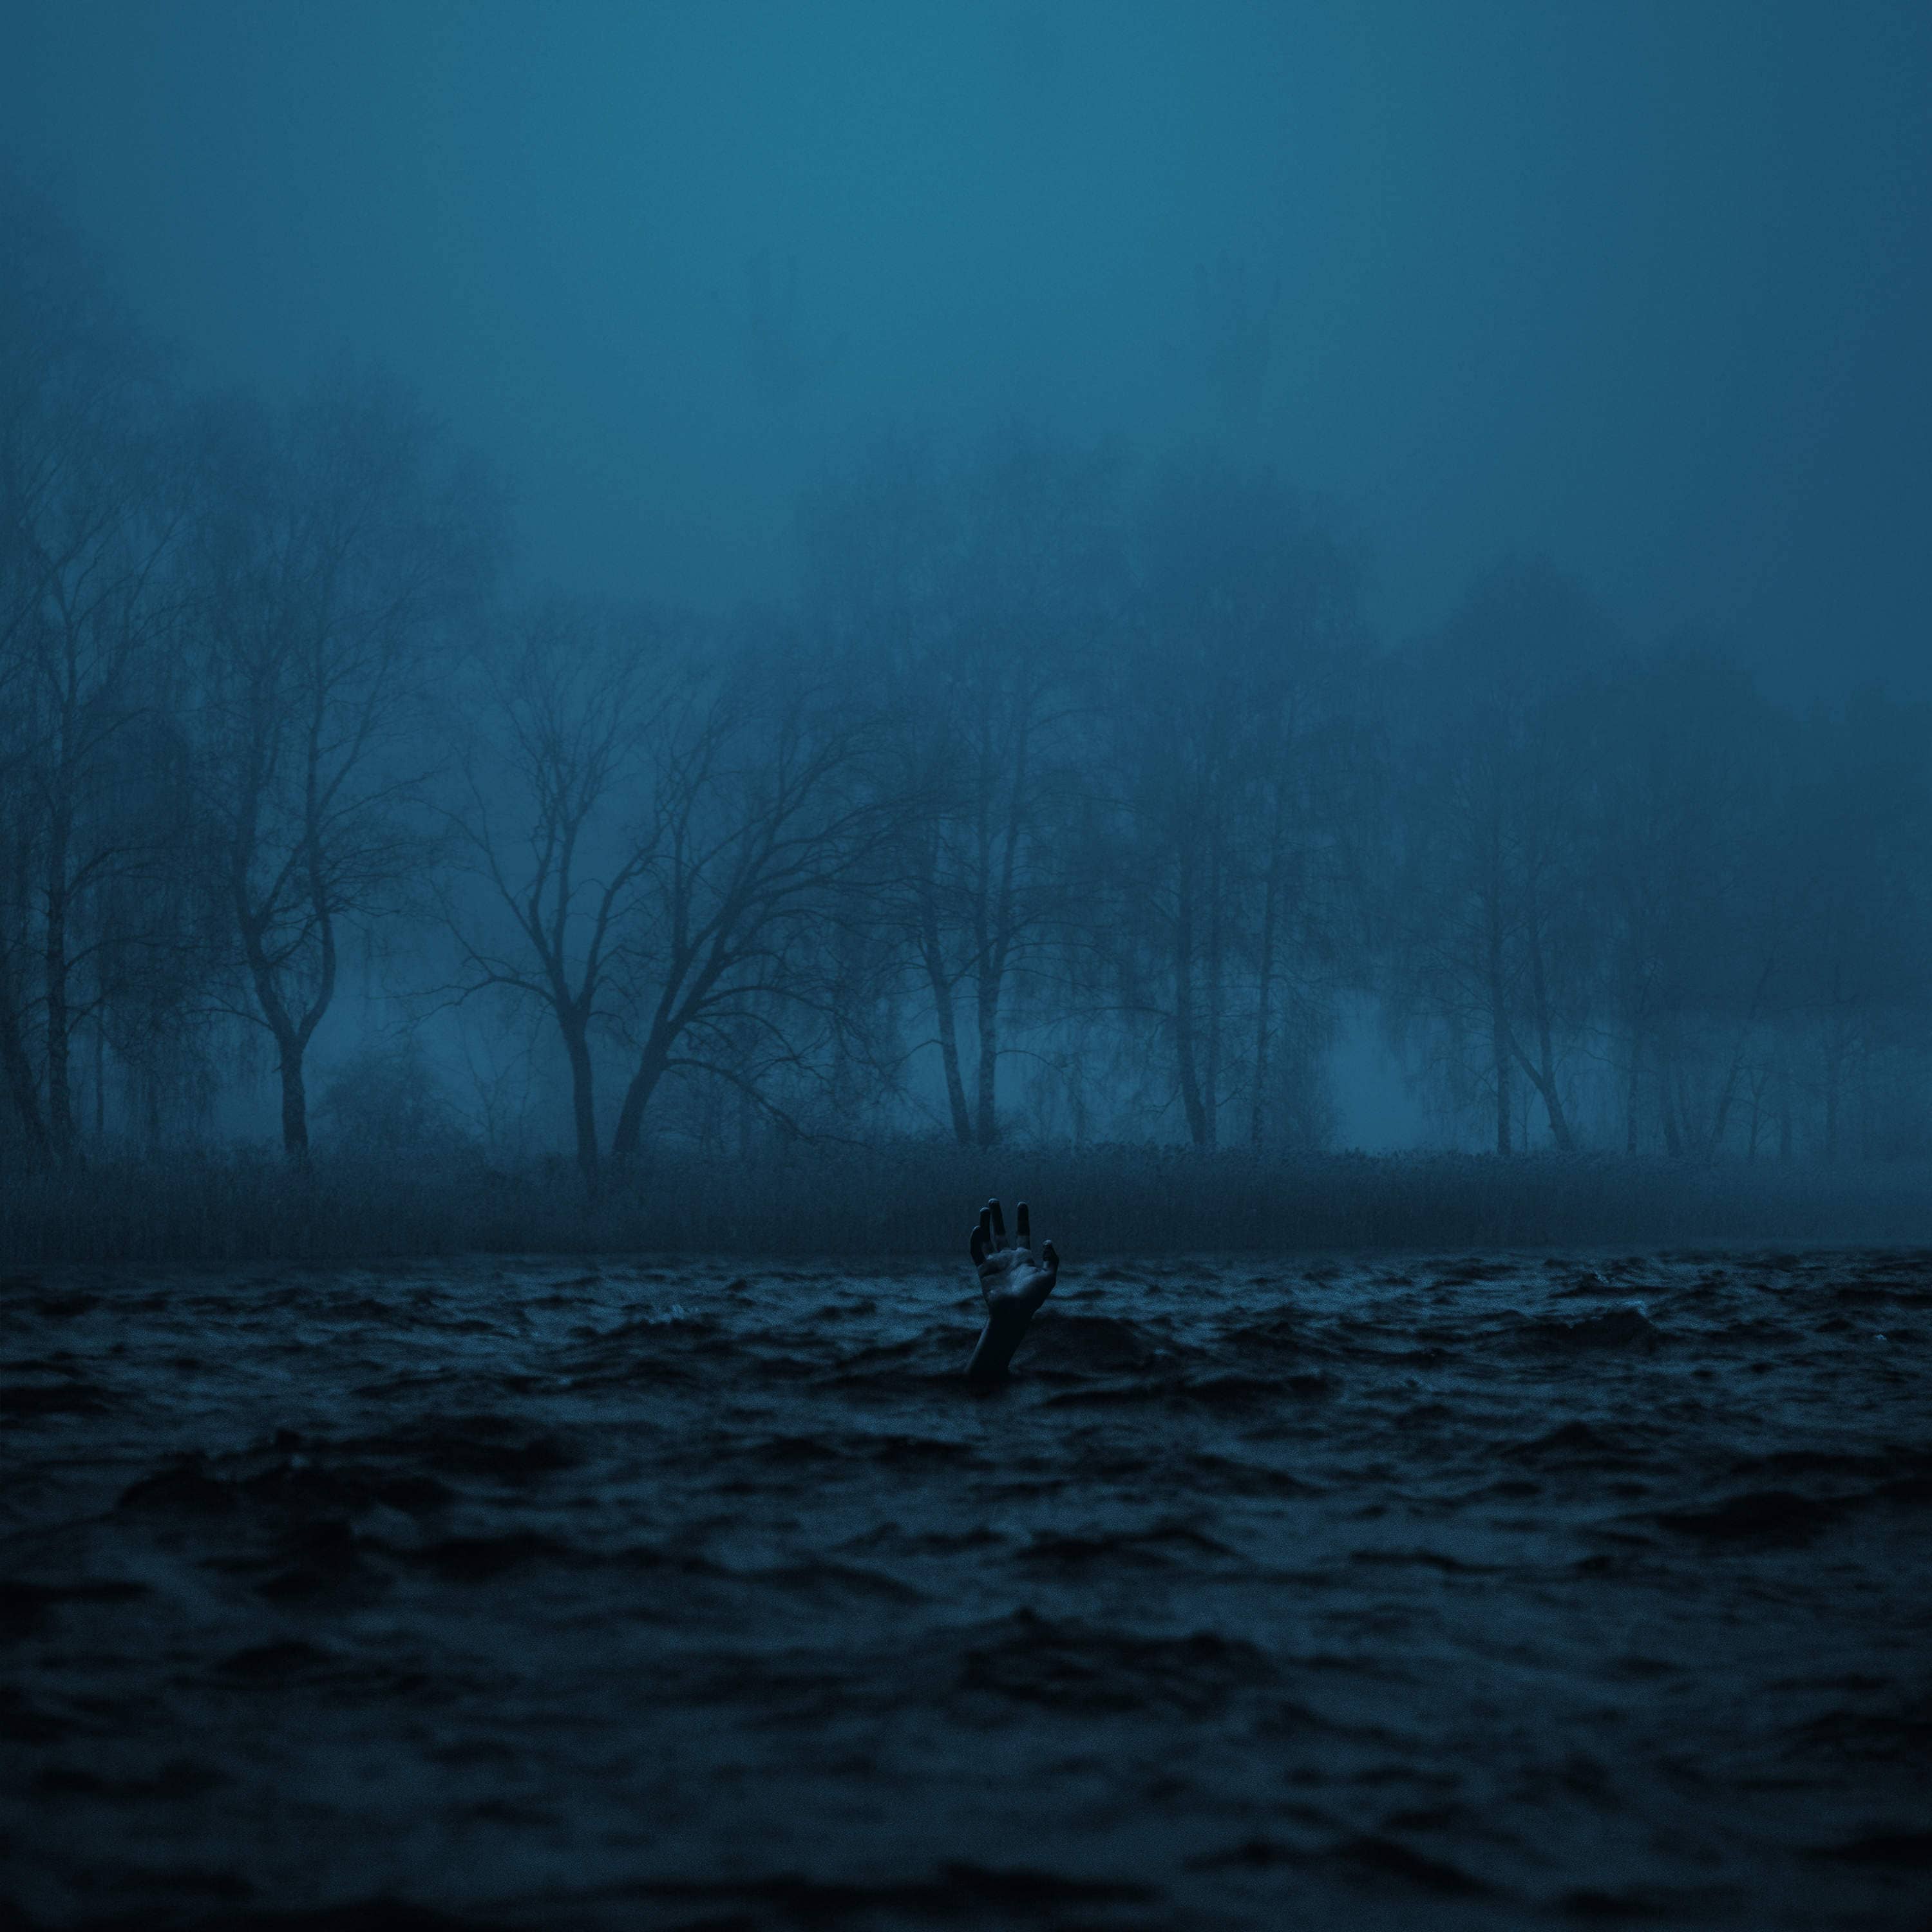
“You're stronger than you think you are. You can get through this, whatever happens, you can get through it. Just don't forget...the rain. It's an angel's tears. And every glass you've ever seen is half full. Don't let yourself forget that. I know what it does to a person... forgetting that hope is out there.” In this Photoshop tutorial, we will learn how to create a mystical scene. First, we added water, then place the background. Next blended it with Adjustment layers. After that add hand and mist, also for the final touch added Camera Raw Filter.
Preview of Final Image

Tutorial Resources
Step 1
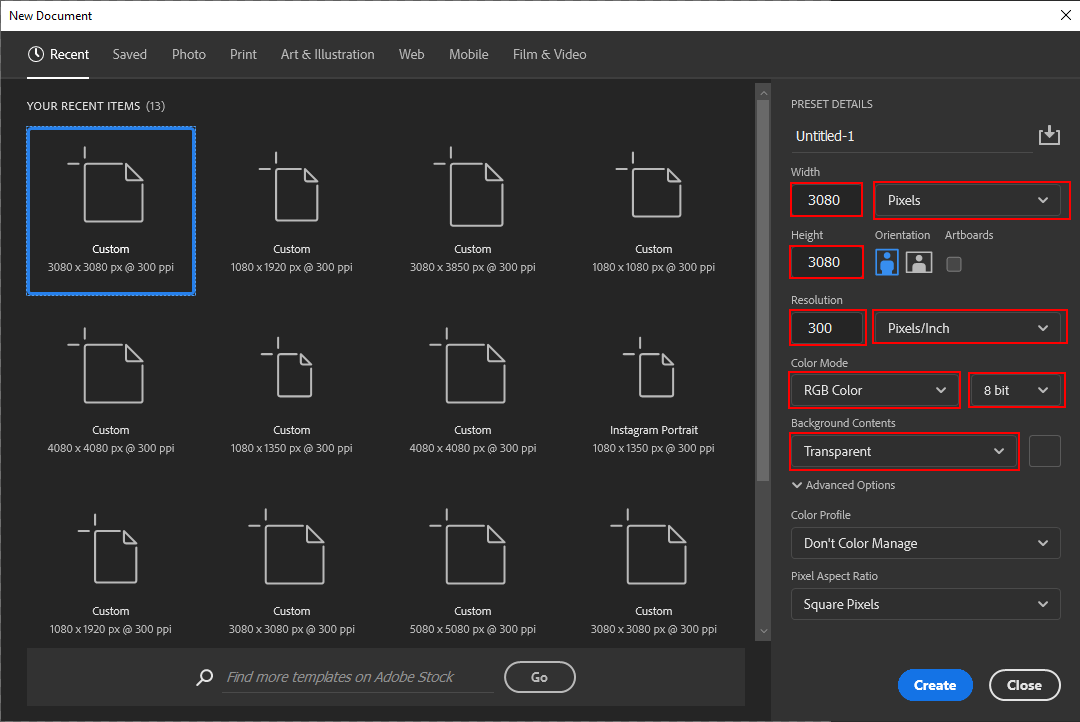
Now, let’s start by creating a new image file, go to the Menu bar and click File > New, and then input the following values on their respective fields
- Preset: Custom
- Width: 3080px
- Height: 3080px
- Resolution: 300px
- Color Mode: RGB Color 8 bit
- Background Contents: Transparent
Step 2
Now, place Ocean Go to File > Place and select Ocean, then place it to our work canvas and position the image with the transform tool (Ctrl / Cmd + T). Hold Alt + Shift and rasterize like the image below. In Photoshop CC only hold Alt to rasterize all sides together.
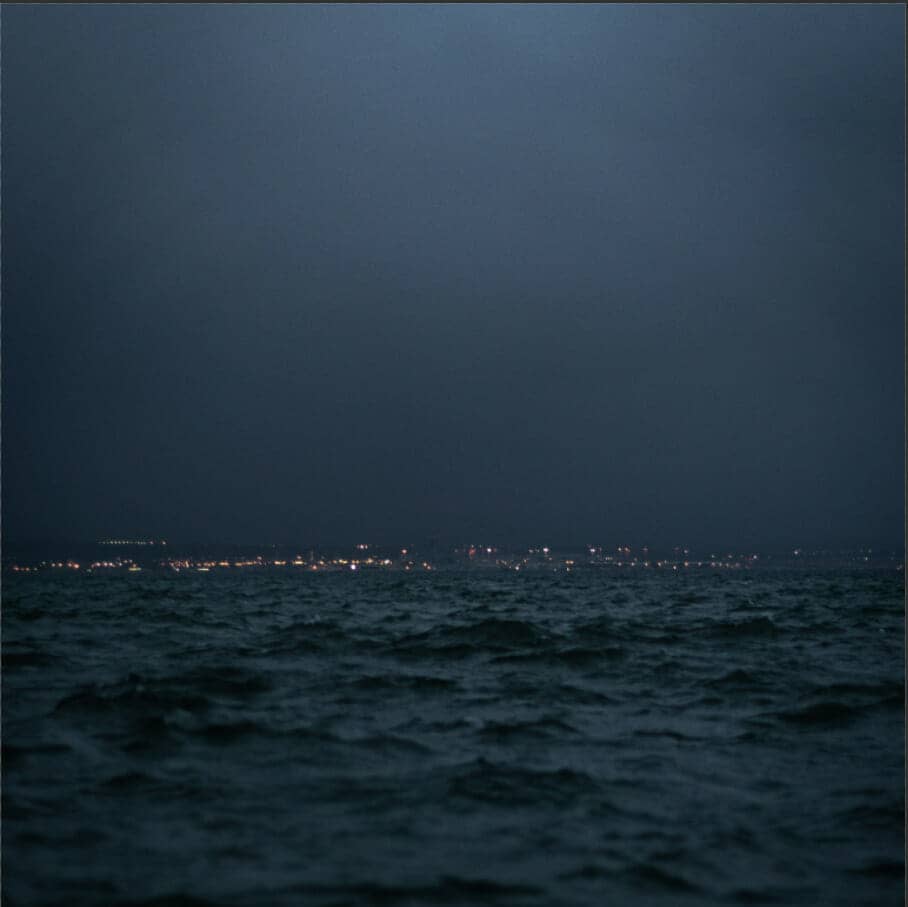
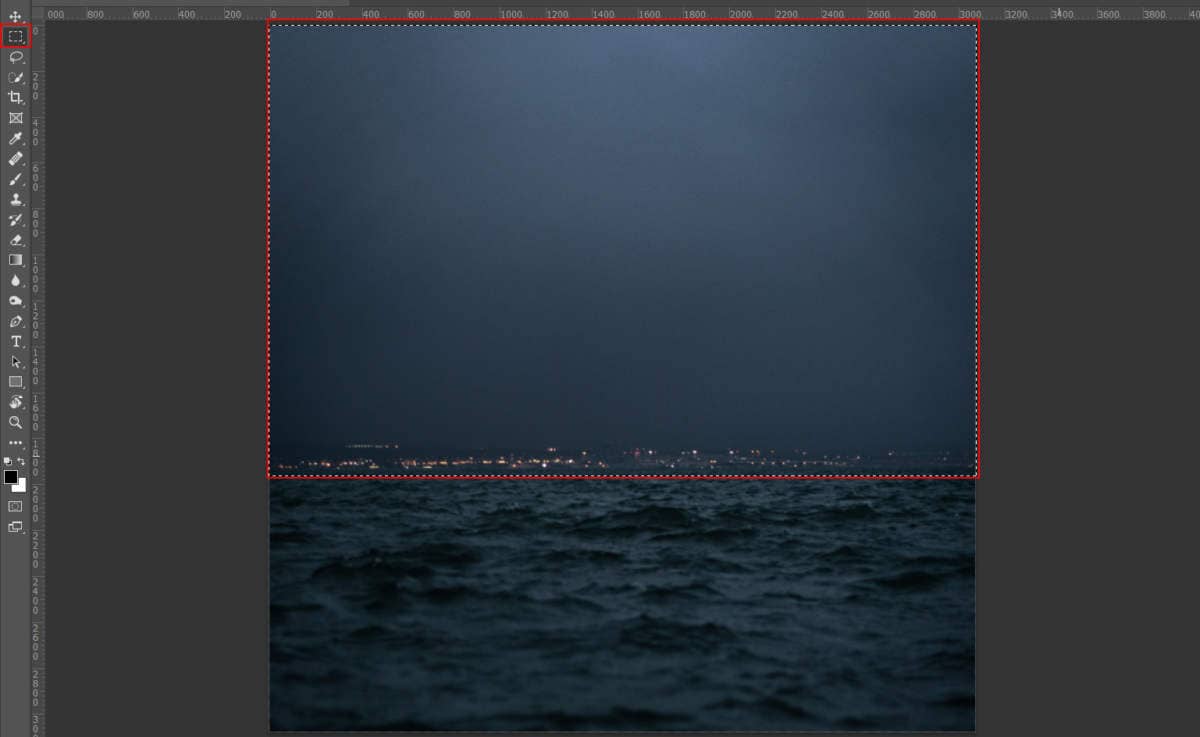
Now create a layer mask and use Rectangular Marquee Tool(M) then select sky and crop (ALT + DEL). Layer mask must be selected and default color B&W.


Step 3
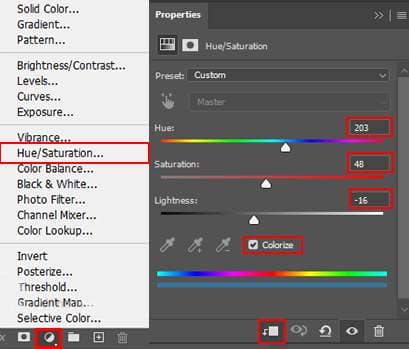
Add Adjustment Layer "Hue/Saturation"
Step 4
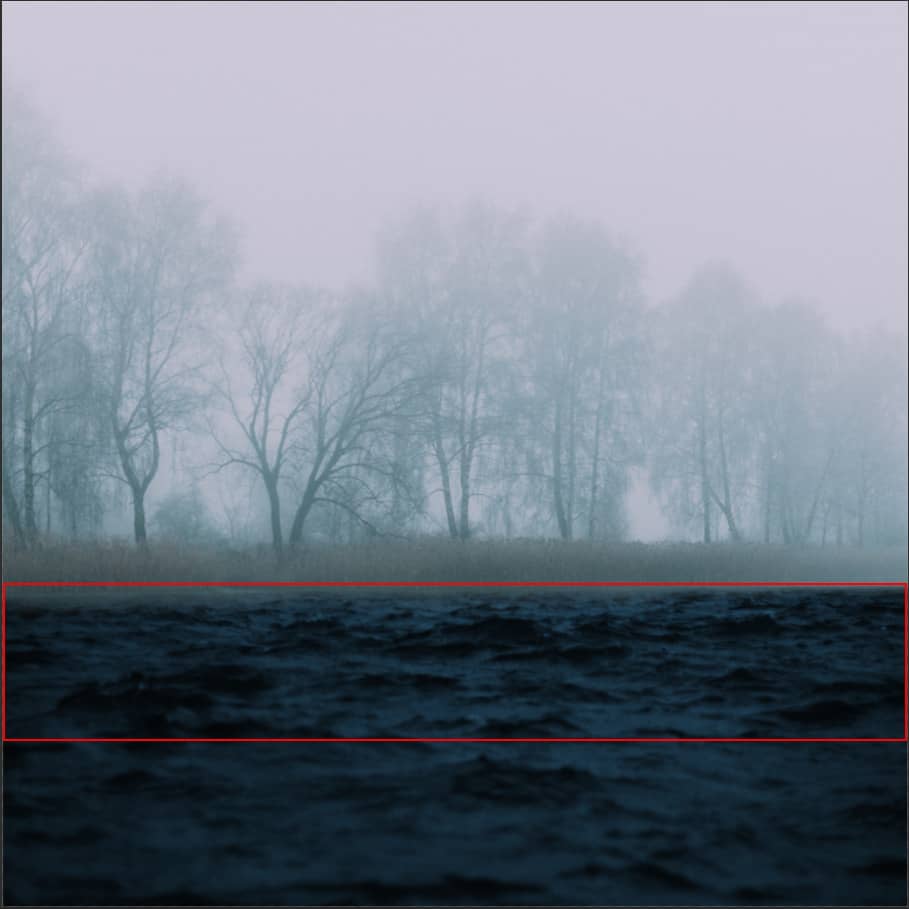
Now repeat the same process as in step 2. Place Lake Go to File > Place and select Lake, then place it to our work canvas and position the image with the transform tool (Ctrl / Cmd + T). Hold Alt + Shift and rasterize like the image below. In Photoshop CC only hold Alt to rasterize all sides together.

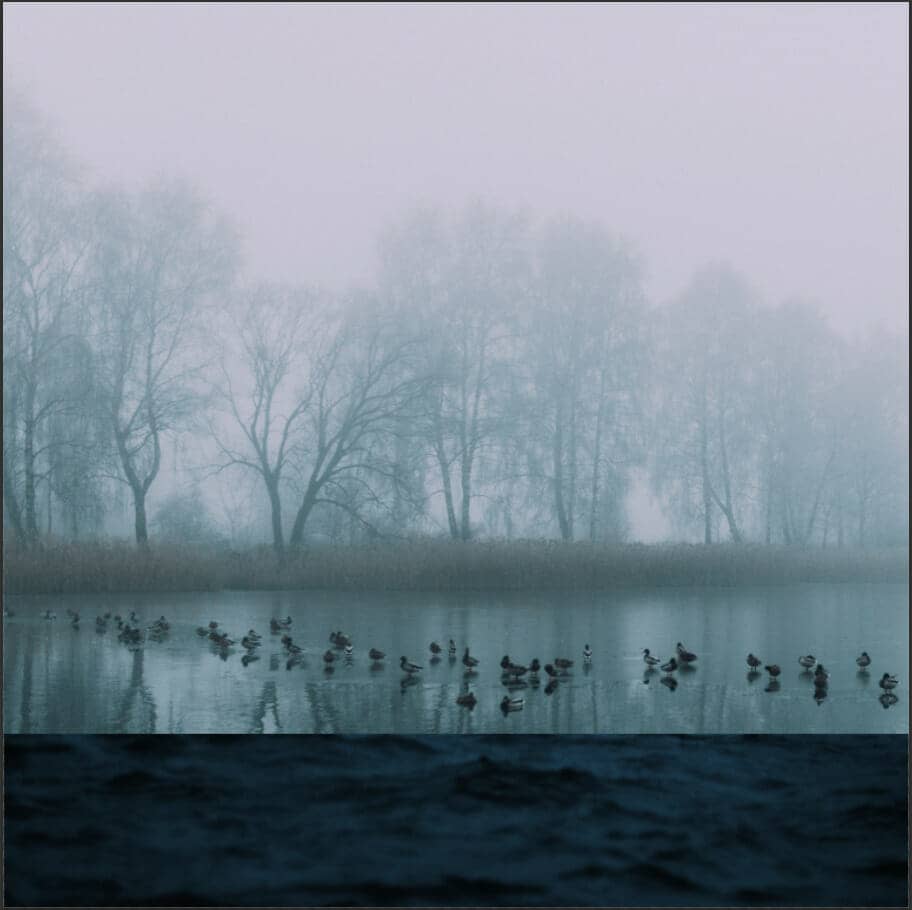
Now create a layer mask and use Rectangular Marquee Tool(M) then select birds and water and crop it (ALT + DEL). Layer mask must be selected and default color B&W.
Step 5
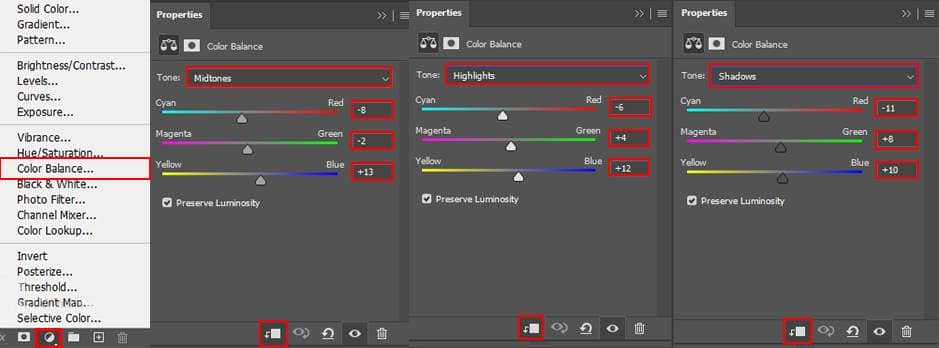
Add Adjustment Layer "Color Balance"
Step 6
Add Adjustment Layer "Hue/Saturation"

Step 7
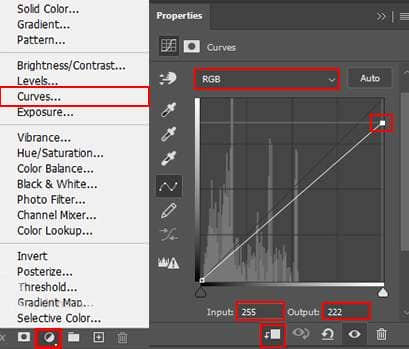
Add Adjustment Layer "Curves"
Step 8
Now, go to File > Open and select Hand. Then use a Pen Tool(P) and start selecting. When we finish the selection press right-click on mouse and “Make Selection” then create a layer mask. The simplest path you can draw with the standard Pen tool is a straight line, made by clicking the Pen tool to create two anchor points. By continuing to click, you create a path made of straight line segments connected by corner points.