
Download Lightroom presets and LUTs, absolutely free. Use the presets to add creativity and style to your photos.
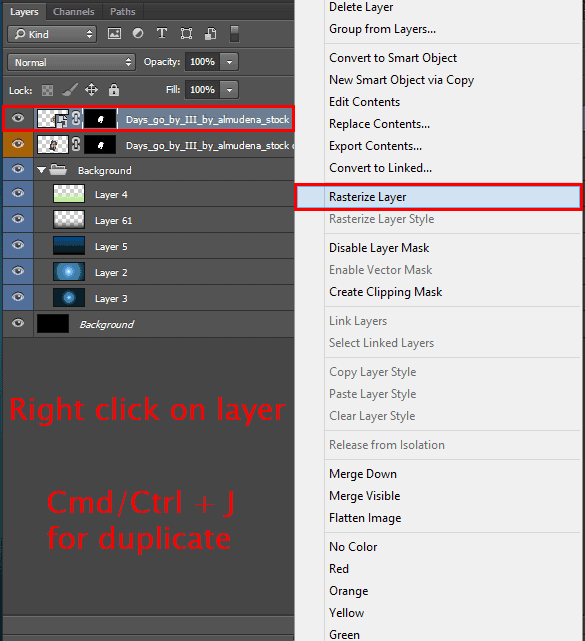
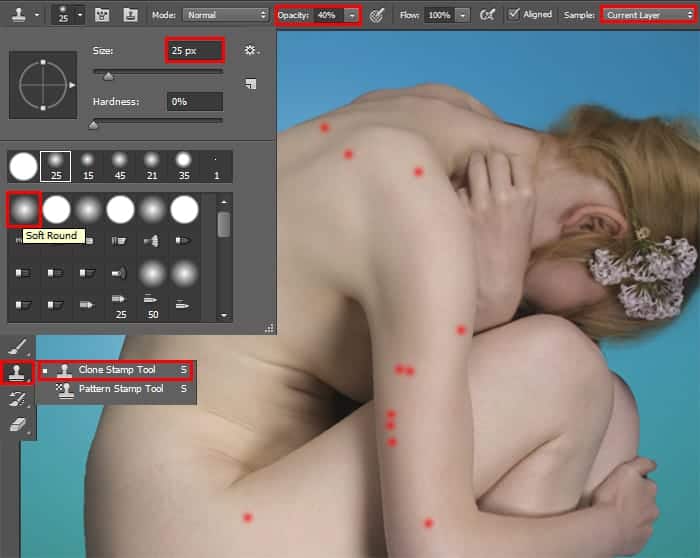
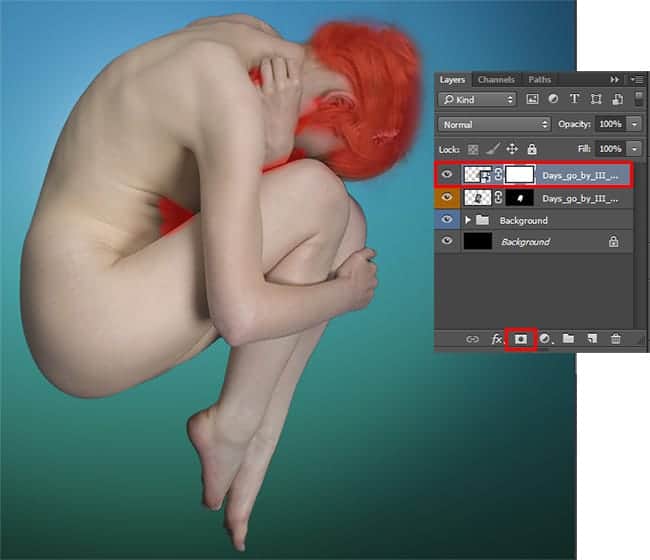
Use Clone Stamp Tool (S) (Size: 25px, Opacity: 40%, Hardness: 0%, Sample: Current layer) to clear skin blemishes (some of them are shown in image below). When you finish, duplicate this layer (Cmd/Ctrl + J or Layer > Duplicate layer...) and apply a layer mask (right click on mask > Apply Layer Mask). Over the next paragraph, I strongly advise you not to move all of the following layers. Otherwise you will have to start all over again.
For duplicated layer add a layer mask ("Add Layer Mask" button in the layers panel or Layer > Layer Mask > Reveal All...). Select layer mask, take a Brush Tool (B) (Size: 20-30px, Opacity: 100%, Hardness: 0%) and paint all the dark areas. In "dark areas" I mean much hard shadows (but I do not advise you to remove them in this case) on body of the model, as well eyes, eyebrows, hair, and etc. So you do not interfere with the lower layers temporarily close them by clicking on the eye icon next to the layer.
Step 7
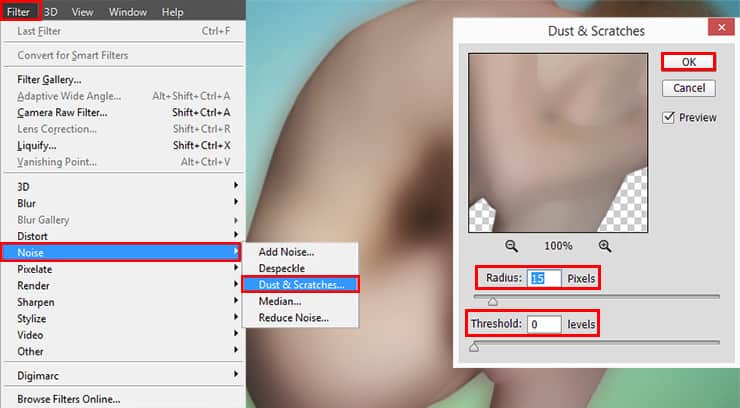
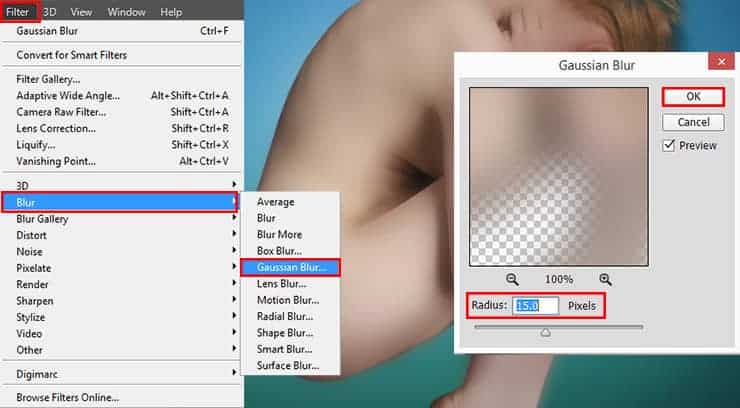
Add some filters to smooth the skin and make it beautiful and young. Go to Filter > Noise > Dust & Scratches. Set Radius: 15px and Threshold: 0. And one more such action filter "Gaussian Blur" (Filter > Blur > Gaussian Blur). In window that appear, set Radius: 15px.
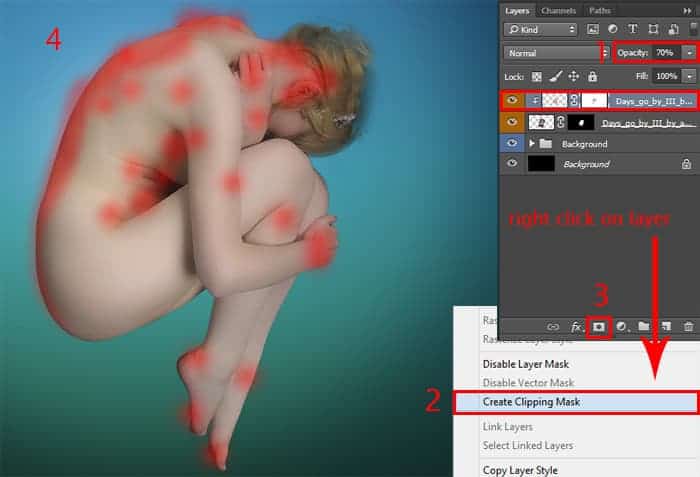
Everything seems quite blurred, but decrease a layer Opacity to 70% and clip this to lower layer (Cmd/Ctrl + Opt/Alt + G or right click on layer > Create Clipping Mask) and again add a layer mask and remove excessive blurring in desired locations, by using Brush Tool (B) (Size: 70px, Opacity: 30%, Soft Round brush). It is important to find the right balance and soften the skin physiological relief, ie, forcing less at edges and detail (bones relief) to keep them a little sharp. Duplicate this layer (Cmd/Ctrl + J).
Step 8
Now I use a filter "Plastic Wrap" to create the effect of an artificial material (plastic) on the skin. Go to Filter > Filter Gallery (Artistic) > Plastic Wrap. Set there settings: Highlight Strength: 10 / (Intensity: 10), Detail: 10, Smoothing: 15 and press OK. Try to change filter settings to get more interesting results. Set layer Opacity 50% and clip it to previous layer (Cmd/Ctrl + Opt/Alt + G). This filter is not completely converted into the plastic skin, and gives only a small glow, which makes a more realistic model.
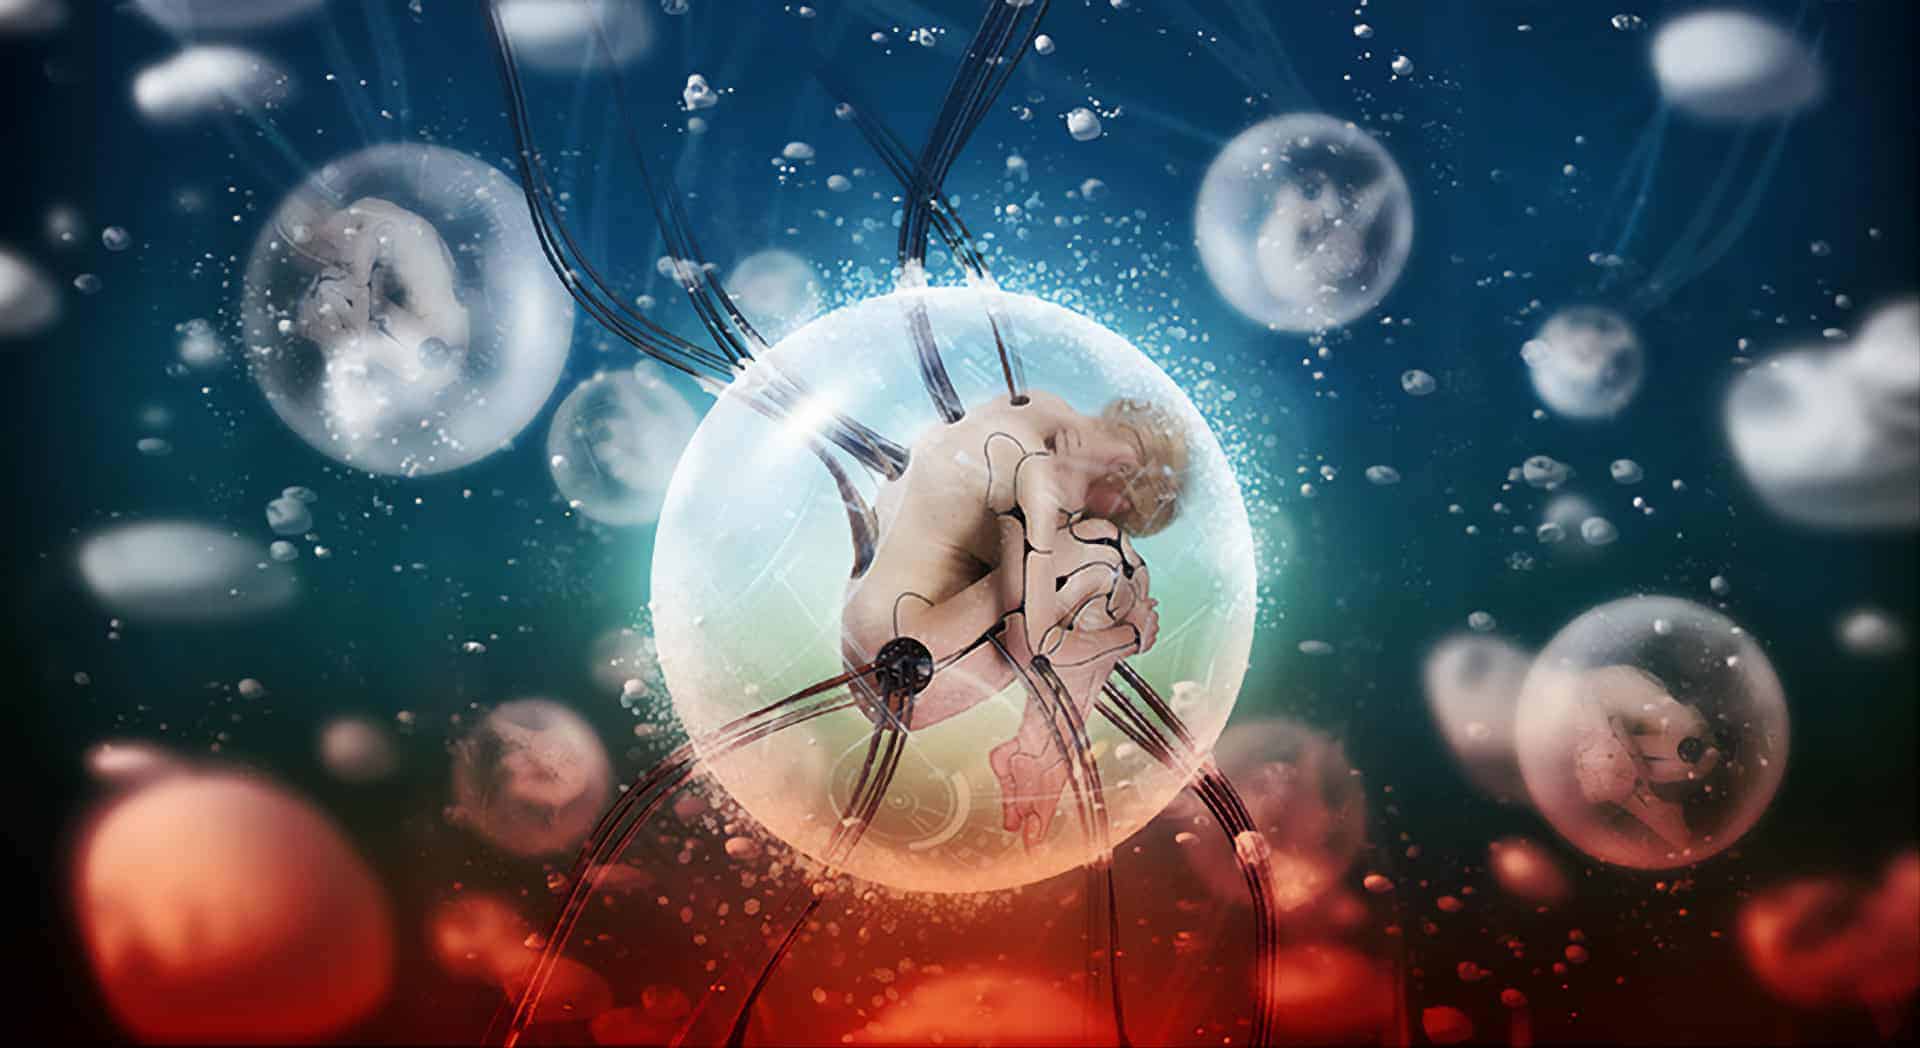
3 comments on “Create a Chilling Sci-Fi Scene of Cyborgs in Bubbles”
love it
Nice one..enjoy ur tutorials..pls I have questions ..what does a vector mask do
Thank you, a cognitive a lesson )) the result from the by curves differs