Download Lightroom presets and LUTs, absolutely free. Use the presets to add creativity and style to your photos.
Step 19
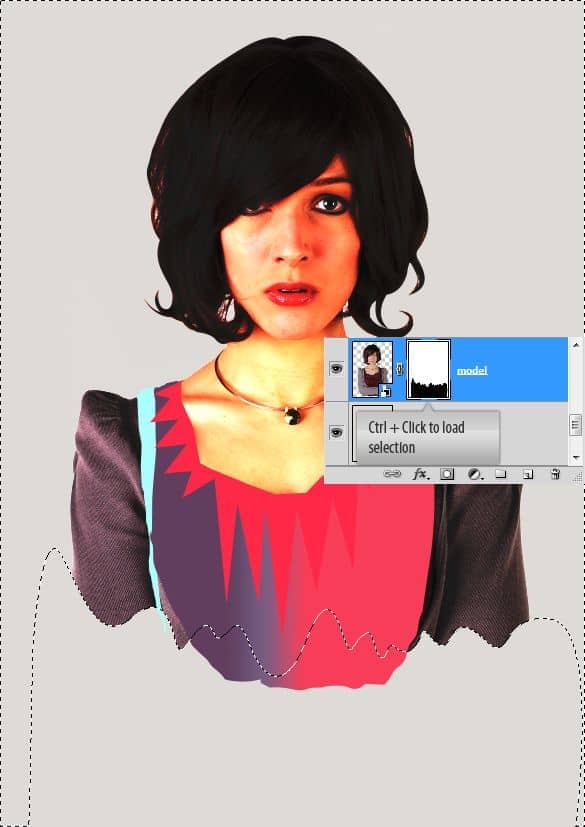
We have some work in Illustrator. And we need to take the model into Illustrator. To do this Ctrl + click on the model's Layer Mask. You have the selection now, press Ctrl + C to copy.
Step 20
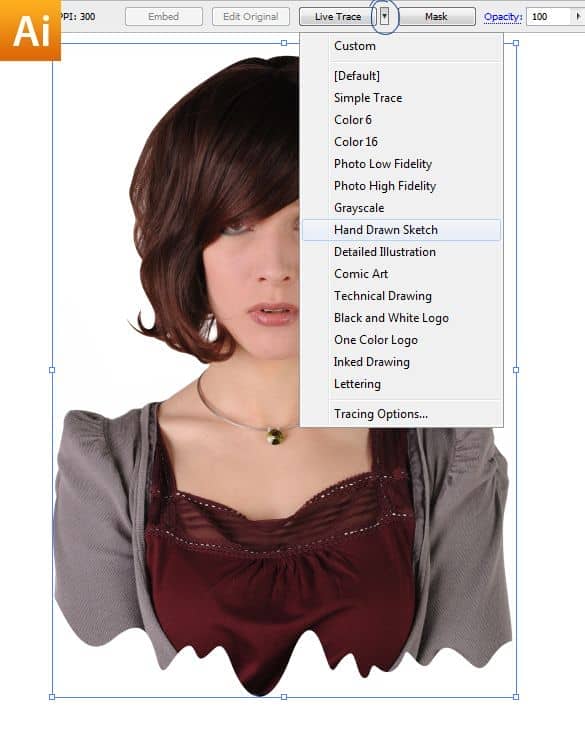
Now open up Illustrator, create a new document and press Ctrl + V to paste. Select the image. On the Options Panel you can find Live Trace button. Click on the small triangle next to it and you will get dropdown menu with tracing presets. Choose Hand Drawn Sketch from the list.
Step 21
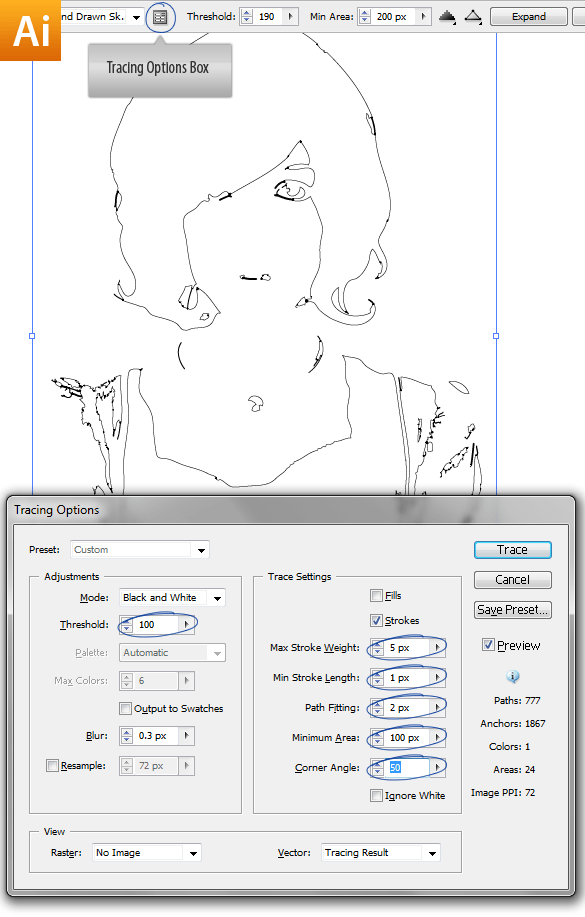
Once the tracing is completed you can fine tune the trace using the Tracing Options box. which can be found on the Options Panel.
Step 22
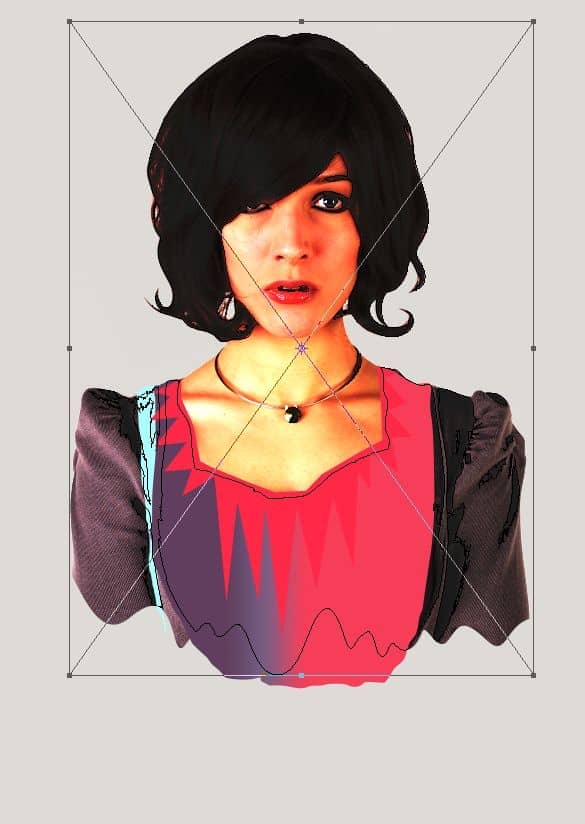
Copy and paste the trace into Photoshop. We can simply copy and paste items into these programs so easily and they work very well together. Now Place the trace layer the model layer.
Step 23
I want to apply a different color to the trace layer on some areas. Create a new layer above the trace layer and clip it to the trace layer (Ctrl + Alt + G). Apply color with the brush wherever you want.
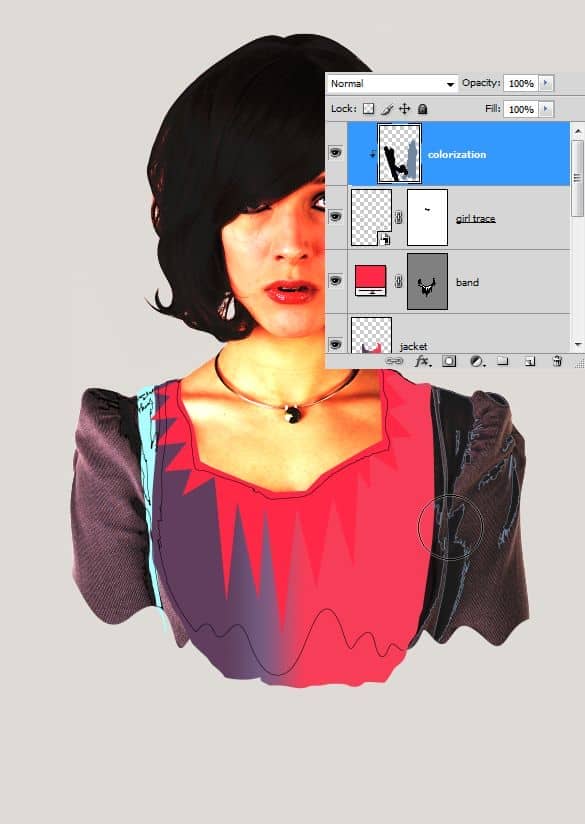
Step 24
Hide unwanted lines using the Layer Mask.
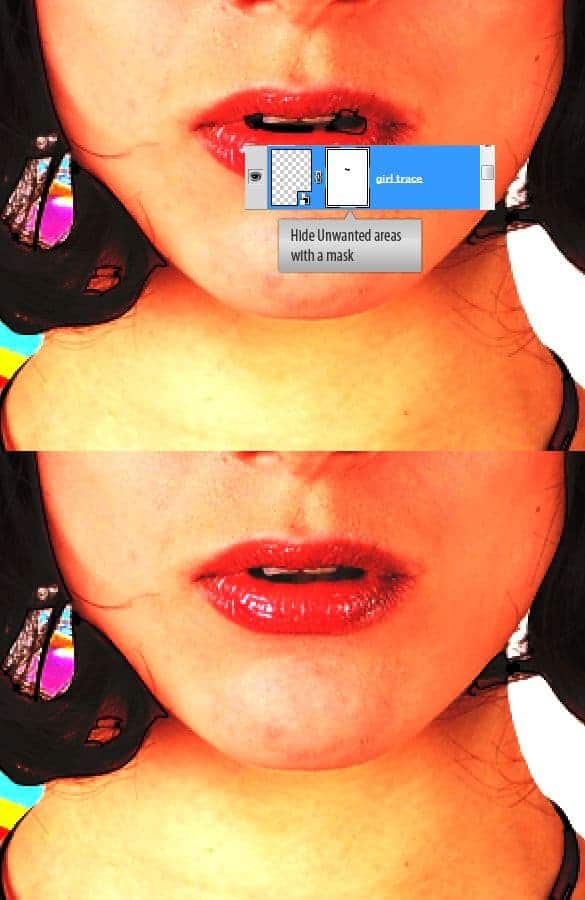
Step 25
Now bring in the galaxy stock image into our design. It will add nice dynamic feel to the design. Take it and place above the jacket layer.
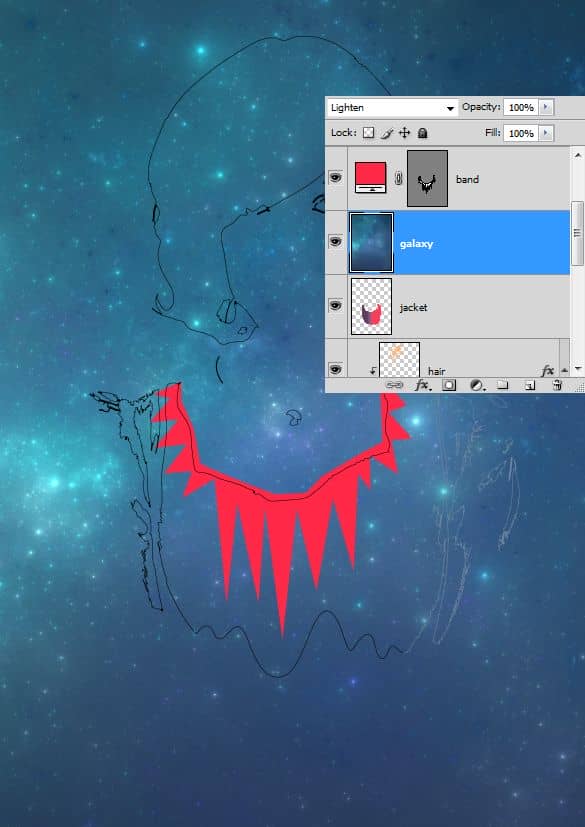
Step 26
The galaxy layer spread across the entire canvas. We need to limit it only to our model and hide the rest. Ctrl + click on the model thumbnail. It should load up the selection.
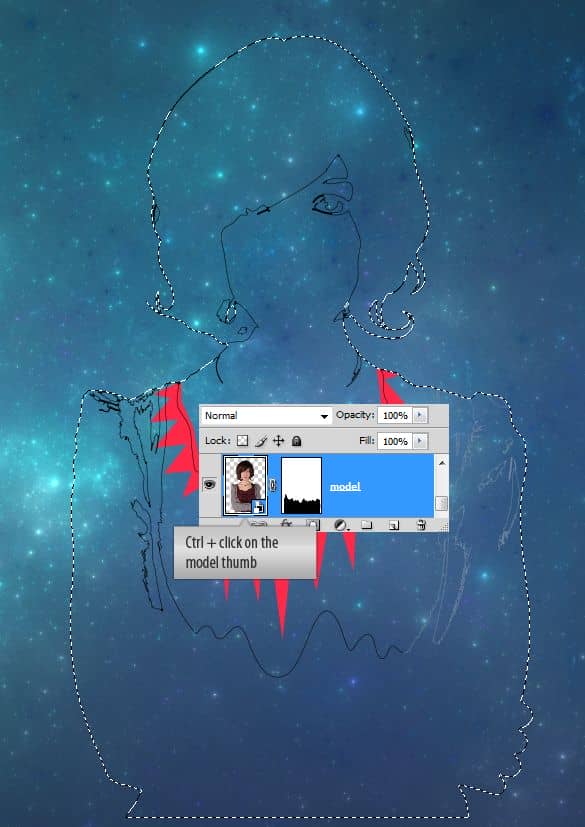
Add Layer Mask with the selection.
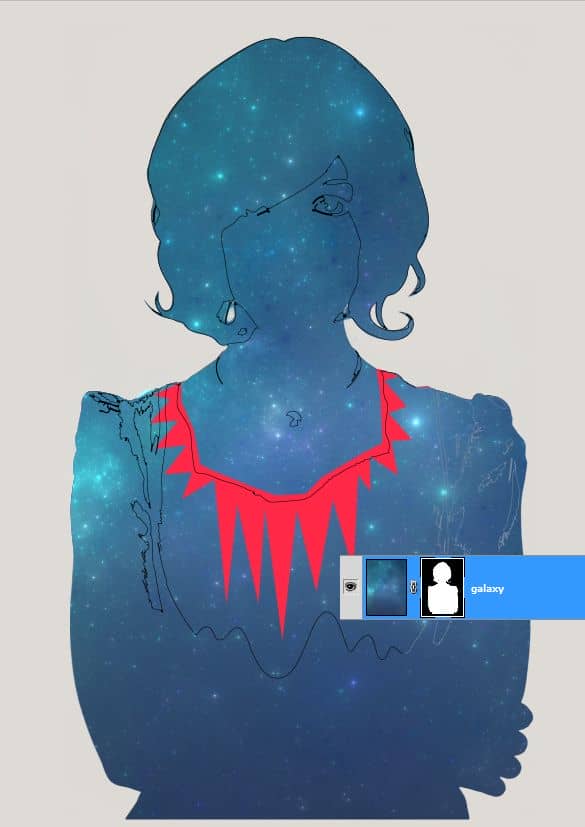
Step 27
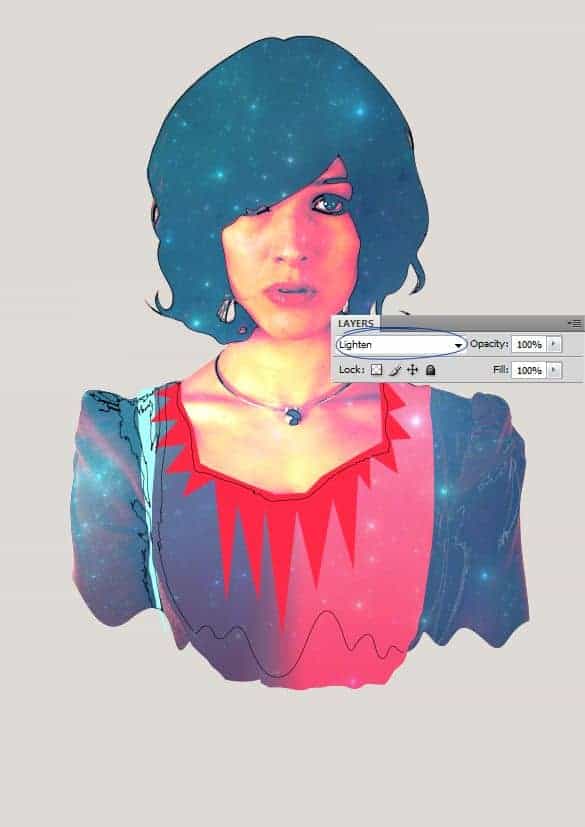
Let's make this galaxy to work. First set the blend mode to Lighten.
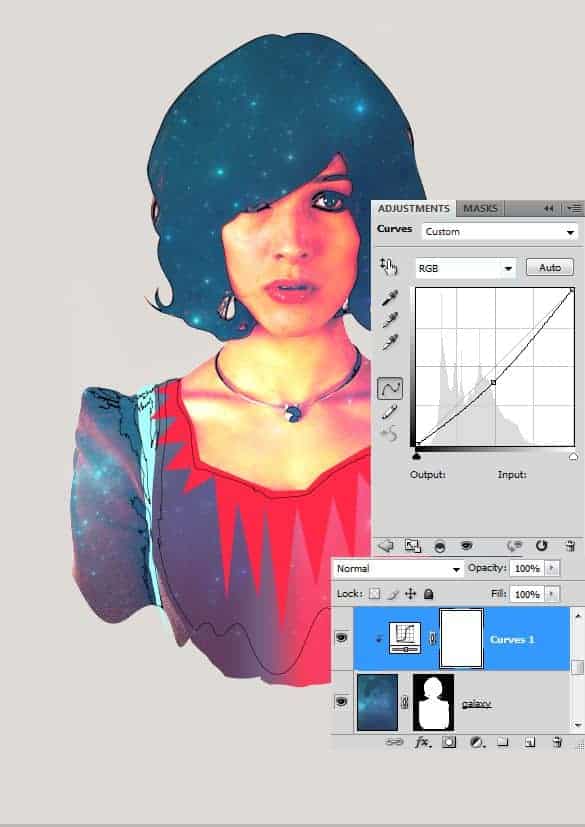
Add Curves Adjustment Layer. Slightly pull down the mid tone values.
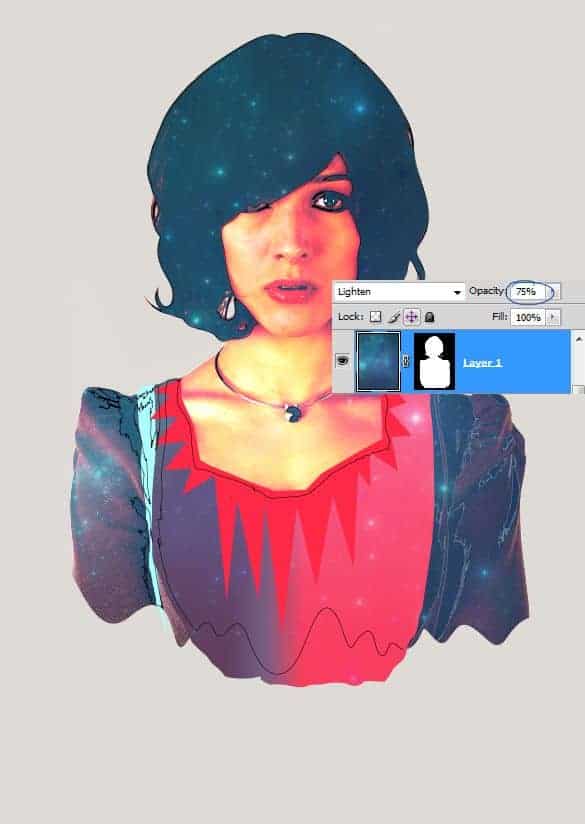
Finally Set the layer opacity to 75%. It's looking better now.
Step 28
Here I am going to make a colorful shape. I used the normal Lasso Tool to make this selection. It will give that unevenness to the selection. Which we like to have.
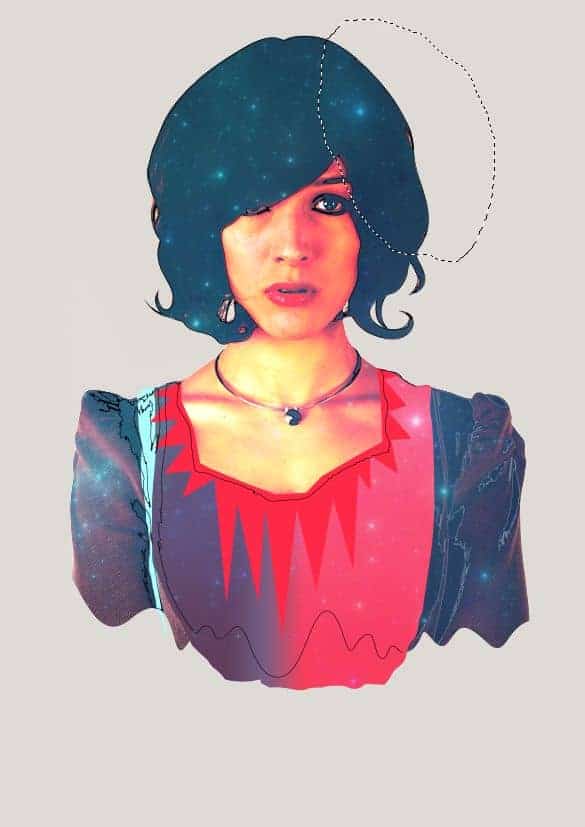
Fill #ffe38b in the selection.
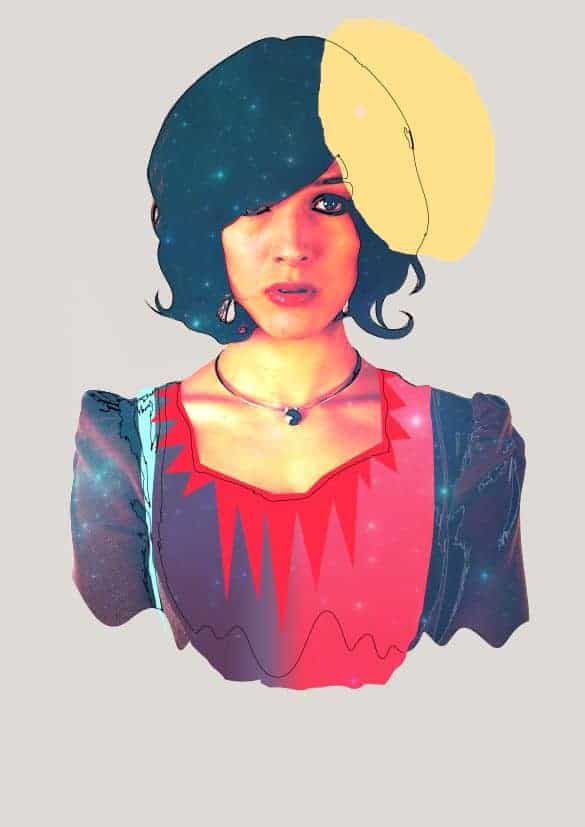
Lock the transparency of the layer. Make another selection above the previous one and fill it with #ff7178.
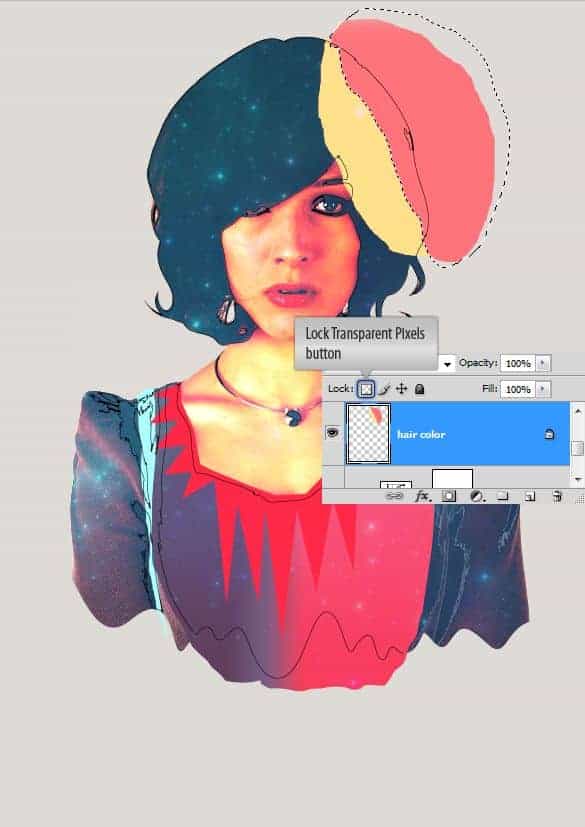
Step 29
Finally clip our shape to the model layer (Ctrl + Alt + G).
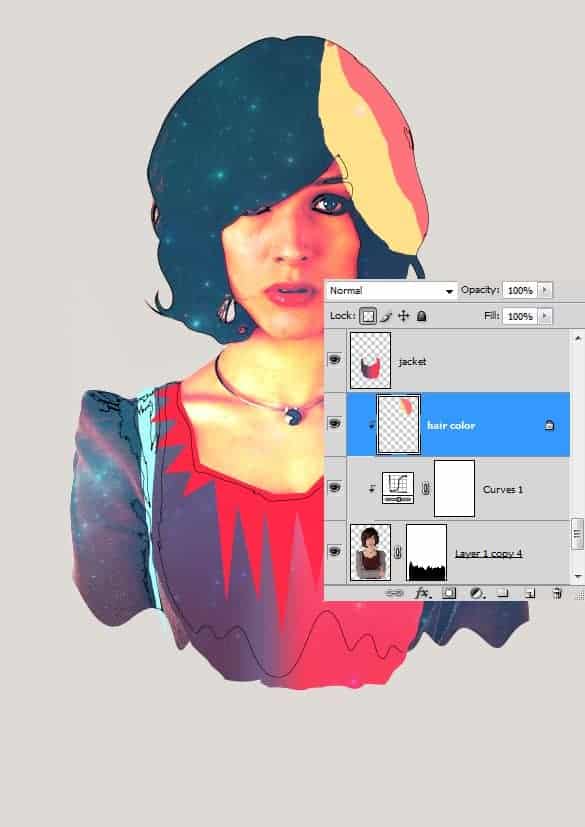
Step 30
Let's create this nice shape with the Pen Tool.
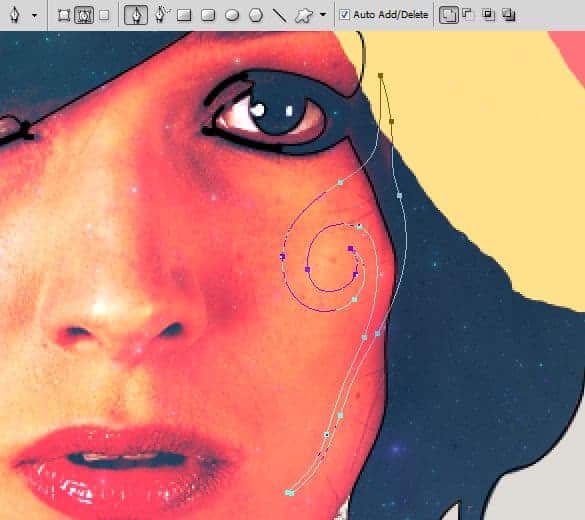
Convert it into selection and fill it with #ffe38b.
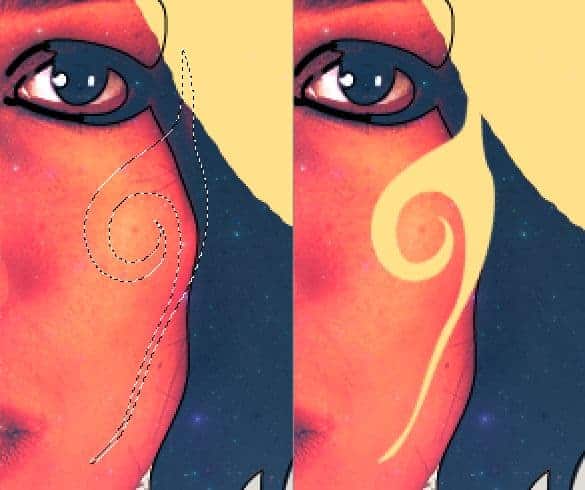
Step 31
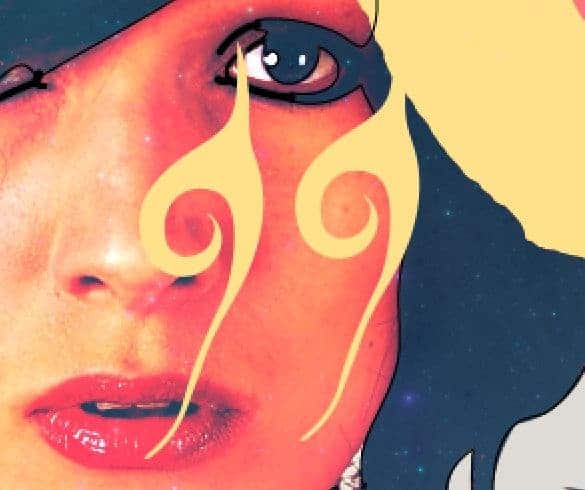
Duplicate the shape.
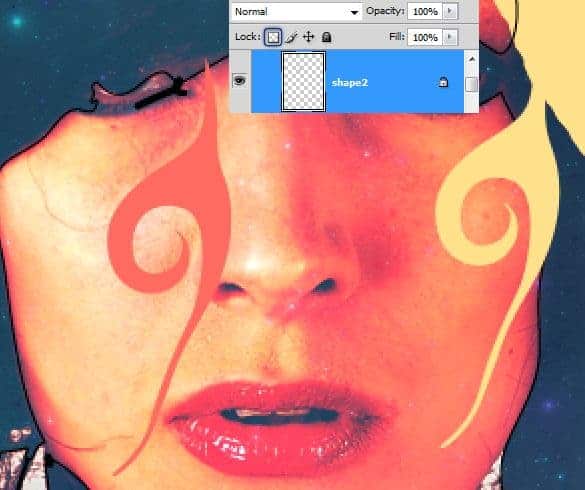
Lock the transparency. Set the foreground color to #ff685e and hit Alt + Backspace to fill the new color. You can fill any color anytime once you have locked down the transparency, and it’s an alternative to Color Overlay which is accessed through Layer Styles. There is more than one way to achieve things in Photoshop. We need to choose what is intuitive in a situation.
Step 32
Press Ctrl + T. Right click and choose Flip Horizontal. The Flip Vertical.
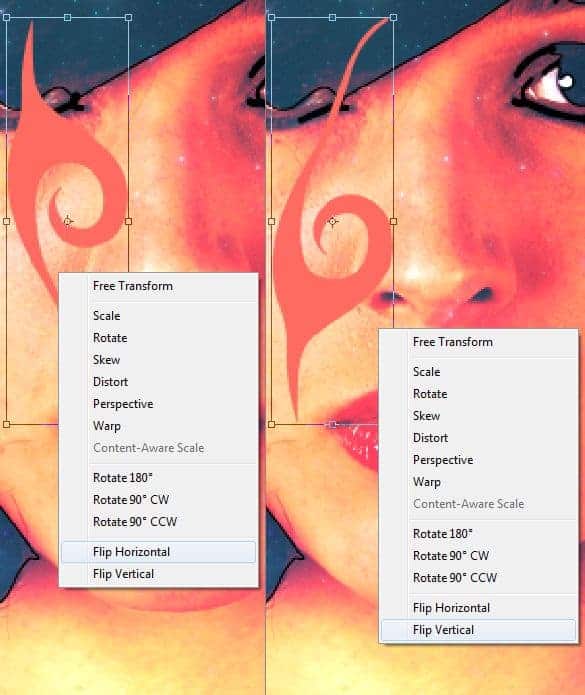
Place it on the other side of the face. Position it properly to get the desired look.
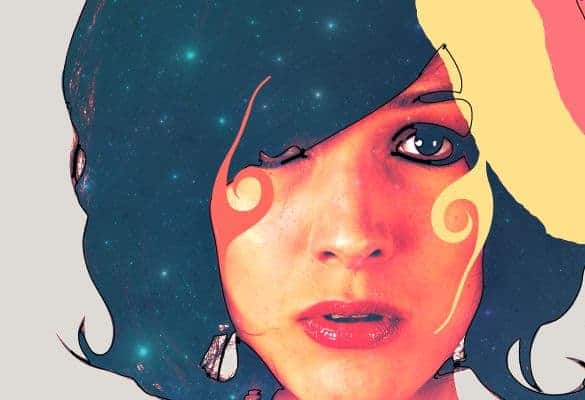
Step 33
Make several copies of the shape. Place them above her arm. As I mentioned you can fill different colors in the shapes because we have locked the transparency of the layer.
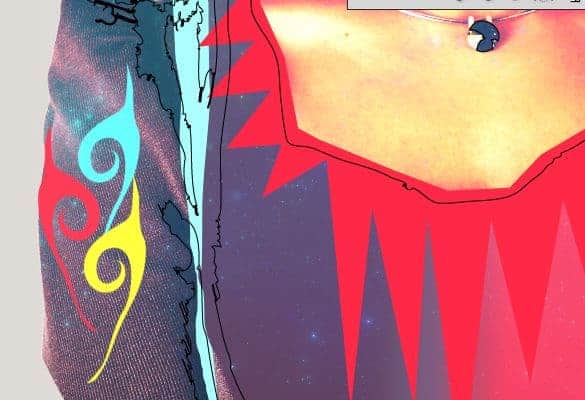
Step 34
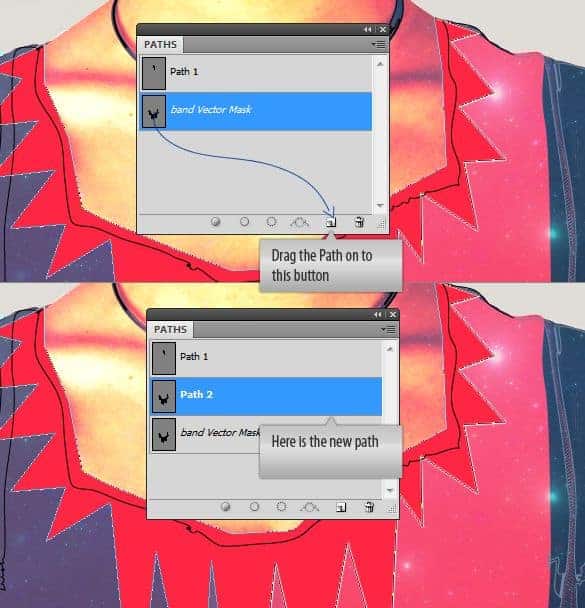
We have this shape here which is created earlier. Remember it is a shape layer that has a vector path associated with it! Click on it.
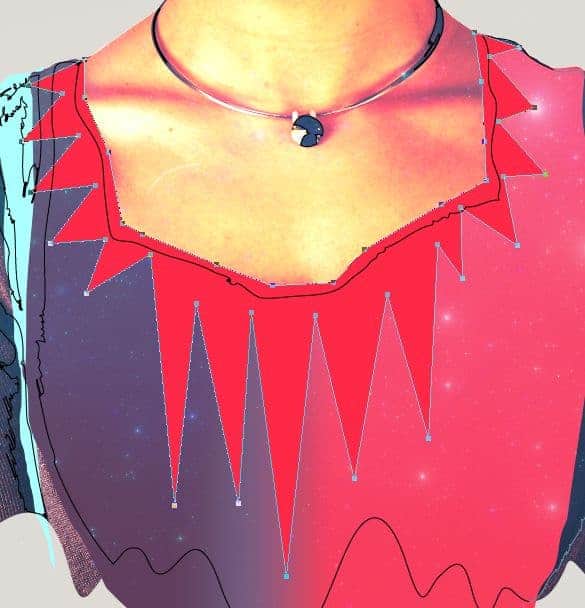
Now open the Paths Palette. You can see the Vector Mask of the shape layer. Click on it and drag it onto the Create new Path button at the bottom of the palette. This will create a new path for us which we need to do something.
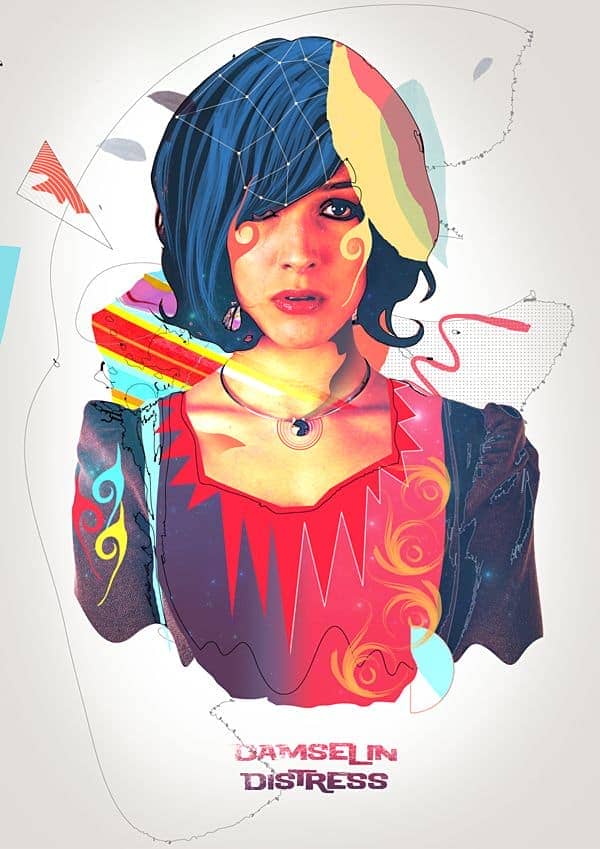

41 comments on “Create a Colorful Retro Poster in Photoshop and Illustrator”
What a fantastic tutorial
i really liked it practical skills worth knowing
yo
Some good techniques I just learned here - thank you! I just wish Photoshop had some of Illustrators features so I don't need to go back and forth. I can copy and paste the illustrator elements into Photoshop CC but the problem is to get Illustrator, you need the full Adobe Creative Cloud subscription. Most of my students can only afford the Lightroom and Photoshop plan.
Nice artwork!
Nice tutorial but sad how you have to use adobe illustrator for that trace contours thing
What is the canvas size for step 1?
1169x1654 pixels
Although you can use any canvas size you like, it's best to use something similar while following the tutorial.
WELL DONE!! Great tutorial Niranth!
who else really gets this ?
totally right couldnt agree more
<3 Cool post ?
I agree Amazing info ?
Yup
Worlds best tips fan
nice
<3 Sweet reply
tnx
Really nice stuff!
Agreed Awesome !
Can we do the same in Inkscape and Gimp?
Really covered a lot of different techniques and new shortcuts. It's cool seeing such seemingly "random creativity" captured and explained step by step.
I also appreciated seeing vector art combining with textures in photoshop. Merges the gap for me that I have in my head.
thank you!
You should add some bookmark or like buttons!!
this is hard as fuck
Where can you find the original pictures to do this? I tried on a random picture and i got lost.
Awesome Post. Lighting is most beautiful.Thanks for sharing such informative post its help me to know deeply Photoshop work step by step.
What a fantastic tutorial! :)
Thank you very much!!!!!!!!!!!
I hate illustrator i was doing geat up until the hair i surrender...
Oh great explanation. I have ready mate unique retro poster
im trying to do this, but i have illustrator cs6 and i cant do it :x
What version its this?
cs5?
Anny help?
Que versão é usada no ilustrator?
eu tenho o cs6 e não consigo :/
This Tutorials is very helpful for me.
Waow this is cool!
Thank you for this amazing tutorial!!
Nice Work , See My Work Too ;)
Way to challenging... yup I give up! I Rhymed!
Where Can I Download PSD file?
Fascinating!!! Got to give this a try. :)
What a fantastic tutorial!
This is my copy :)
https://www.box.com/s/frz9gp0hi3mpkzs9f0b7
Nice Tutorial .. I'm loving it. Thanks