

Download Lightroom presets and LUTs, absolutely free. Use the presets to add creativity and style to your photos.

Step 11
Duplicate (Cmd + J) the sprinkle again, and we change Gradient Overlay.

Step 12
Now we repeat previous step for green sprinkle.

Step 13
Next, we repeat previous step for blue sprinkle.

Step 14
Next, we repeat previous step for pink sprinkle.


Step 15
Duplicate (Cmd + J) the sprinkles and resize them smaller, place them as the way you like. Here my result.
Step 16
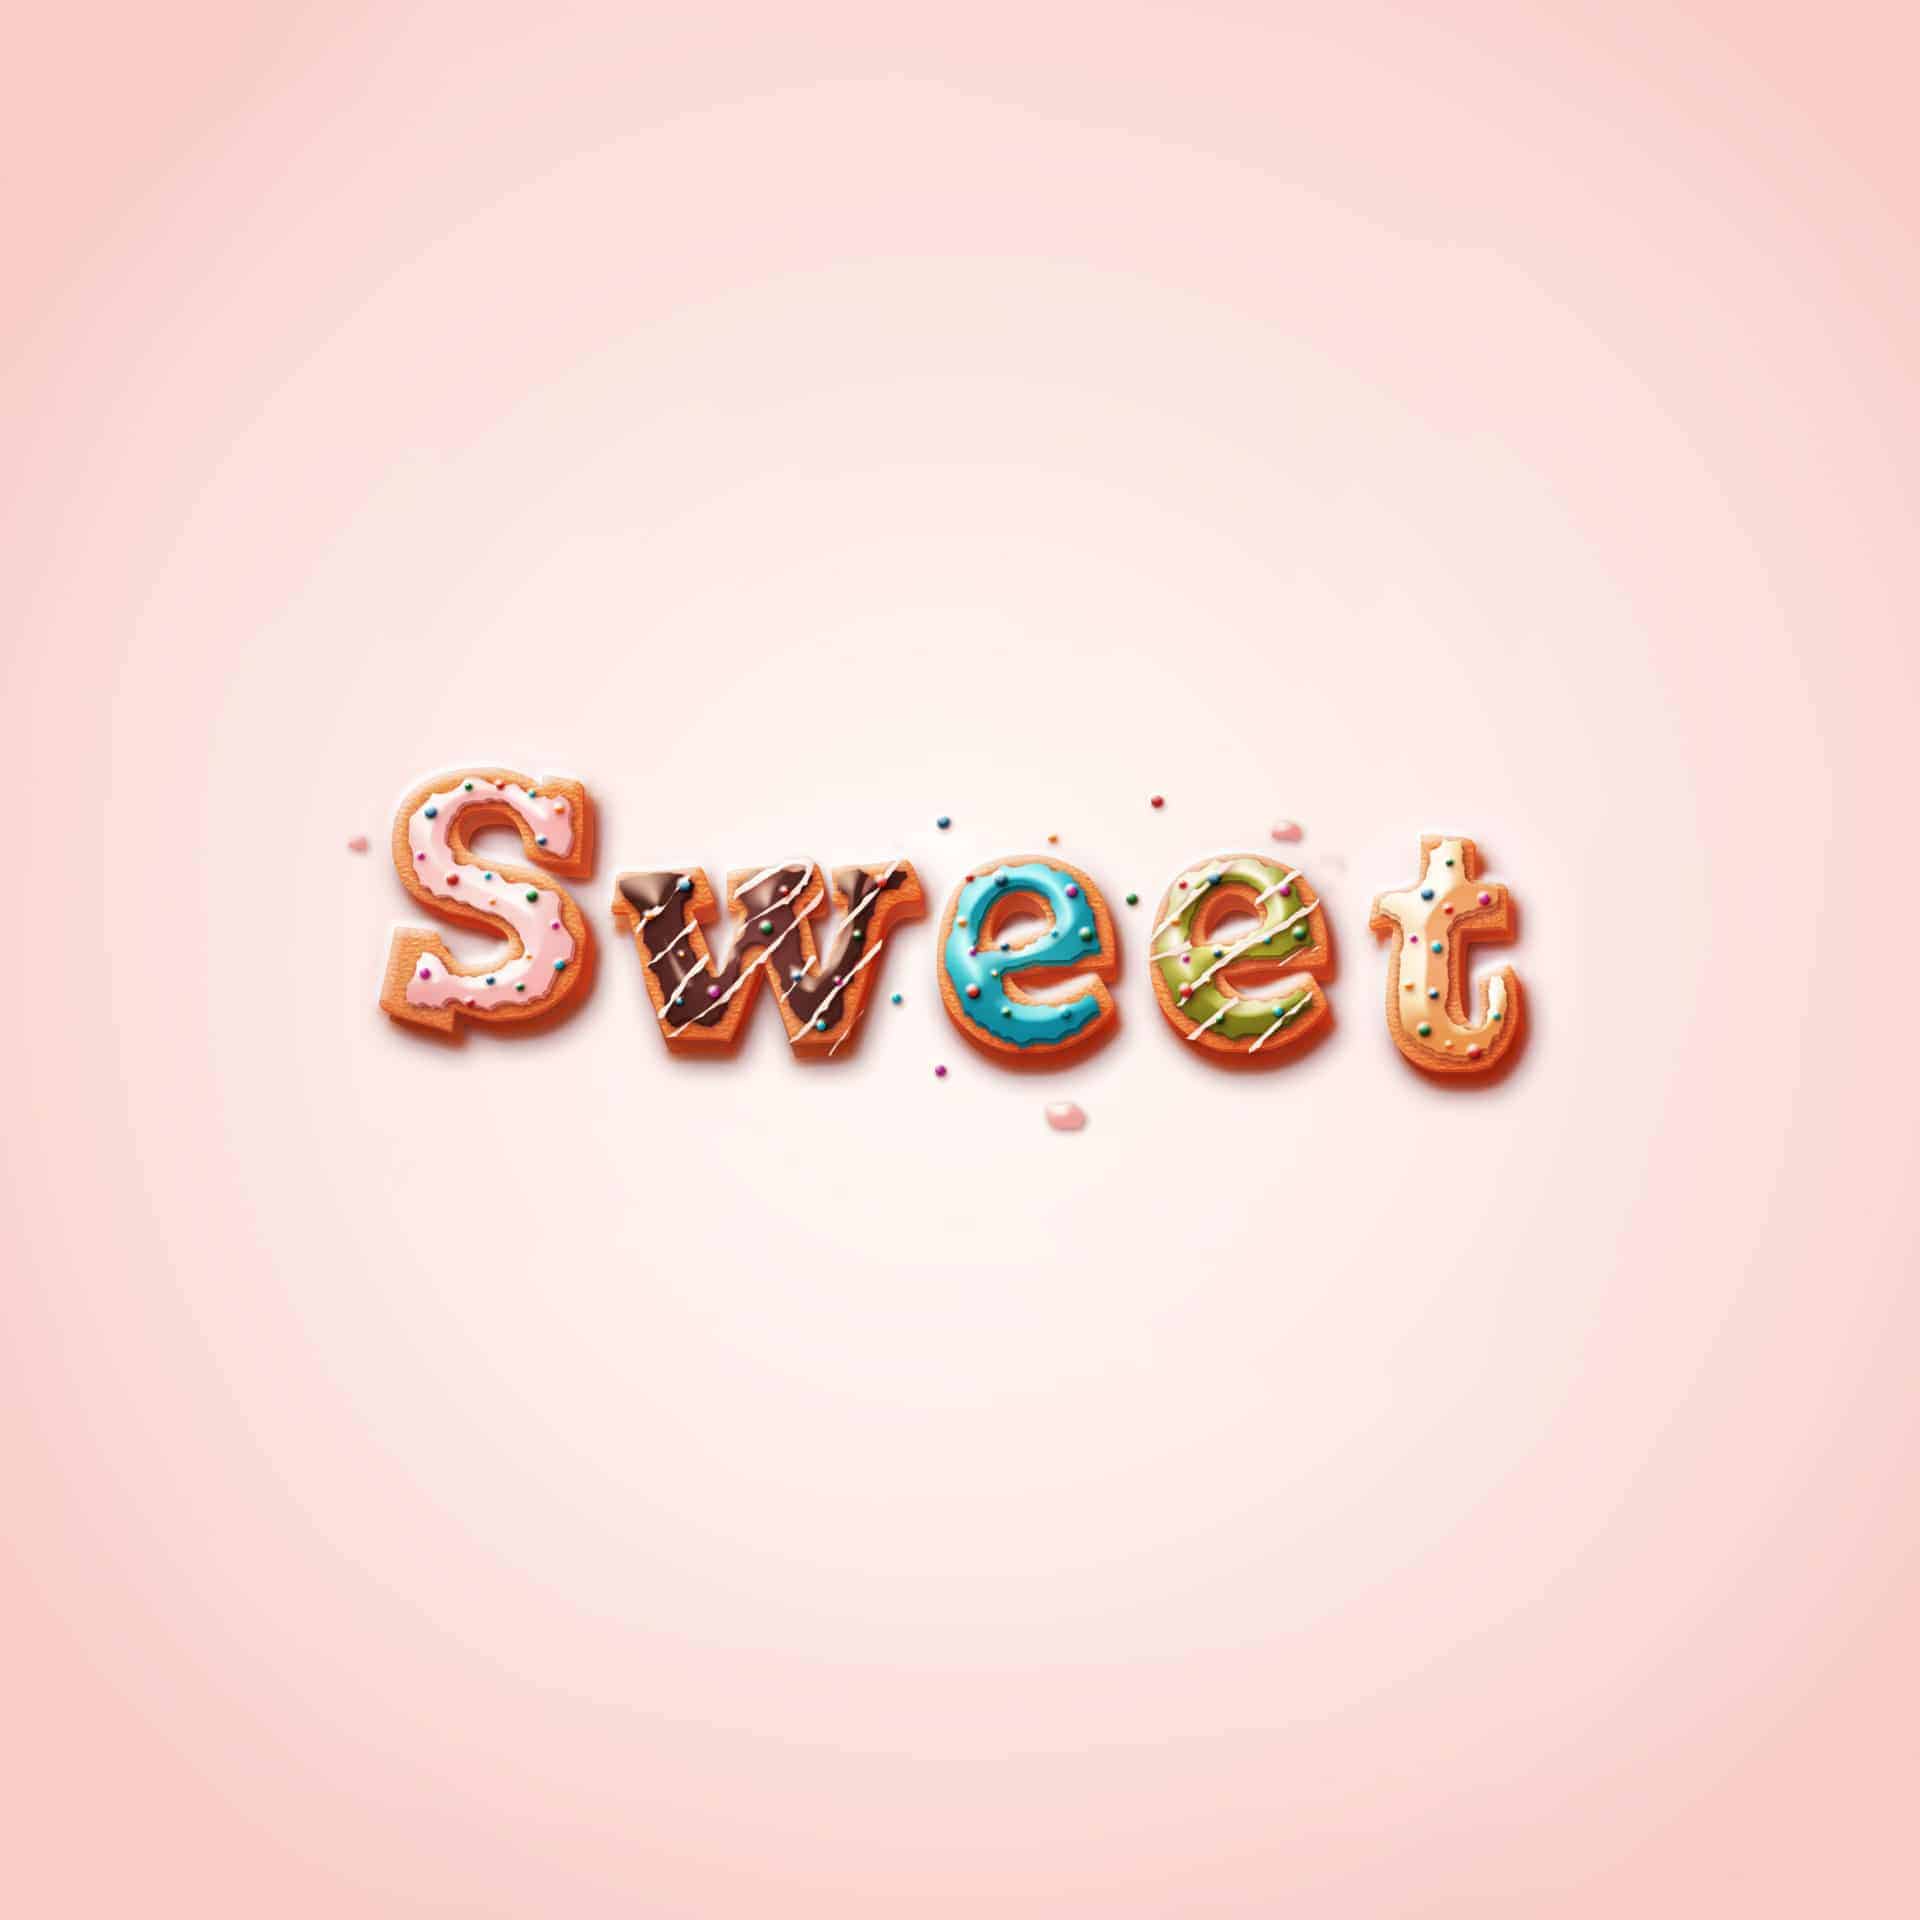
Now we've done with the " S ". In this step, we duplicate the " S " group, rename the copy group as " W ".
Step 17
Open the " W " folder, first you delete the " Cream S " layer , then turn off all the layers except 3 base layers, then you type the text " w ".

Step 18
Next, we apply Layer Style for the frosting " Cream W ". Add the " Drop shadow "


Step 19
Let's create a new layer, name it as " Frosting W " , pick the brush and draw shape like this.

Step 20
Next, we apply the Layer Style for the " Frosting W ". First, we add " Drop Shadow ".


Step 21
Let's add some sprinkles for the letter " W ".
Step 22
Now we will work with letter " E " . Just repeat previous step as we did with group " W ".
Step 23
Next, we will make frosting for letter " e " . Just repeat previous step as we did with letter " W " .
Step 24
Add layer mask and erase some part of the frosting to make it look imperfect. Then open the layer style window and apply the following settings.


Step 25
Duplicate the frosting and move the copy upper a little bit.

Step 26
Now we duplicate the group " E " . On the group " E " copy, we keep the Layer Style as the way it is, just change the " Gradient Overlay " and " Bevel and Emboss ".


Step 27
Next, we use brush to draw a line as frosting like this image below.

27 comments on “Create Delicious Donut Text That Will Make You Hungry”
how do you change the text S to W
Hi, I can’t seem to add a pattern overlay to the S lettering. Followed the steps to add but doesn’t change anything. Please help!
Same
Lmao truth
I rather bake the cookies than to do this tutorial in class.
naseau heet burn incojusted upsit stumoch direah
how can I get the grain on step 6?
Go to Window > Patterns. Click on the panel menu and select "Legacy Patterns and More".
https://i.imgur.com/rgQcuTv.jpg
Thank you for sharing, it looks great.
Luv this❤❤
I can't control my hungry stomach. Just Kidding!
Oh my God that looks so good! I cannot believe you created these from scratch! Thank you for sharing!
Thanks
Mahal ko save mopo ito o iscreenshot galing sa link nayan kpag free ka gawa rin tayo ng donut na font ng text, Rochelle Bantayan ayaw magload po sakin maganda to, using photoshop
Heel leuk om te maken
Thank you, it was very fun and easy to do !
Thanks for sharing :) it's very nice and i made myself one :">
After Step 6 (creating "base 3" with gradient change), my donut becomes burnt. :(
After Step 6 (creating "base 3" with gradient change), my donut becomes burnt. :(
I use CS5 and I don't have this pattern
Reminds me of the time I attempted to eat a donut
so I'm not have thats pattern
Look in your defaults patterns, because came with photoshop
Mmm! This looks tasty! I can see this being used for things such as cupcake or donut shops. The little droplets of frosting are a nice touch! Thank you for sharing!
Very nice tutorial, thanks for sharing!
Thanks
Nice tutorial