
Make skin look perfect in one-click with these AI-powered Photoshop actions.

Step 15 - Coloring
Add new adjustment layer Gradient Map on the top of all layers and set the gradient as shown below.

Step 16 - Adding Plasticity
It’s time to add more plasticity to your image. It basically means that you want to make highlights lighter and shadows darker. Add new empty layer on the top of all layers and name it PLASTICITY. Change its Blending Mode from Normal to Soft Light.


Step 17 - Creating Interesting Light
To make your photo manipulation more interesting you'll add some light behind the woman in this step.Start by adding new empty layer on the top of all layers and name it LIGHT. Take a look at the following image to see your layer order so far.

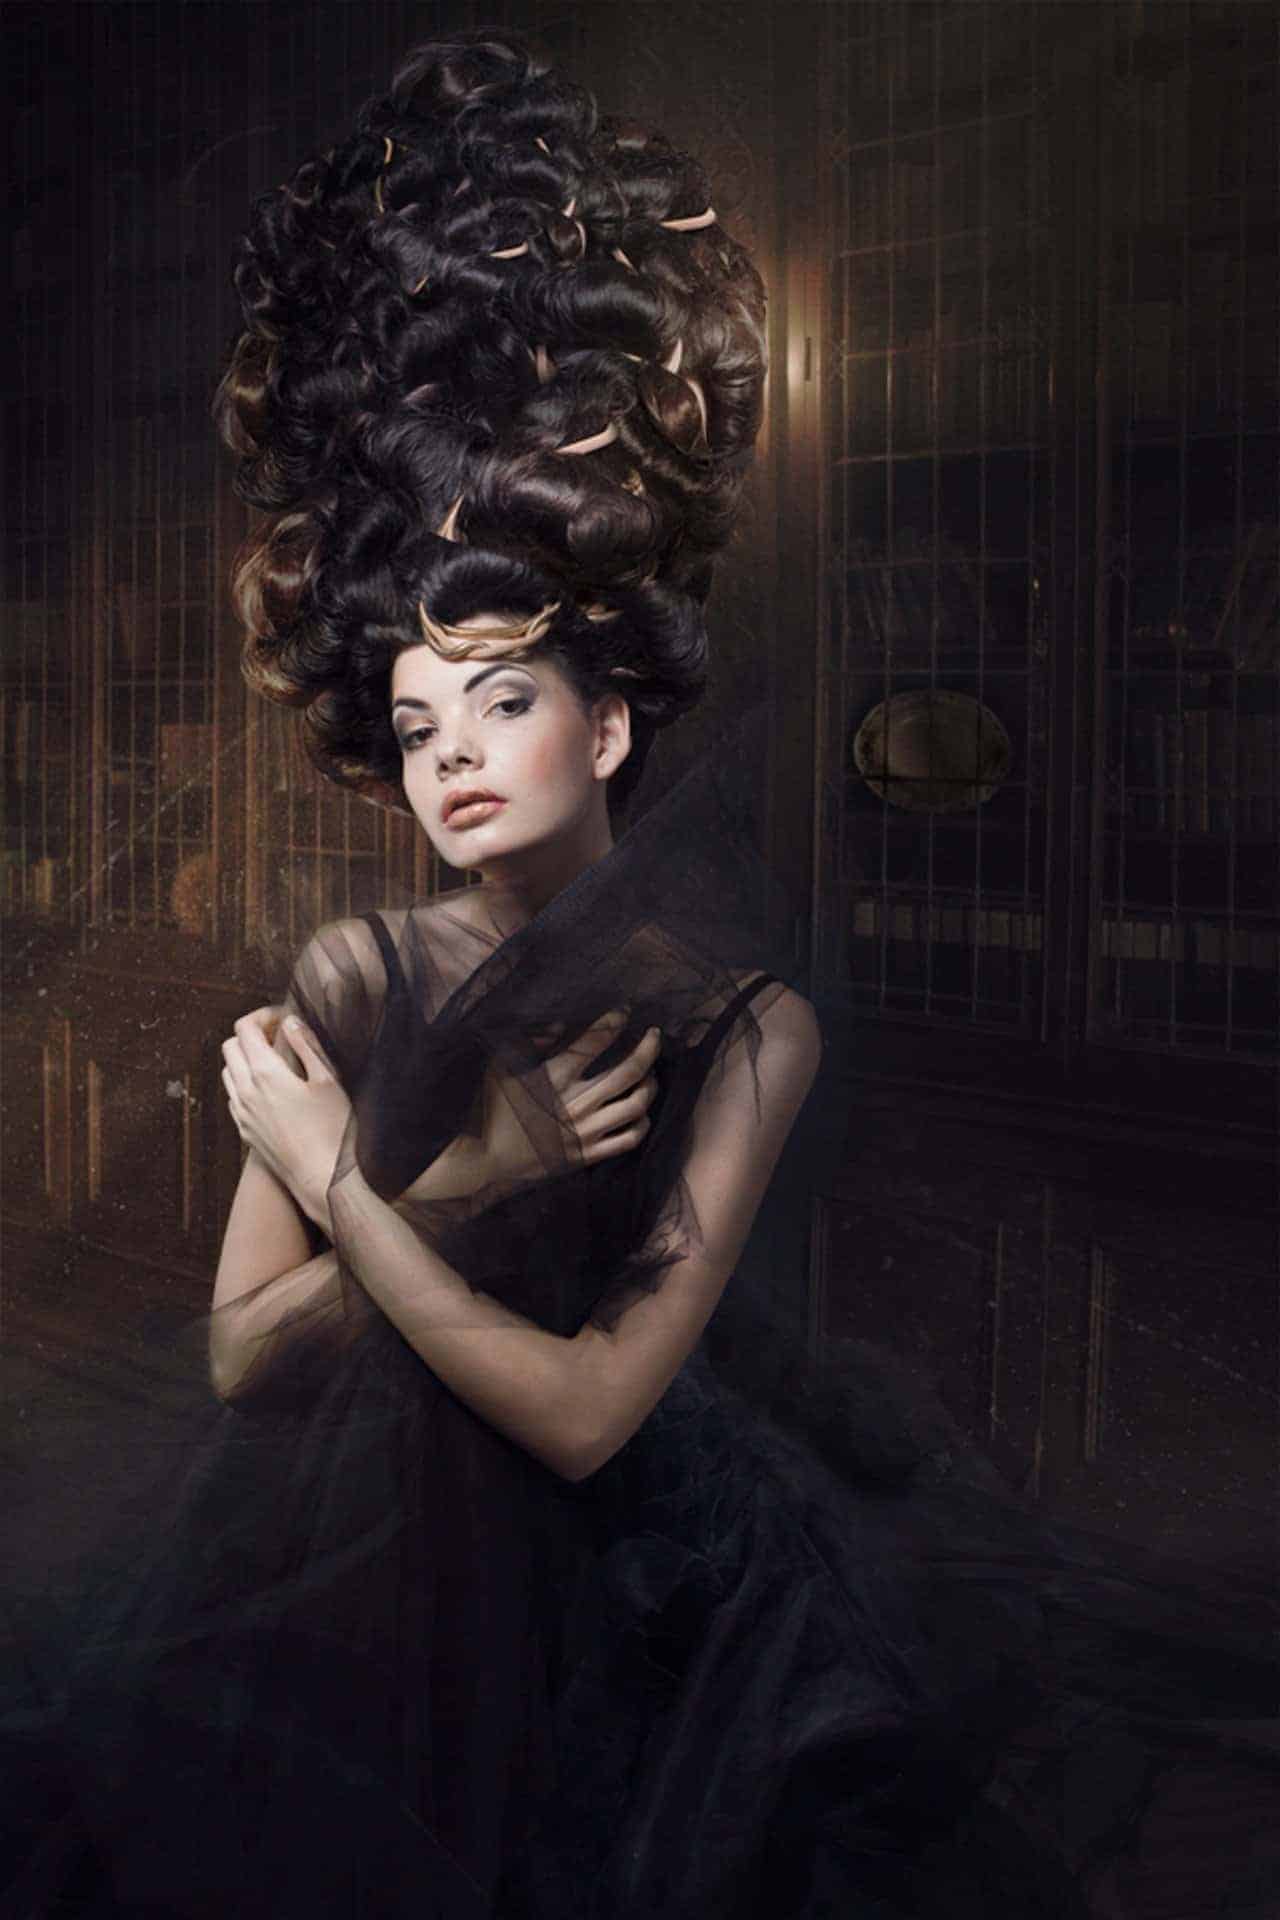
Step 18 - Retouching
There are still some parts of the image which should be lighter or darker to create more balanced feel. You'll fix it in this step.Add new empty layer on the top of all layers and name it RETOUCH. Change its Blending Mode from Normal to Soft Light. Grab the Brush Tool (B). Use the same setting as in the previous step, only switch to black color. Paint over the areas highlighted on the following image. As you can see you should make the bottom part of the image and the bottom right corner bit darker to draw the attention to woman. Also there are some too bright parts in her hair which should be bit darker.


8 comments on “How to Create Dramatic Light in Your Fantasy Photo Manipulation”
?
just awesome work can you share advanced technique for masking ........ i will be grateful to you .
Thanks for this article. I'd also like to convey that it can always be hard if you find yourself in school and starting out to initiate a long history of credit. There are many college students who are only trying to live and have long or good credit history can often be a difficult thing to have. fkdkedacegcggegc
I loved your post.Much thanks again. feedfkdbfdgc
спасибо! красиво!
Done and published here http://annewipf.deviantart.com/art/In-the-Library-491408093 Thank you!
Hi, these sunray brushes can't be downloaded for free? So what to do next? Thnxs.
beautiful work!