
Turn any photo into a dot grid artwork with these Photoshop actions. You'll get great results with dots that change size. They get larger in brighter areas and smaller in darker areas. Free download available.

Step 24
Import the smoke brush. On two new layers create two wisps of smoke rising from below.

Step 25
Import the clouds brush. On a new layer paint some white clouds covering most of the bottom part of the working document. If you have exaggerated a little with your clouds or smoke (as I did) you can group them together, add a layer mask to the group and hide away the unwanted parts.

Step 26
Open the resource “Glitter” again. Copy and paste it into our working document and after you’ve converted it into a smart object change the blending mode to Screen. Add a layer mask and hide the area that falls over our guy.

Step 27
Create a new layer and fill it with black (press D first to switch to default colors and Alt + backspace afterwards). Render some flares by going to Filter > Render > Lens Flare. Use the 105mm Prime type of lens flare.

Step 28
Now change the lens flare blending mode to Screen and all the black disappears leaving us only with the lens flare. Add a layer mask and hide away all the bright areas leaving only the lower left part of the lens flare.

Step 29
Create a Gradient Map adjustment layer (Layer > Adjustment Layers > Gradient Map) and use the settings shown below. Change the blending mode of the gradient layer to Soft Light and lower the Opacity to 59%.

Step 30
Open resource “Broken Glass”. Copy all and paste into our working document. Change the blend mode to Soft Light and convert it to a smart object.

Step 31
Add a layer mask to the broken glass layer and mask away most of the upper areal leaving only the lower areas visible.

Step 32
Open resource “Snow”. Copy all and paste into our document. Change the blending mode to Screen. Lower the opacity to 72%.

Step 33
Add a layer mask and hide away the snow that falls on our guy.

Step 34
Import the rain brush. Create a new layer and create some white rain using one of the brushes. Add a layer mask and again mask the rain that falls over the guy.

Step 35
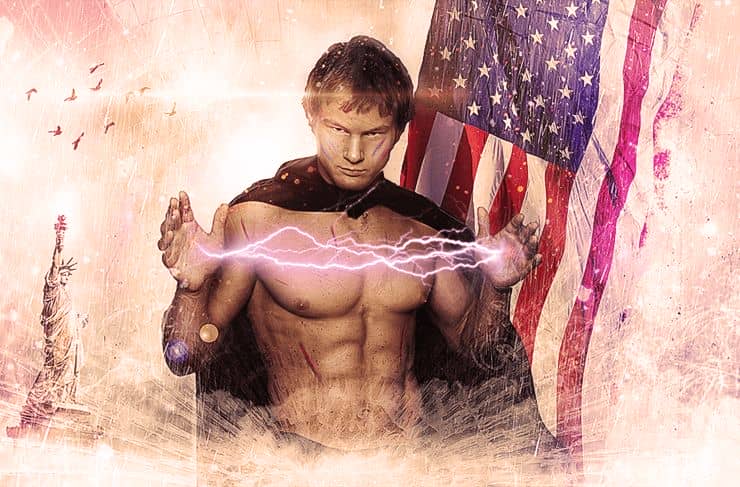
Create a new layer and choose a deep blue color (#2f35b0). Change the layer blend mode to Overlay and paste with deep blue color over the right side of the flag. With magenta (#c691c4) paint over the left side of the document.
6 comments on “How to Create an Electrifyingly Patriotic Manipulation in Photoshop”
Amazing result, such a great image choice! Thanks! :)
Well..That is very cool !
Where are the great artists as Jenny Le, Santhosh Rao and Daniela Owegoor?
This man is badly cut, there is no retouch this image.
looks just as good as those artist imo
But how do I photo shop abs like that? Asking for a friends okcupid profile.
for a 'friends' profile haha ;)