
Turn any photo into a dot grid artwork with these Photoshop actions. You'll get great results with dots that change size. They get larger in brighter areas and smaller in darker areas. Free download available.
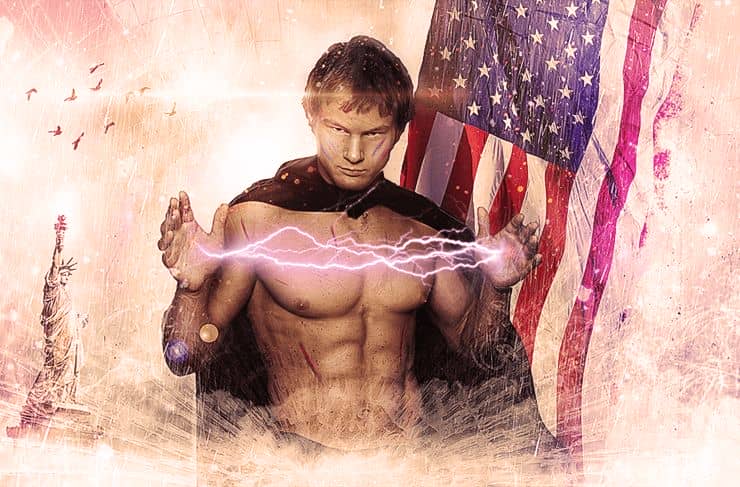
Learn how to create this intense photo manipulation of a guy shooting lightning from his hands. In this tutorial you will learn various blending and lightning techniques.
You will create an intense photo manipulation depicting a guy who has the power of lightning at his fingertips.You will need Photoshop CS5 or newer in order to follow this tutorial.

Tutorial Resources
- Sky - freeimages.com
- Birds Brush - redheadstock
- Glitter Effect - acheronnights
- Flag - freeimages.com
- Guy - vishstudio
- Statue of Liberty - regisztralt
- Lens Flare - darkoozz
- Clouds Brush - ryoku15
- Smoke Brush - falln-brushes
- Broken Glass - freeimages.com
- Snow Texture - emilyemilybeth
- Rain Brush - amorphiss
- Lightning Brush - elestrial
- Lens Flare2 - saphiredesign
Step 1
Create a new file 1823x100 pixels. Open the resource “Clouds”. Select all (Ctrl + A) and copy (Ctrl + C). Paste into the newly created file (Ctrl + V). Convert the pasted clouds to a smart object by choosing Layer > Smart Objects > Convert To Smart Objects. Resize and place the clouds layer by applying a Free Transform (Ctrl + T).


![47[1]](https://cdn.photoshoptutorials.ws/wp-content/uploads/2014/10/4711-1.jpg?strip=all&lossy=1&quality=70&webp=70&avif=70&w=1920&ssl=1 "47[1]")
Step 2
Duplicate the clouds layer (Ctrl + J) and move it to the left. Change the blending mode of the clouds layer to Overlay.

Step 3
Import the clouds brush (Edit > Presets > Import/Export Presets). Create a new layer (Ctrl + Alt + N) and paint some white clouds on top of our existing clouds.

Step 4
Import the birds brush. On a new layer paint some black birds.

Step 5
Open the resource “Glitter”. Select all, copy and paste into our working document. Change the blending mode to Screen.

Step 6
Add a layer mask to the “Glitter” layer. You can do that by choosing Layer > Layer Mask > Reveal All. Select the gradient tool (G) and press D to automatically switch to the default colors (black and white). Now click on the layer mask and with the gradient tool drag from the indicated areas while holding shift. By doing this we will hide the lower area of the glitter effect but because we are using the gradient tool there will be no hard edges. Also, painting with black in a layer mask will hide that portion of the layer.

Step 7
Open the resource “Flag”. Make a selection of the flag using whatever selection tools you’re comfortable with (I mainly use Quick Selection Tool for fast selections). Copy the selection and paste it into our working document. After you’ve converted it to a smart object place is as indicated below.

Step 8
In order to make the flag look shredded add a layer mask and with the standard Chalk Brush paint with black on the right side of the flag. You can see my result indicated below.
6 comments on “How to Create an Electrifyingly Patriotic Manipulation in Photoshop”
Amazing result, such a great image choice! Thanks! :)
Well..That is very cool !
Where are the great artists as Jenny Le, Santhosh Rao and Daniela Owegoor?
This man is badly cut, there is no retouch this image.
looks just as good as those artist imo
But how do I photo shop abs like that? Asking for a friends okcupid profile.
for a 'friends' profile haha ;)