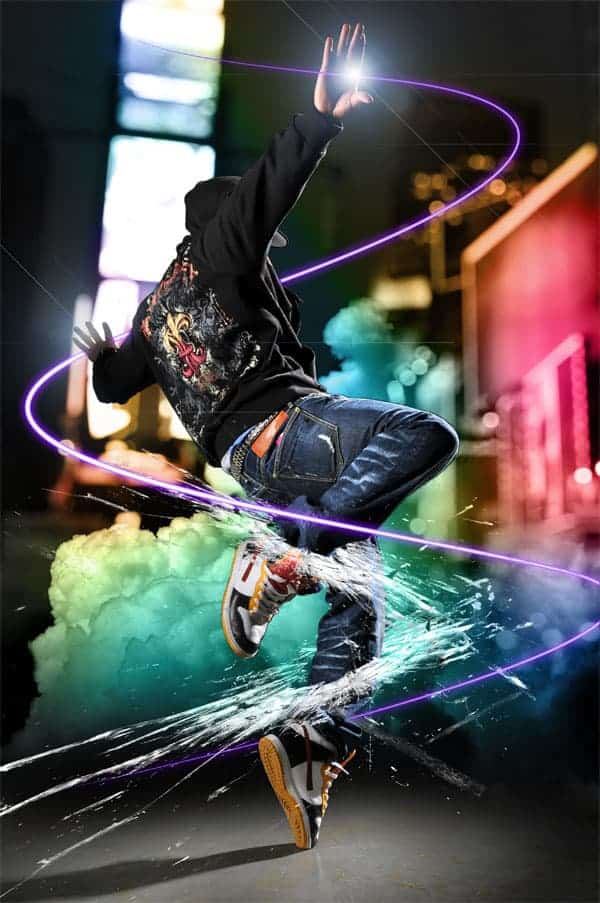


Make your artwork look like they're from an alternate universe. These Cyberpunk presets work with Photoshop (via the Camera Raw filter) and Lightroom. Download all 788 presets for 90% off.

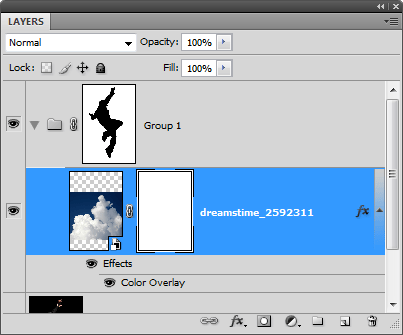
When you’re done refining the mask, you can delete the color fill layer and make the layer with the clouds visible.
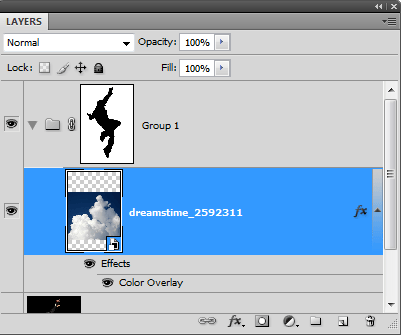
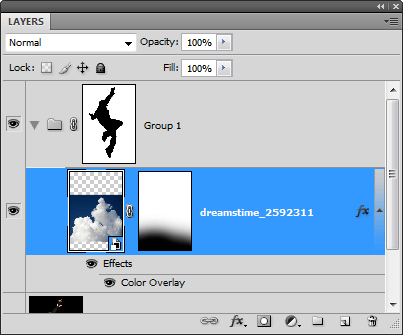
Step 7 – Complete the blending of the clouds
Add a layer mask to the layer with the clouds. To do this, select the layer then choose Layer > Layer Mask > Reveal All.
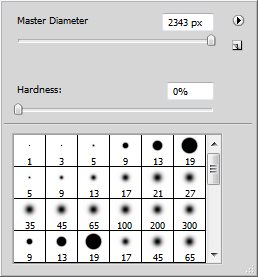
Select the eraser tool. Right click anywhere in the document window to bring up the brush options. Use a very large brush size with a hardness of 0%.

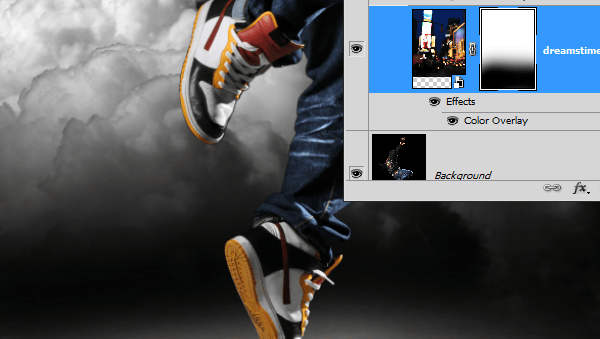
Make sure that the layer mask of the cloud layer is selected. To select the layer mask, click on the layer mask thumbnail in the layers palette. It should have a border around the layer mask to indicate that it is selected. With the eraser tool, erase the bottom of the clouds so that it fades gradually.
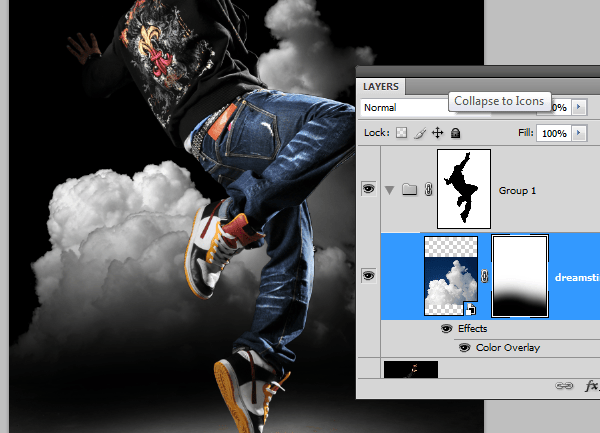
Select the move tool then move the clouds lower so that it is just above the spotlight.
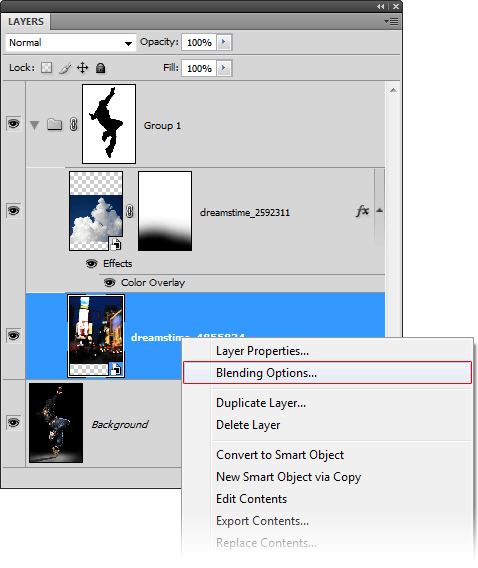
Step 8 - Place the city background
Before you can use the place command, you need to have the layer mask deselected. Click on the layer thumbnail of the clouds layer to deselect the layer mask.
Choose File > Place. Browse for the photo of the city then click OK. Scale and position the image like shown below then press enter on your keyboard to apply the changes.
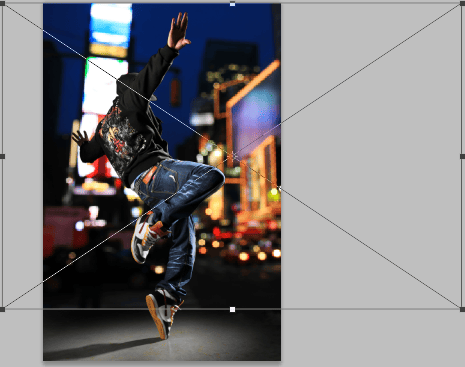
Move the layer with the city background below the layer with the clouds.
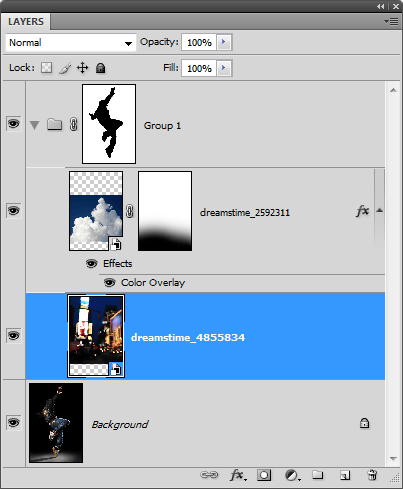
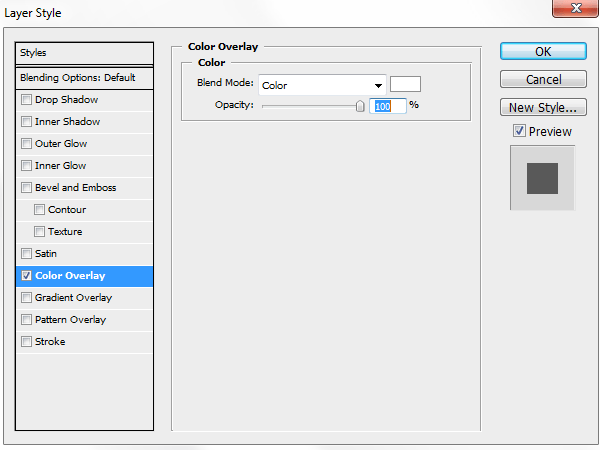
Step 9 – Desaturate the city background
First, we’ll make the layer grayscale using the same technique we used earlier with the clouds layer. Right click on the layer of the city background then choose blending options.
Apply the settings as shown below then click OK.
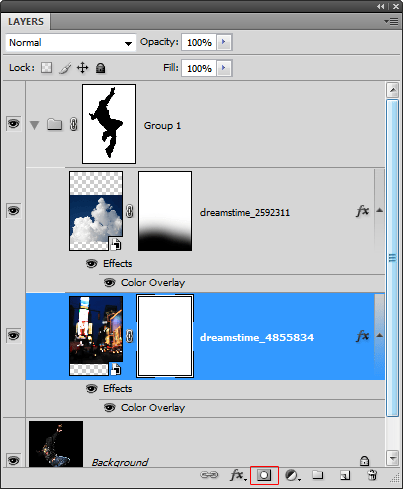
Step 10 – Fade the bottom edge of the layer with the city background
If you look closely at the bottom of the city edge layer there is a hard edge. To fix this, we’ll fade the edge with a layer mask.
With the layer of the city background selected, click on the ![]() to add a layer mask.
to add a layer mask.
Select the eraser tool then right click anywhere in the document window. Use a large brush with a hardness of 0%.
Make sure that your layer mask is selected. It should have a white border around the layer mask thumbnail to indicate that it is selected. With the eraser tool, erase the bottom of the edge so that the hard edge is gone.
Here’s the before and after of fading the bottom edge.
21 comments on “Dazzling Dance Photo Manipulation”
Thanks alot.
Thankz for the sharing ....that's great ..anyway does it have a video?
Yes it does. You can find the Photoshop tutorial here: https://www.youtube.com/watch?v=6wHajsp12_U
I am having trouble in the step7. I am following your instructions but my photo remains back of the cloud.
Please help me as soon as possible.
Thank you for such nice share.
cool piece
My Stoke Path Is Not Enabled.Why?
nice
Excellent tutorial. I love your imagination and creativity. The use of the Gun Shot was an outstanding touch!!
thank u........
Job well done! Thanks for being willing to post this.
Phaaaaaaaaaaaa............. nice
wonder full
I love your work! thanksalot! we want more
Thanks a lot for the tutorial
quisiera que mi hicieras el favor de darme un link para descargar ese programa....
This is incredible! Thanks a lot for the tutorial
Send Me the glass Picture If you see my comment.......ALso Thanks
a bit hard to follow but great help besides im still a no0b at this stuff
This is a wonderful tutorial i came to know through my client. thanks for posting this
Thank you very much . :)
This is awesome .
it's a really great image i love it n the tutorial is even better, thx alot i really needed to know how to work something like this, keep it up