


Luminar AI lets you turn your ideas into reality with powerful, intelligent AI. Download the photo editor and see how you can completely transform your photos in a few clicks.
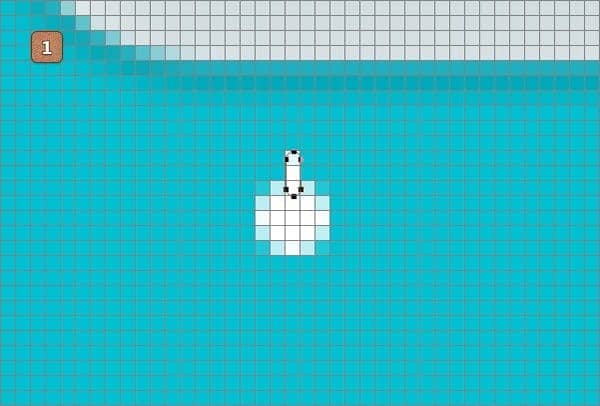
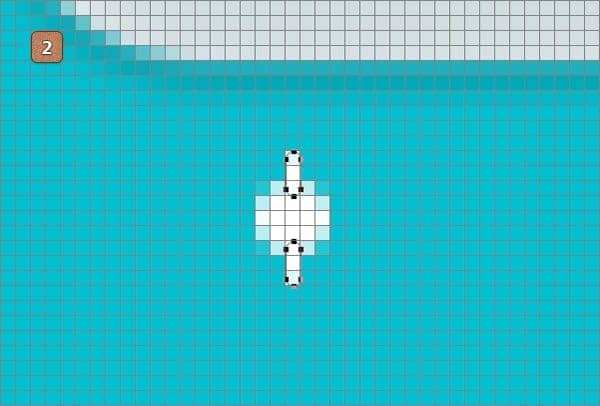
Duplicate (Control + J) this vector shape and place the copy exactly as shown in the second image.
Step 18
Look inside the Layers panel, select the vectors shapes made in the previous step, right click on one of these shapes and go to Merge Shapes.
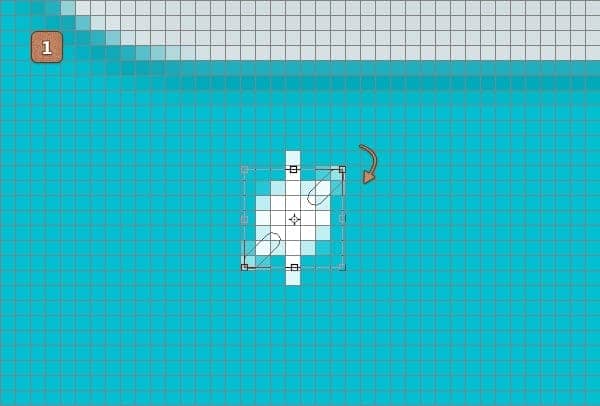
Duplicate this new vector shape, make sure that the copy is selected and hit Control + T.
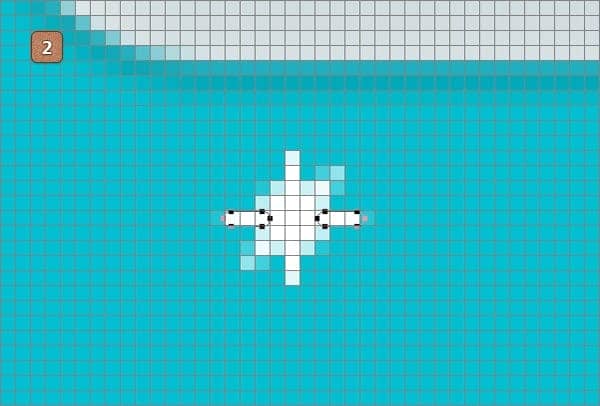
Rotate your shape 45 degrees and then hit Enter. Repeat this technique twice.
Tip: Hold the Shift button from your keyboard to perfectly rotate your selection.
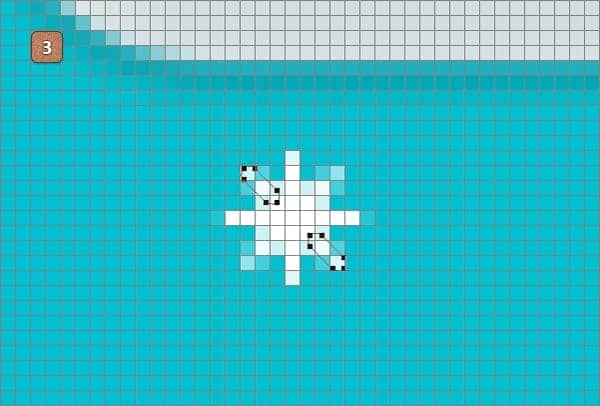
Step 19
Select the vector shapes that make up your snow flake and go to Merge Shapes.
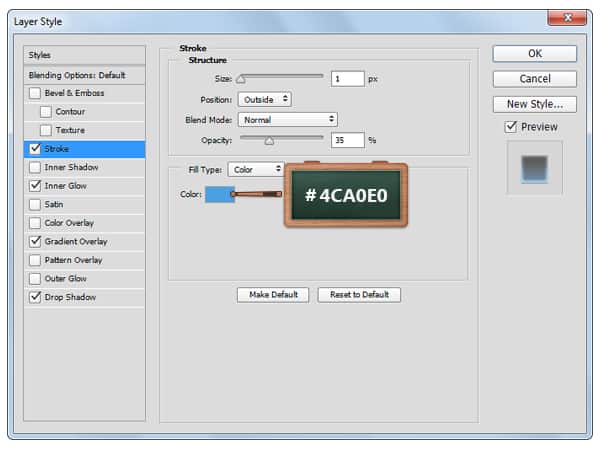
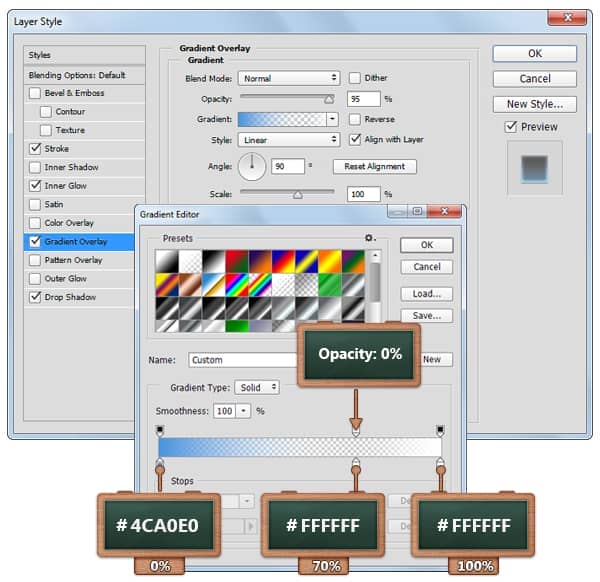
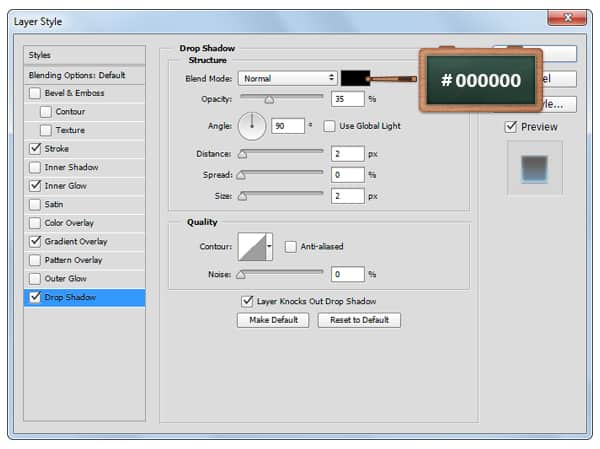
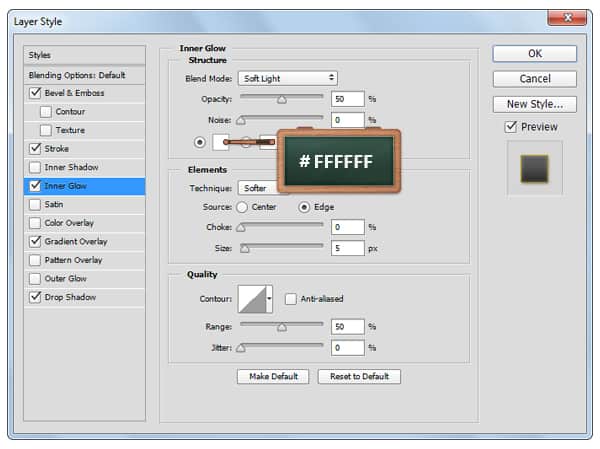
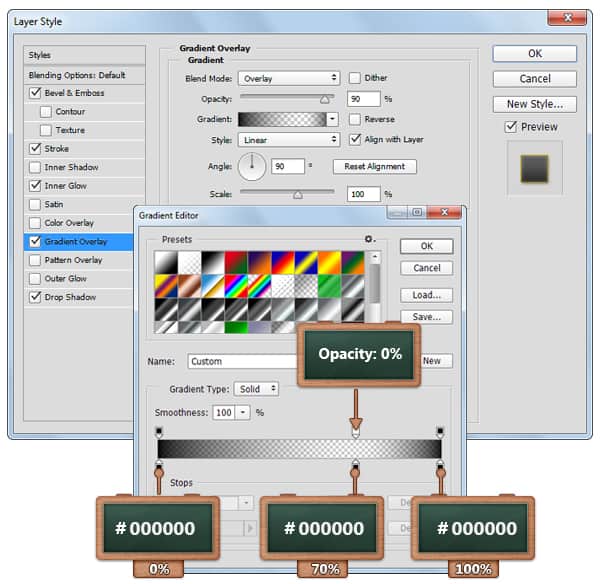
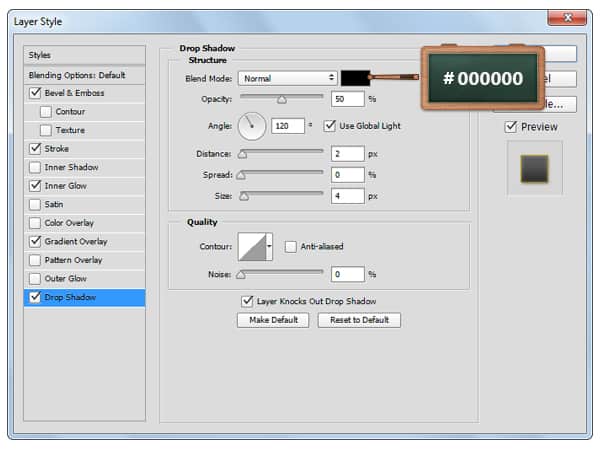
Open the Layer Style window for this vector shape and enter the settings mentioned in the next images.


Step 20
Duplicate the vector shape made in the previous step and place the copy as shown in the image below.
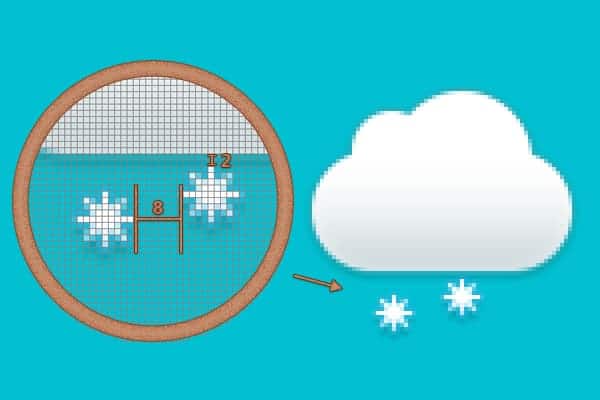
Step 21
Make a new copy of your "Cloud" vector shape, rename it to "StormyCloud" and place it as as you can see in the image.

Step 22
Look inside the Layers panel, select one of your "WaterDrop" vector shapes an make two copies.
Select these copies one by one, focus on your "StormyCloud" and place them as shown below.

Step 23
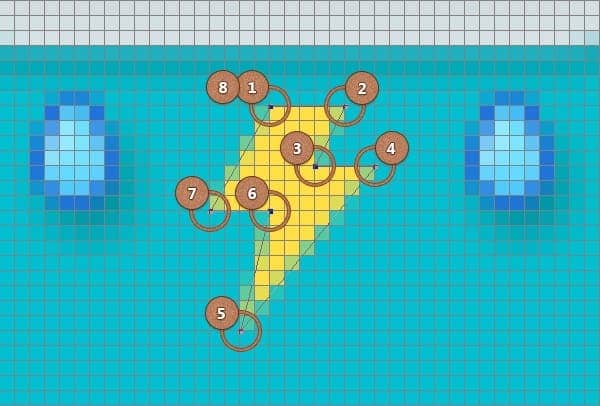
Change the foreground to #FFDF45 and using the Pen Tool create the vector shape that you can see in the image below( follow the numbers and try to use the grid as a reference ).
Step 24
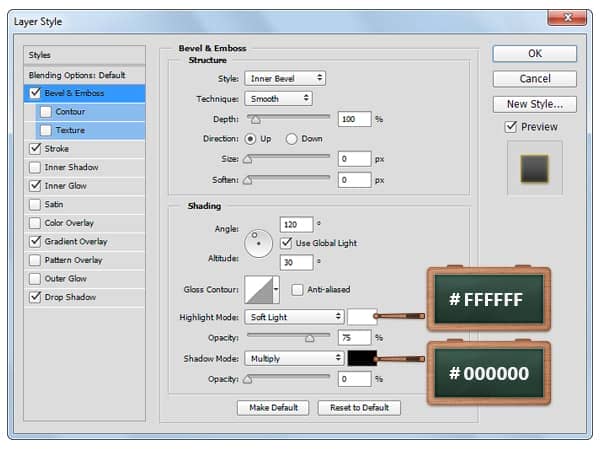
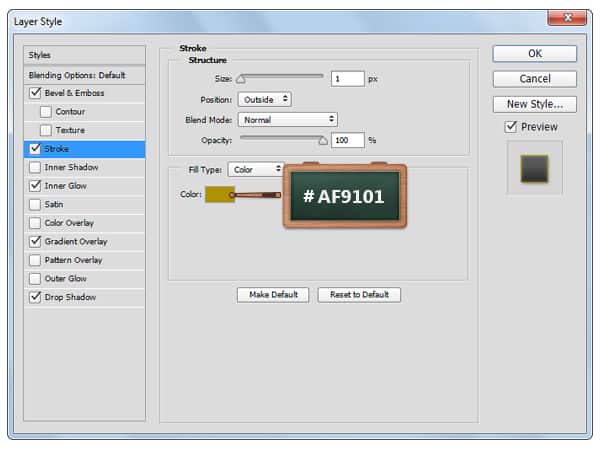
Bring on the Layer Style window for the vector shape that makes up your lightning and enter the settings mentioned in the next images.

Step 25
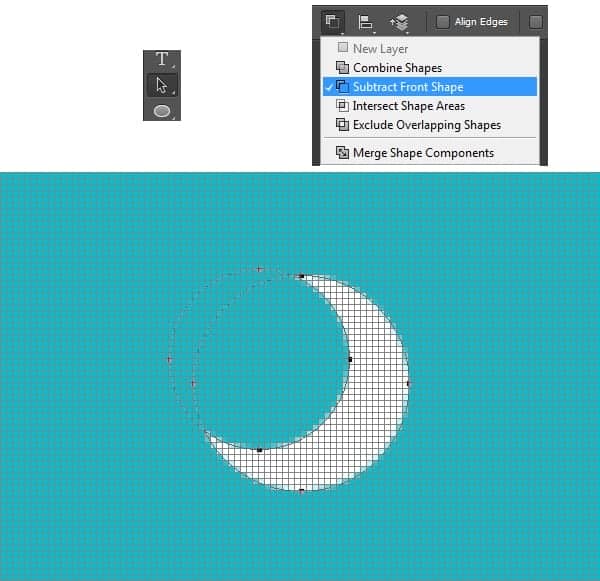
Change the foreground color to #FFFFFF, take the Ellipse Tool and move to your canvas.
Create a 36 x36 px circle and a 30 x30 px circle. Make sure that these new vector shapes are placed as shown below.
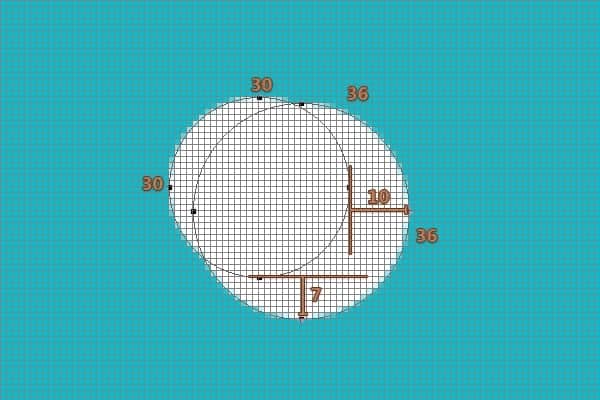
Step 26
Make sure that the circles made in the previous step are still selected and go to Merge Shapes.
Pick the Path Selection Tool, click inside on the small circle (30 x30), focus on the top bar and select Subtract Front Shape.
Step 27
Look inside the Layers panel, select the "Cloud" vector shape, hit right click and go to Copy Layer Style.
Return to your moon vector shape, right click and go to Paste Layer Style.

Step 28
Duplicate (Control + J) your moon vector shape and place it as shown in the image below.
8 comments on “Create a Set of Weather Icons in Adobe Photoshop”
Thank you Razvan. Nice and clear tutorial. Although I think you should have made it higher-res to begin with since you are using layer styles. Also a lighter background would look better. But nonetheless it is a good tutorial.
Cool!!!
gr8 m8 i r8 it 8/8
Thank U
Very easy tutorial.
Nice work
Great job.. if you were a preschooler
Very good tutorial!!!
Nice tutorial, well done.
NICE!!!