Make your artwork look like they're from an alternate universe. These Cyberpunk presets work with Photoshop (via the Camera Raw filter) and Lightroom. Download all 788 presets for 90% off.
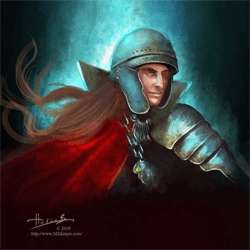
This picture represent a fantasy warrior character portrait that I painted as a personal artwork. For this tutorial, I will be using Photoshop with a Wacom tablet to create the finished result. I will also be using techniques and methods that I feel most comfortable with when coloring. I suggest that after following this tutorial, you find out what works best for you.
Painting a Fantasy Warrior in Photoshop
Step 1 - Sketching
I often draw a lot of sketch, on computer or maybe sometimes on paper. I decide to paint a portrait of a fantasy warrior . Here is the simple sketch work I did with Photoshop. For the initial sketch work, Photoshop File size is 600x600. Resolution can be 72 for now.
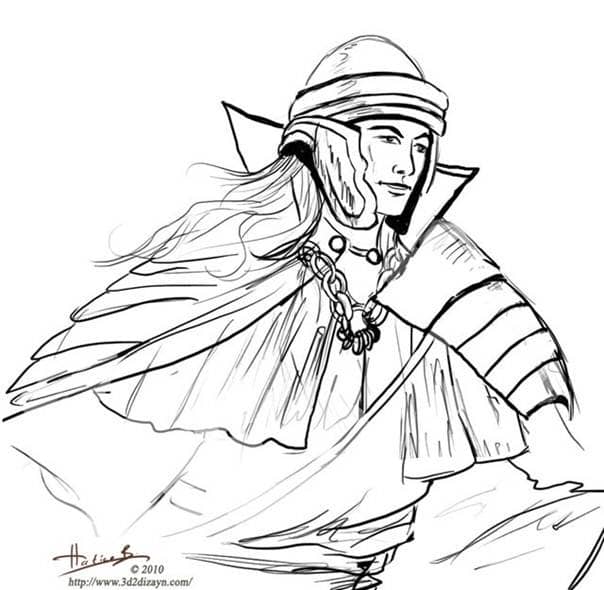
Step 2 - Color Palette
The second thing here you to choose color scheme. I want to do something really colorful and cold colors for the character portrait . I decided for background a dark blue color . Other colors are for the character face and his clothing. Open an another file and save your colors. And always keep open that new file when you are painting.
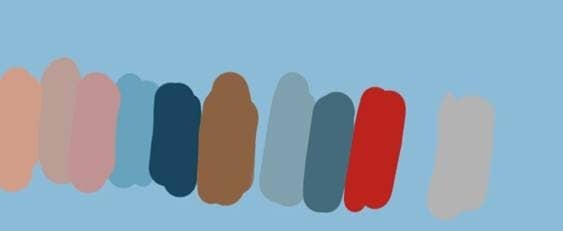
Step 3 - Choosing a Brush
For my character I use only standard brushes with some different pen pressure settings. Chose a simple standard brush
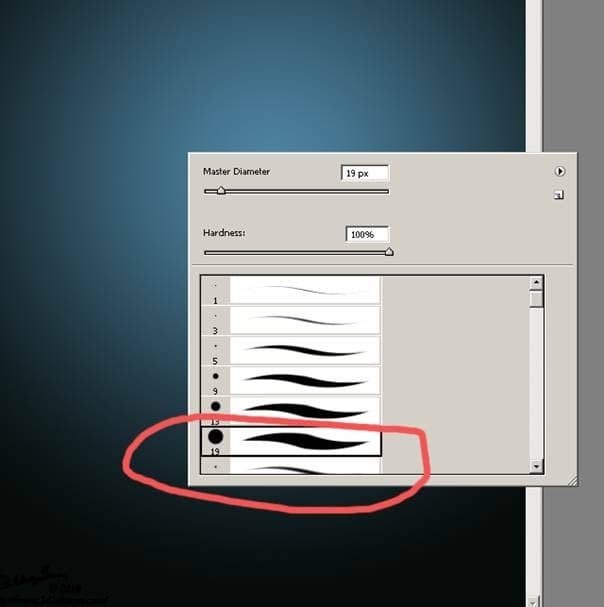
After that from brush panel choose "Other Dynamics" and make the setting as seen on the below picture.
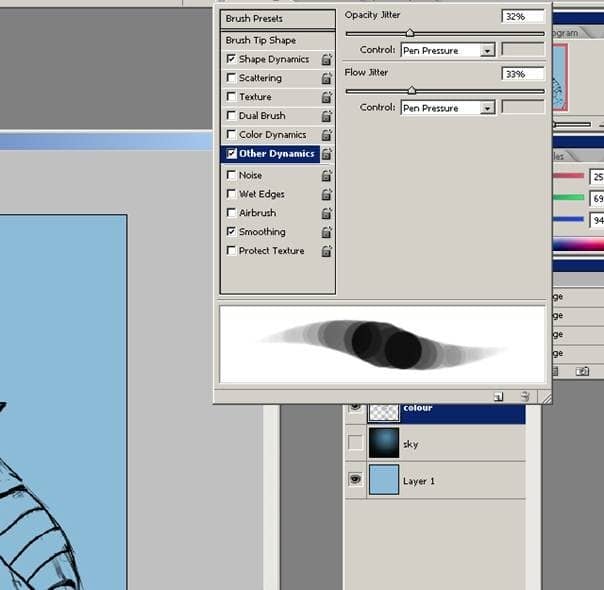
Now try your brush. You can change the setting as you see on this picture.
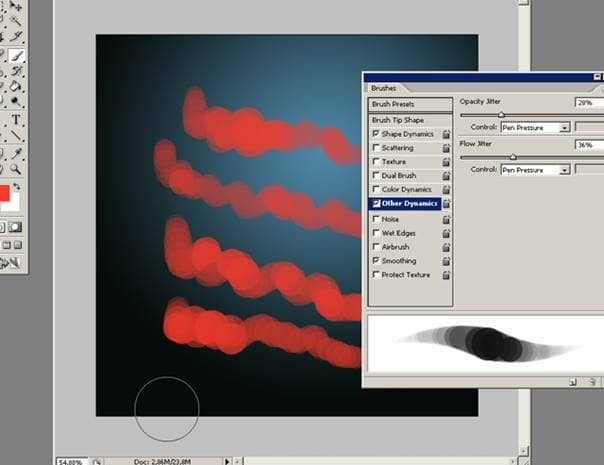
Step 4 - Coloring
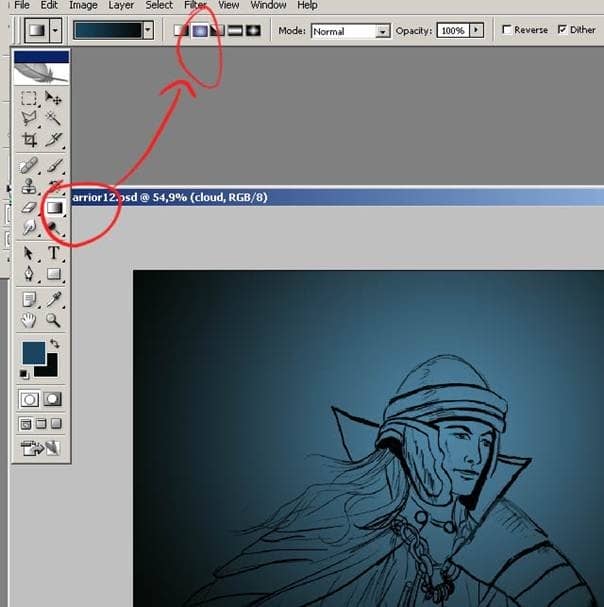
And now we are going to begin adding colors and some details. Now change the file size as 2000x2000 . Resolution must be 300. Now I start coloring and give the basic tone coloring to the sketch. Please select the Gradient Tool and do as you see an the picture.
Now I'll show you how to open a layer and how to name the new layer. First of all please select the "create a new layer" icon.
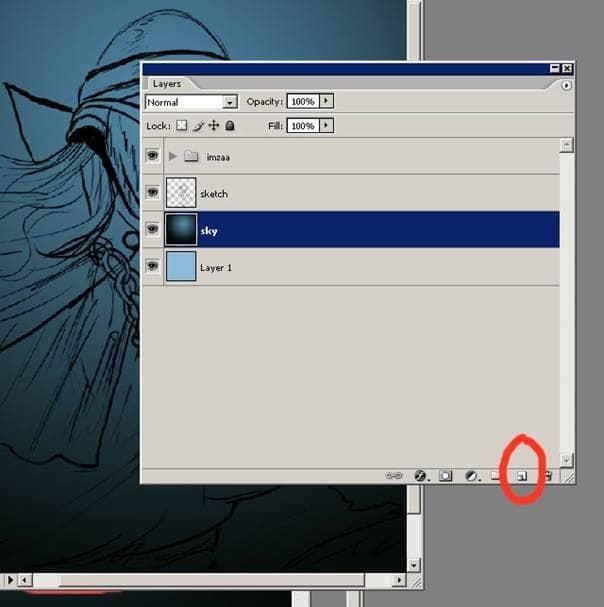
So we have opened a new layer with the name "Layer 6" But now we must change the name of the layer.
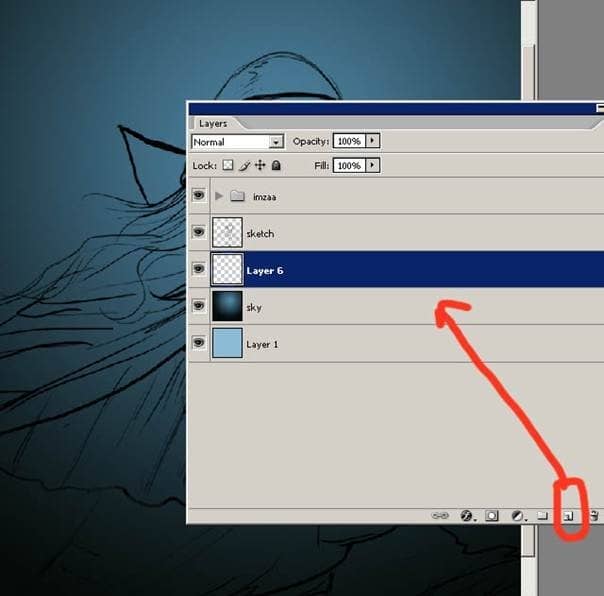
Please click twice on the layer and write here face_color. This layer is be going to be for the face painting.
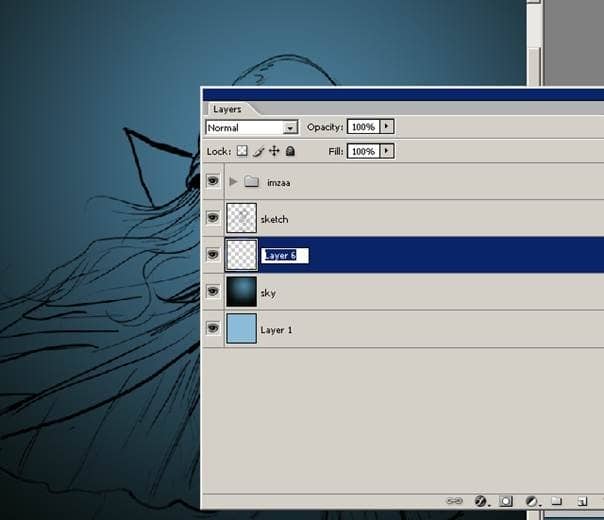
And now here as you see I have 5 layers. You do the same on your project. And now the first layer group is for my signature. You can add a sign your image You have a question in mind - Why so much layer for such simple artwork ? Because if I am not satisfied with the color and want to change I can make some changes via help of those layers. This Step is very important.
