

Turn any photo into a dot grid artwork with these Photoshop actions. You'll get great results with dots that change size. They get larger in brighter areas and smaller in darker areas. Free download available.
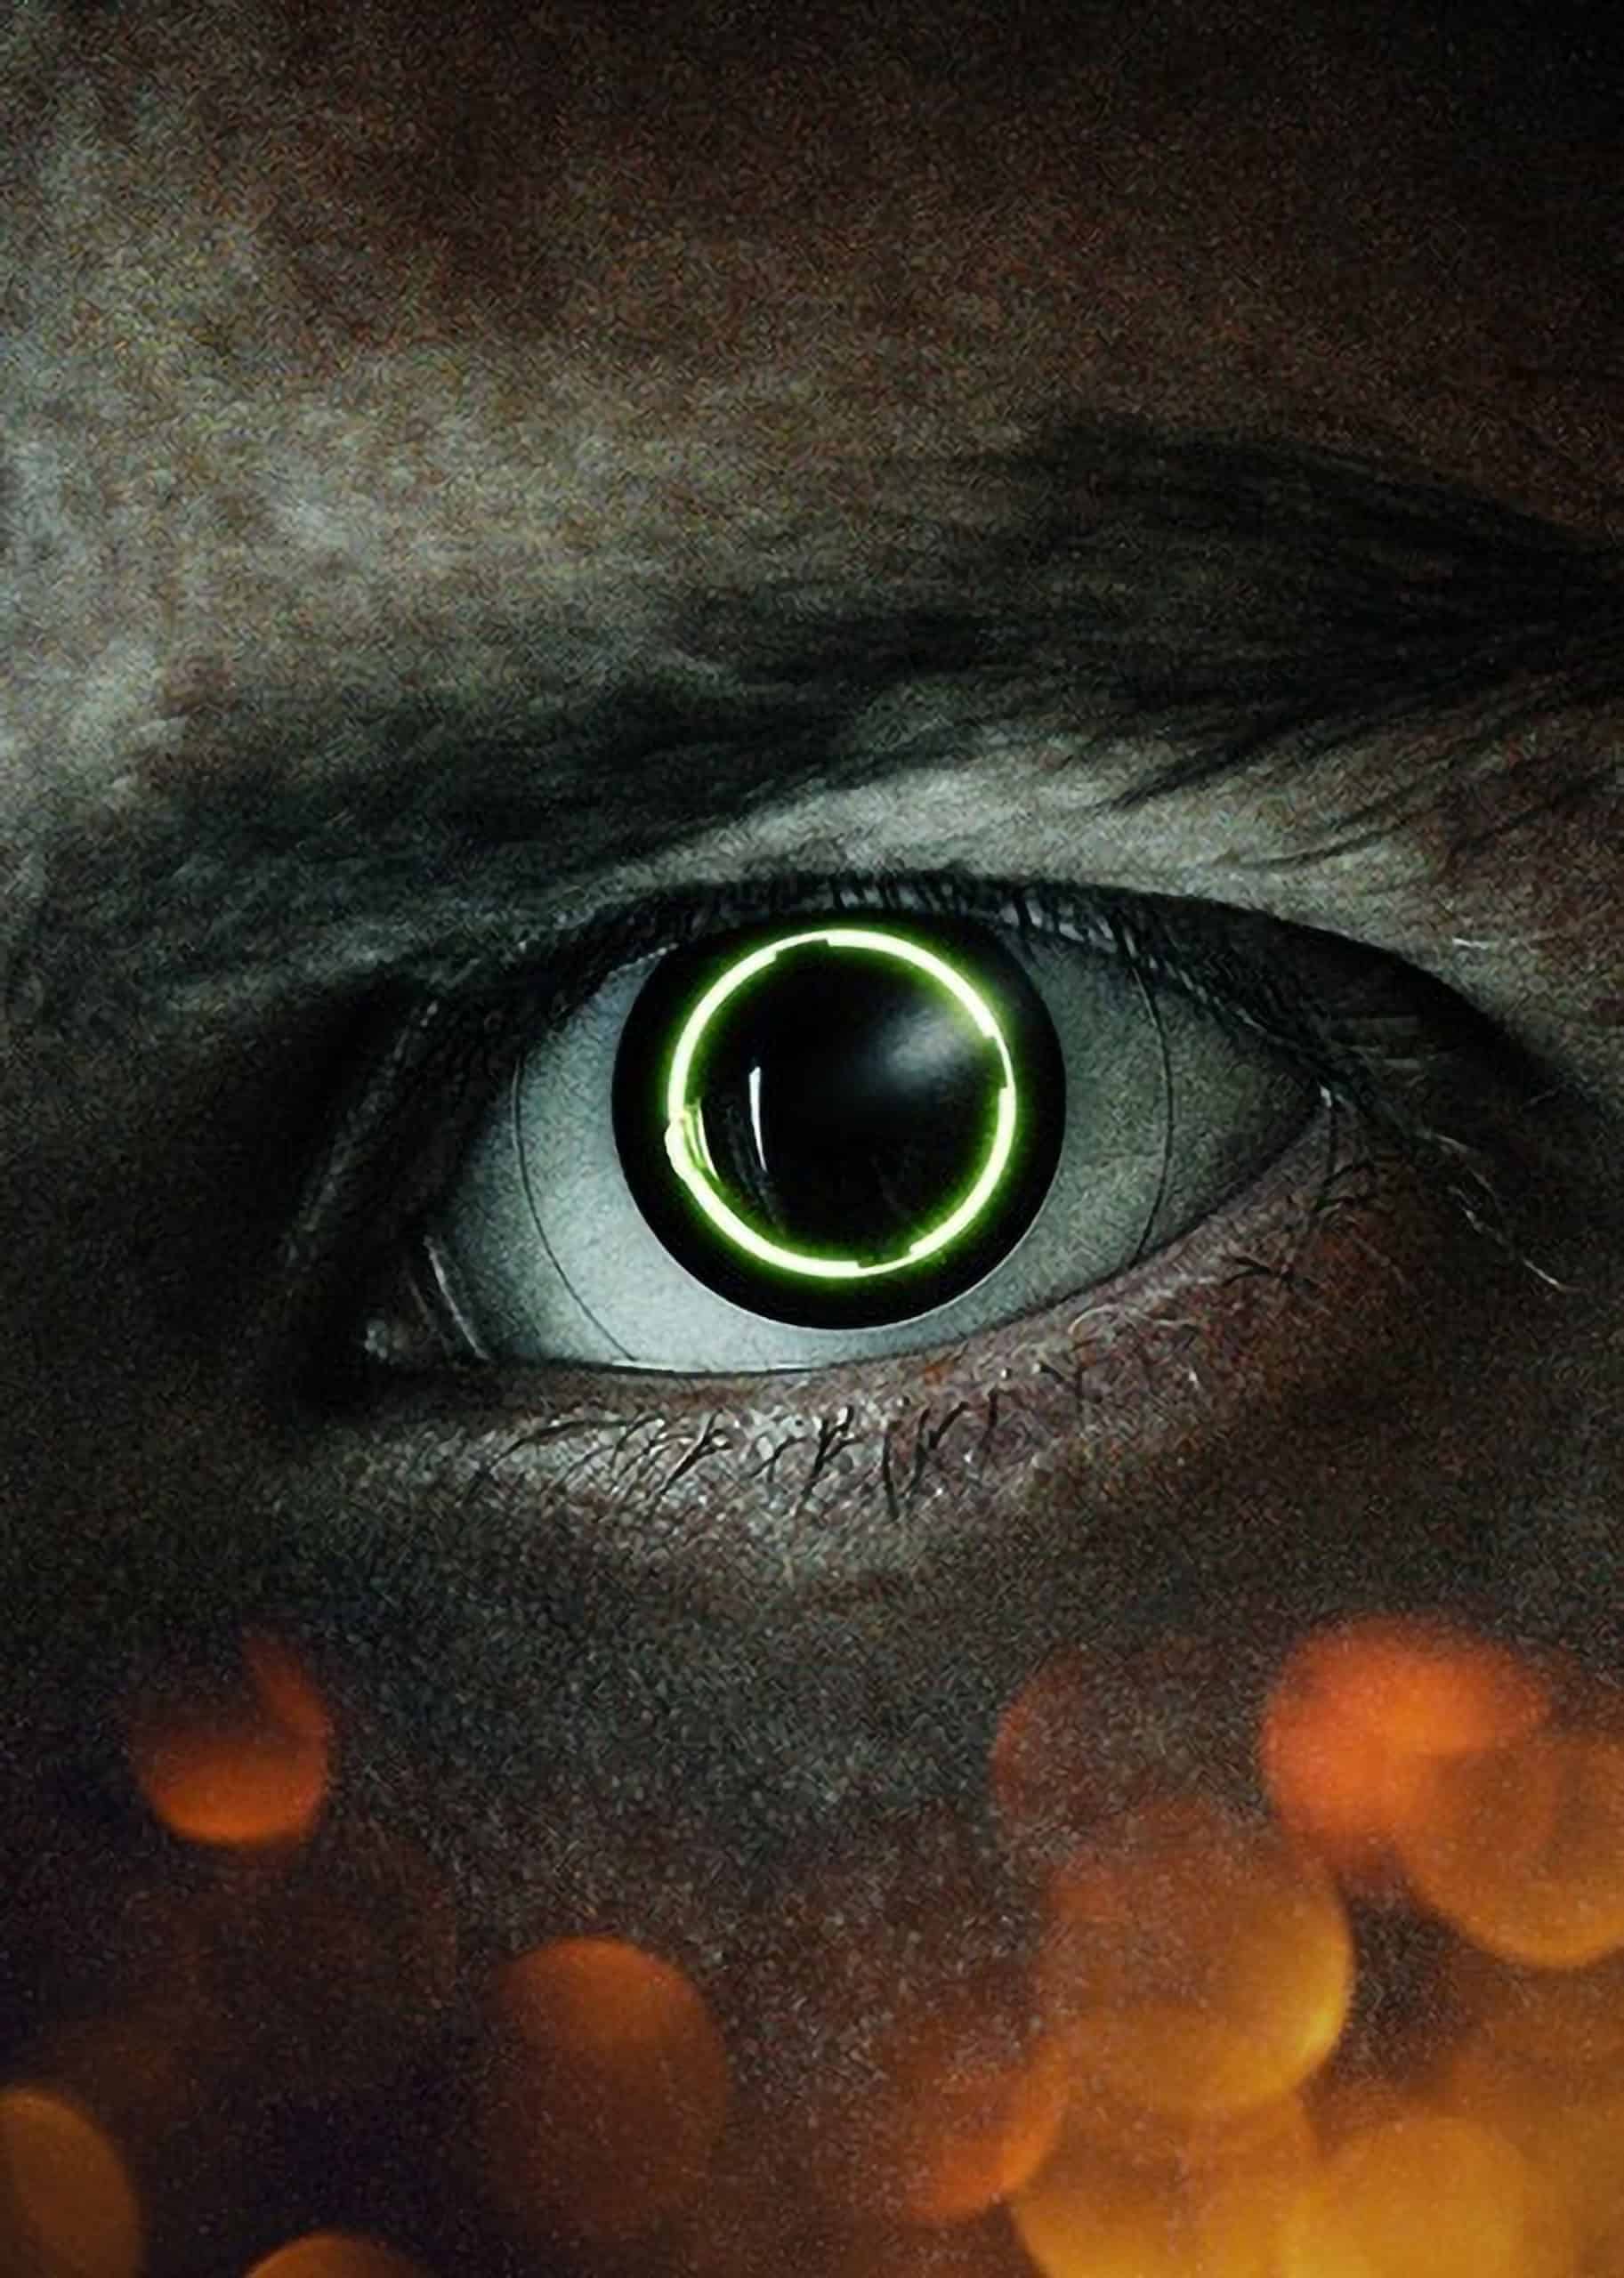
Let's get started with the high-tech part of the eyeball. If you check the Deus EX reference art, you can see there's a large ring on the outside of the iris. Grab the Ellipse Tool (U) and simply draw a large circle evenly by clicking once in the middle of the pupil, hold the Alt button at the same time and drag it to how large you want it to be.
The Opacity of the Shape layer in the image below has been lowered to show you the position where it needs to be.

Step 7
Select the shape by using the Path Selection Tool (A) and press Ctrl + C to copy the shape. By pressing Ctrl + V to paste the shape layer, Photoshop will automatically select the newly pasted layer. Press Ctrl + T and hold ALT to resize the shape, make it just a few millimeters smaller.

With the copied shape selected, click on the Subtract icon (-) shown below to subtract this smaller shape from the larger circle.

Set the Blending Mode of this layer to Soft Light.
Step 8
To add a realistic embossed effect, we need to add a Layer Style. Double-click on the Shape layer and the Layer Style menu pops up. Check the Bevel and Emboss and click on that section and apply the settings shown below.


Step 9
By default, the Layer Styles can't be painted away on a Layer Mask. In order to do so, go back into the Layer Styles menu and click on Blending Options and check the 'Layer Mask Hides Effects' box.

Add a Layer Mask to the Shape Layer and paint away the parts on the top and bottom of the eye.

Step 10
Create a black circle Shape layer around the iris with the same technique we have used in step 7 and set the Blending Mode to Soft Light. You can also add additional details to this area as shown in the reference art. We will deal with the masking later on.

Step 11
Create a new black circle Shape layer around the iris only this time, it should not be subtracted and place this layer underneath the Shape layer we have created in step 10. Set the Blending Mode to Soft Light.

Step 12
We need to retouch the eye a little bit so that the iris on the photograph doesn't bleed outside of the Shape layers we have created earlier. Copy the Background layer once and place it directly on top of the Background layer, right-click, and select Rasterize Layer.
7 comments on “How to Create a Deus-Ex Inspired Photo Manipulation with Photoshop”
Good
Having read through the steps, and revisited the example image at the start I can't imagine why I would want to do this. Is there something about the title that I don't understand?
Great tutorial, easy to follow with all the screen shots. You came across just fine. Especially enjoyed it because I love the game,Thanks!
good idea, nice realisation. But it's not explained very well !
Great effect which you do very well! As a tutorial your steps could be explained a bit better.
Thanks very much though!
Fantastic idea, beautifully executed, but terribly explained.
Still ... you're a genius!
3