

Turn any photo into a dot grid artwork with these Photoshop actions. You'll get great results with dots that change size. They get larger in brighter areas and smaller in darker areas. Free download available.
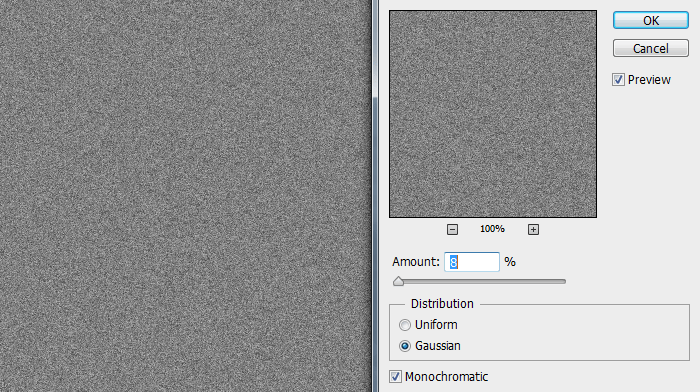
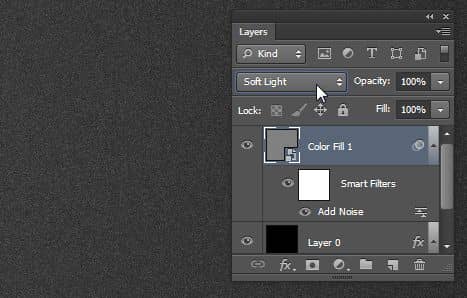
Step 5
Change the blending mode to Soft Light. Now you can see the grainy texture mixed in with the gradient.
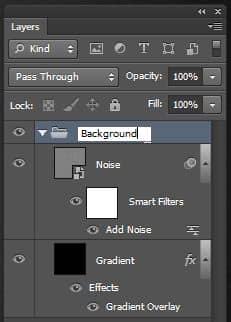
Step 6
We’re done with the background and to keep things organized, we will rename and group the layers. Start by renaming the bottom layer to “Gradient” and top layer to “Noise”. Next, select both layers (hold Ctrl/Cmd to select multiple layers) then group them (Ctrl/Cmd+G). Rename this group to Background.
Step 7
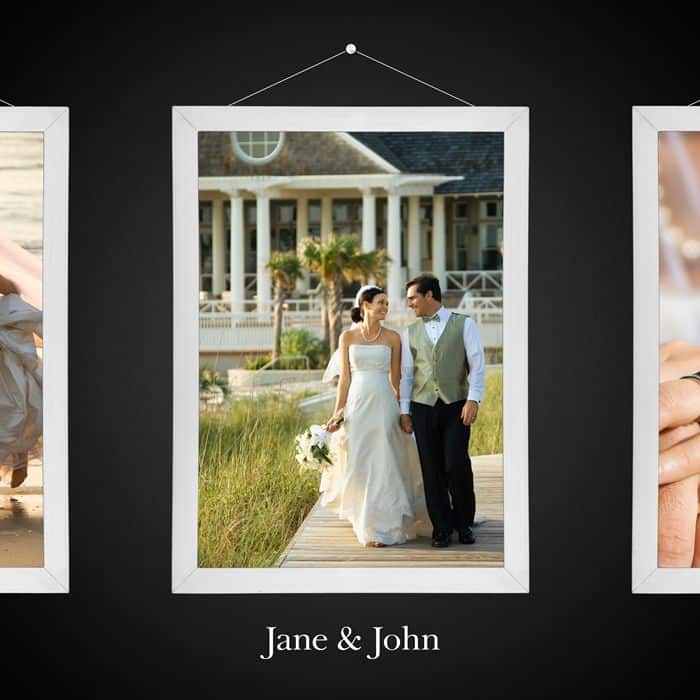
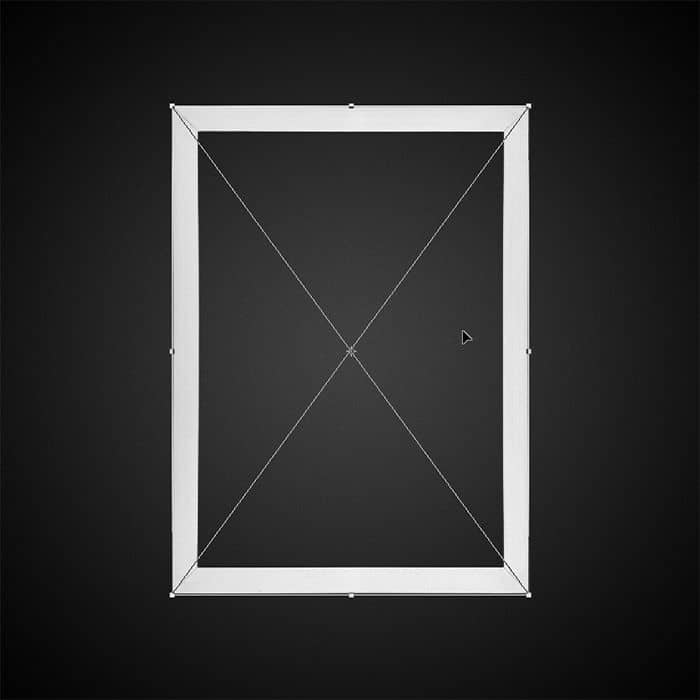
Next, we’re going to place some picture frames. From the Picture Frames packages, place any picture frame you’d like to use. I recommend sticking with the rectangular picture frames. My favorites are the Brushed Aluminum and Smooth Aluminum picture frames because they stand out from the dark background.
To place the picture frames, go to File > Place, browse for the picture frame image, then click OK. Resize the picture frame so that it fits in the center. Hold the Alt and Shift key while resizing – the Alt key lets you resize the image towards or away from the center and the Shift key maintains the aspect-ratio of your image. Press Enter to apply the transformation.
Note: When you use the File > Place command (instead of copying/pasting), Photoshop will automatically place your photo as a Smart Object. This lets you resize/transform the layer as much as you like without losing image quality. See this image for an example.
Step 8
With the Move tool selected (V), hold Alt+Shift then drag the picture frame towards the right. Holding the Alt key while using the Move tool will duplicate it in a new layer. Holding the Shift key constrains your movement horizontally, vertically, or diagonally (45°). Once you’ve copied a picture frame to the right-side, do the same thing to create another picture frame on the left side.

Step 9
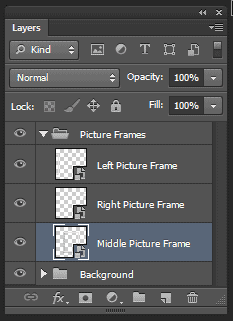
Rename your layers to Left/Right/Middle Picture Frame then group them into a Picture Frames group. To group the layers, hold down the Ctrl/Cmd key and select the three layers then press Ctrl/Cmd+G to group them.
Create a new group (Layer > New > Layer Group) and rename it to Photos. Position this group below Picture frames.
8 comments on “Create a Skeuomorphic Wedding CD Cover Using Only Nondestructive Layers”
This is perfect for a wedding photographer! Great post!
Wow, these are really creative! They remind me of those Chip Fosse drawings from Overhauling’. Great work!
I've the C6 but could not find the poly option for 3 sides...also I couldn't find the steps for text. Thanks i advance for help it is appreciated.
I have a problem man when I tried to save it as picture A window came and reporting that the operation couldn't be completed!
What I do :(?
Thanks brother for good work and perfect design I just made changes that I just made metallic with LAB instead of HSB
and thanks again finished like you exactly . :) ^^ Yours:Alaa
Oh goodness!!Simple tutorial and nice :DBut i wanna ask how could you do the 10 step above?I mean, i just got one selection rectangular tool ( middle only)
How to make the selection as above?
@ZakiiAydia hey man to make many selections just press shift when you are making new selection will make it with the previous selection and press again shift and will again make the third selection :D .
Hope it works ^-^.
Your organizational skills are marvelous! This is a nice tutorial! Thank you