Make your artwork look like they're from an alternate universe. These Cyberpunk presets work with Photoshop (via the Camera Raw filter) and Lightroom. Download all 788 presets for 90% off.
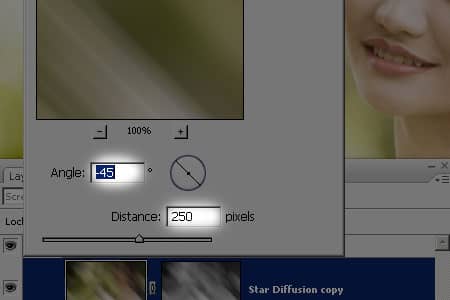
Step 8: Apply the opposite diagonal motion blur to the other Star Diffusion layer
Now select the other Star Diffusion layer that you did not apply the motion blur effect to. Choose Filter> Blur> Motion Blur and use the same distance settings as before but use the opposite angle setting by simply removing the - from the angle (ex. 45º instead of -45º). If you're working on a high resolution image and you had to repeat the filter in the previous step to get long streaks, don't forget to repeat the filter again so that this layer has the same streak length as the other Star Diffusion layer.
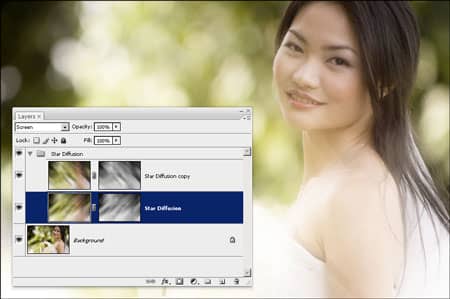
Step 9: Sharpen the Star Diffusion Layers
We now have a star diffusion effect, but it seems quite blurry and it's not every noticeable. To make it more visible, we'll use the Unsharp Mask filter to sharpen the layers. First, select any one of the two Star Diffusion layer and choose Filter> Sharpen> Unsharp Mask. In the Unsharp Mask tool, adjust the amount and radius settings to make the effect more visible.
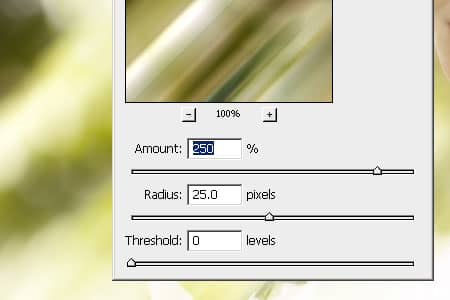
When done, click OK, and apply the filter again on the other Star Diffusion layer by selecting the layer and pressing Ctrl+F or choosing Filter> Unsharp Mask.
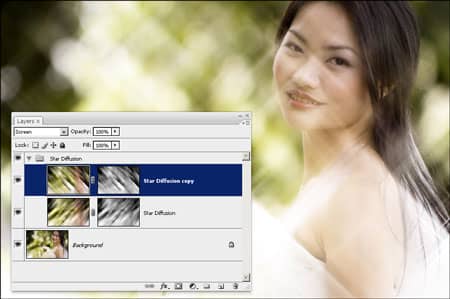
Step 10: Mask the effect out of the foreground
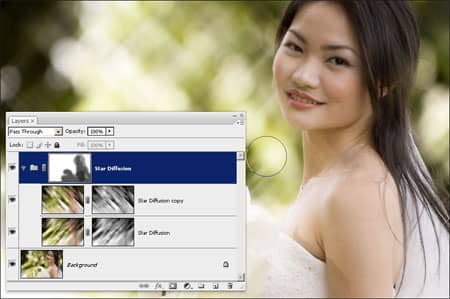
This star diffusion Photoshop effect can interfere with the subject in the photo by covering it. To correct this, we'll simply mask out the effect from the important areas in the photo. Begin by selecting the group in the Layers pallet and then clicking on the Add Layer Mask button in the Layers pallet or choosing Layer> Add Layer Mask> Reveal All. Once you have a layer mask, select the eraser tool and erase the areas that you would like to hide the diffusion effect from. Start with a soft and large round brush with a 50% opacity. The opacity of the brush can be changed from the option bar located near the top of the Photoshop window and the brush settings can be accessed by right-clicking anywhere in the document window.
Step 11: Alter the color of the Star Diffusion effect (optional)
If you want to be more creative, you can alter the color of the star diffusion effect. For example, in the image below, the color of the two layers were changed to make the background bokeh look like it came from a city instead of a park. To alter the color of the effect, select the Star Diffusion layer and adjust the hue with the Hue/Saturation tool (Ctrl+U or Image> Adjustments> Hue/Saturation). Then, select the other Star Diffusion layer and use the Hue/Saturation tool again to change the color. You may also checkmark the Colorize option in the Hue/Saturation tool if you want to use a specific color for the entire layer.


10 comments on “Star Diffusion”
I love this . Thank you! It was also very easy.
thank yu , this tutorial was very helpful and easy to learn
very intrustimg. =)
Nice editing
thankyou...
thank you
It was awesome experience...thnnnxxxxx a lottt
good one!
excellent tutorial. thanks!
Awesome.. really easy and helpful..