

Turn any photo into a dot grid artwork with these Photoshop actions. You'll get great results with dots that change size. They get larger in brighter areas and smaller in darker areas. Free download available.

Step 25
Now we need to make the shadows of insects. Go to the group “Bugs”, then click on the cicada, spider and blue beetle with the Ctrl key held, and duplicate them (the short key Cmd /Ctrl+ J). Then, combine them into a group (the short key Cmd /Ctrl+ G) and drag the group under the darkness.

Duplicate the layer with the cicada 1 times.
Step 26
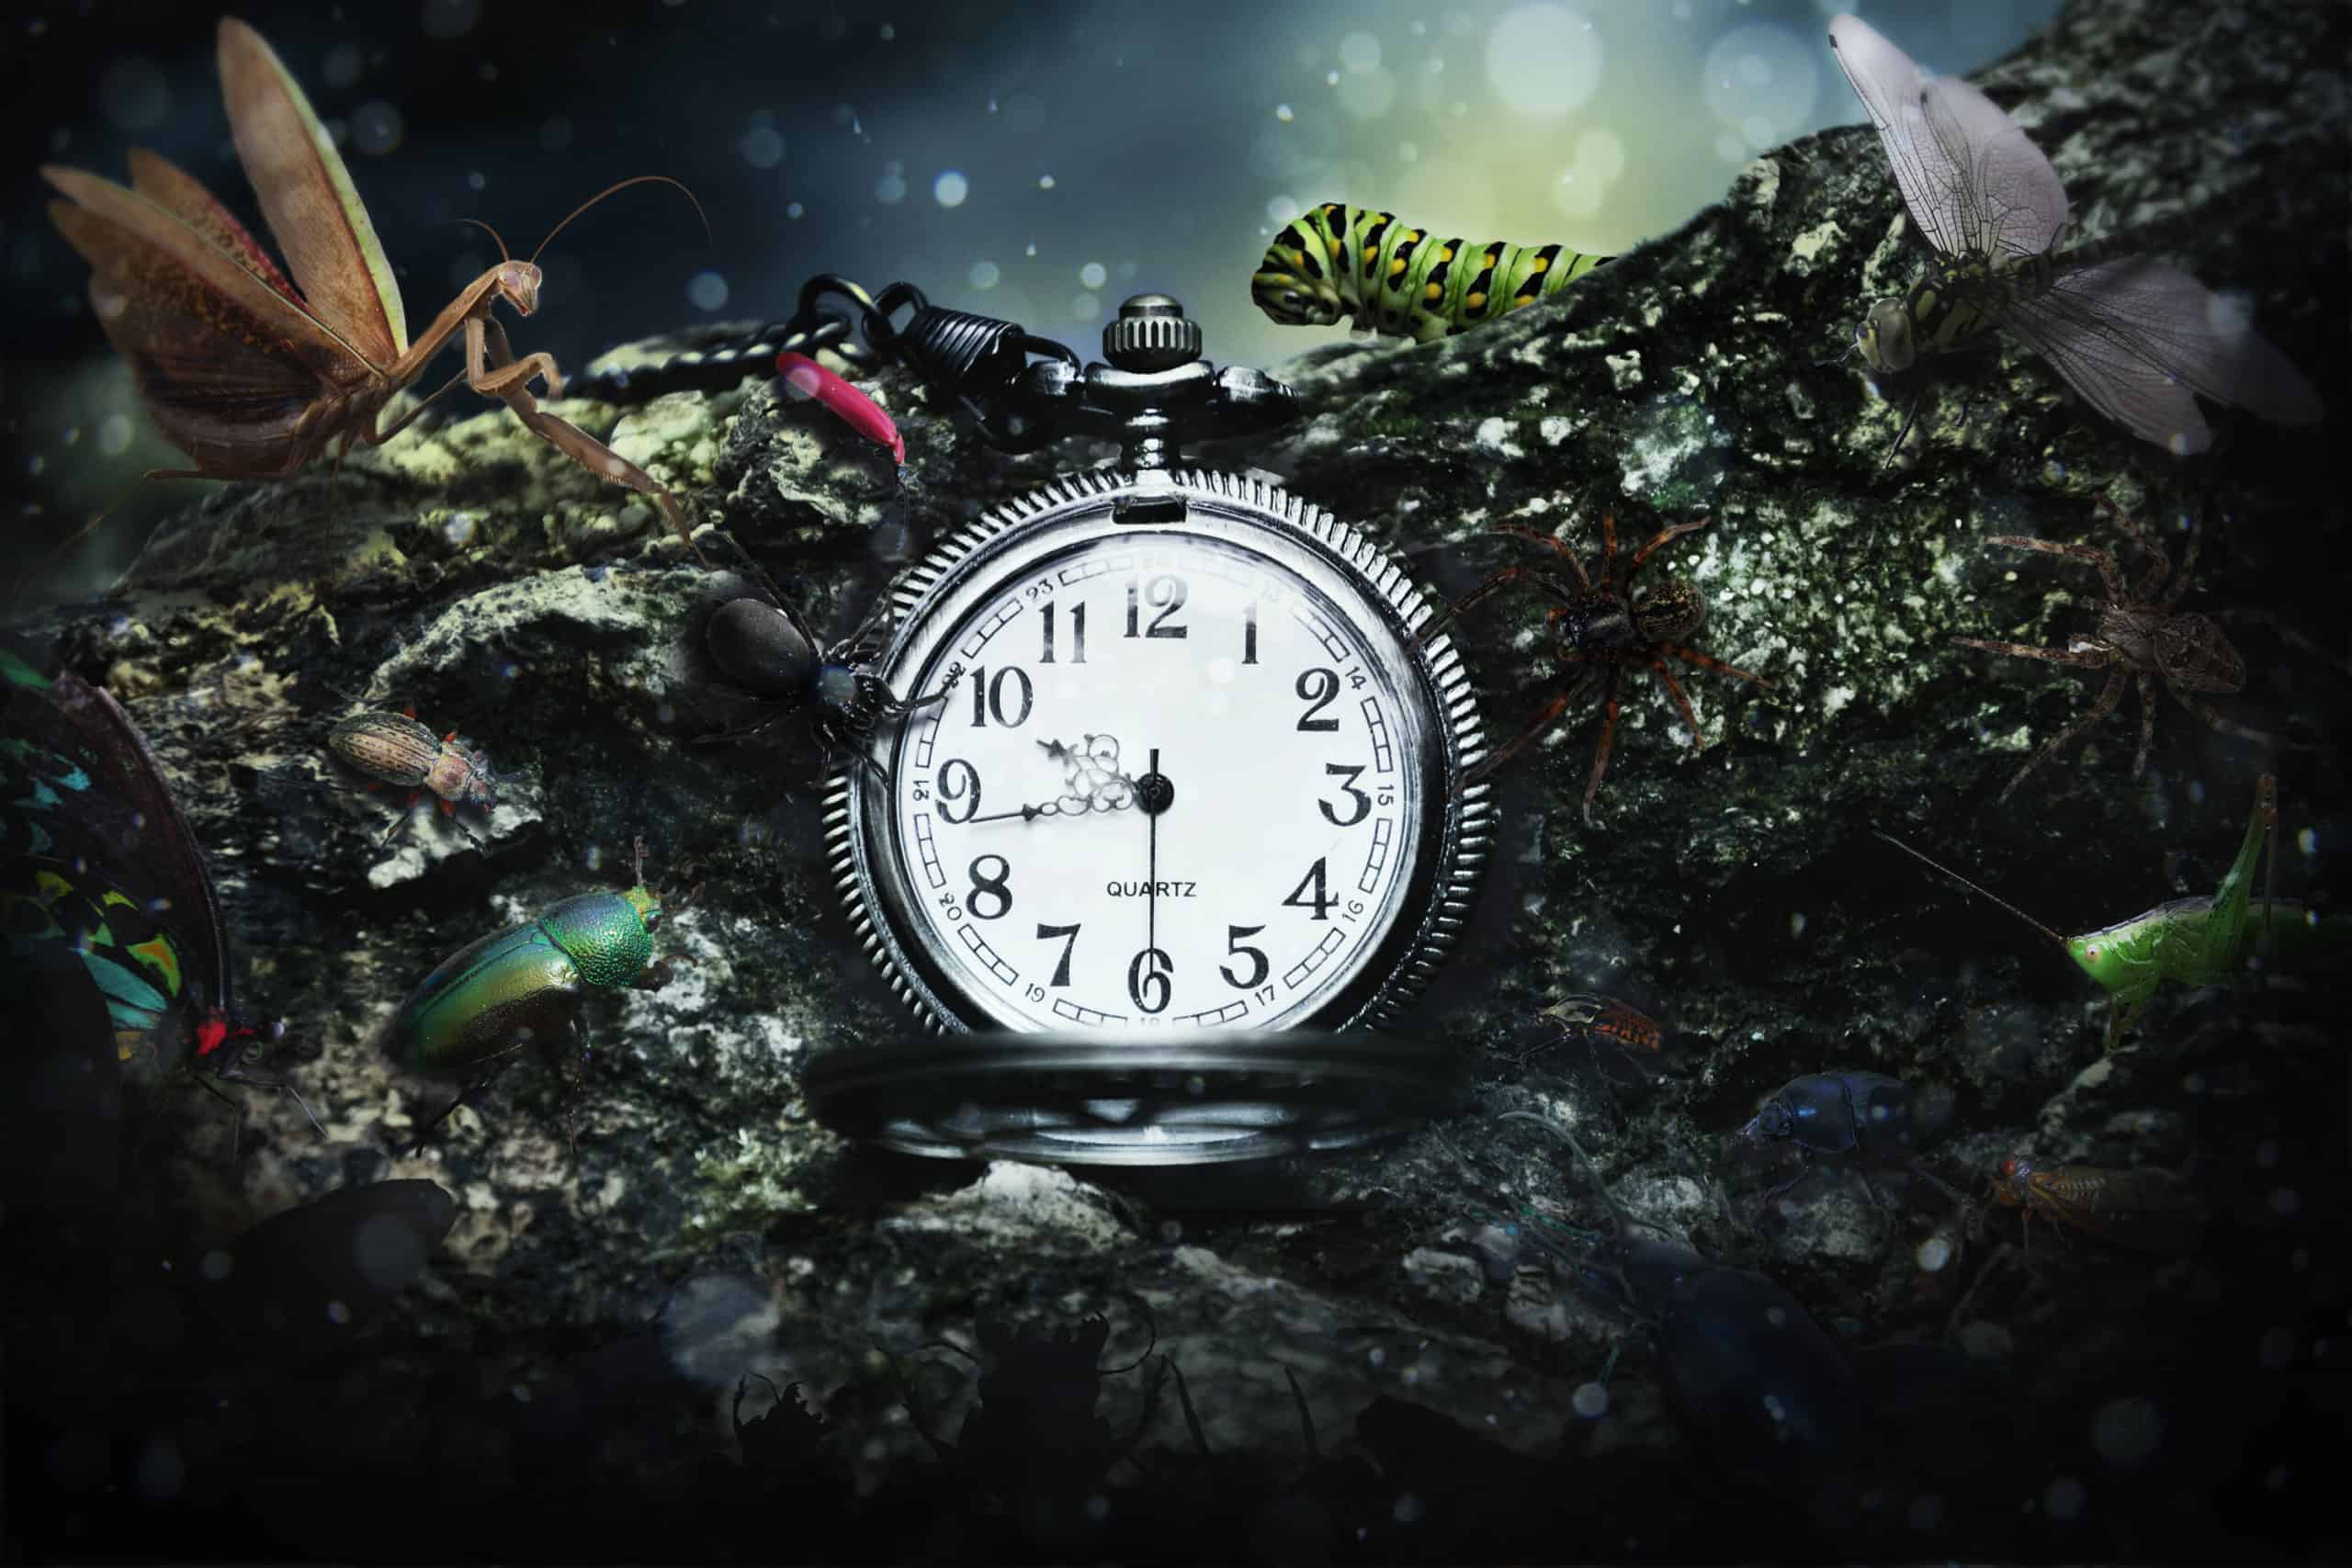
Now place the insects as shown in Figure. Second blue beetle (left) reflected horizontally for do this, go to Edit> Transform> Flip Horizontal

Second blue beetle (left) reflected horizontally for this go to Edit> Transform> Flip Horizontal.

Step 27
Now add the beetle with jaws. Open picture with beetle the short key Cmd /Ctrl+ O or go to File > Open.

Step 28
Select the Quick Selection Tool (W) . Select all the white background and inscription below photo.

In this case, we are not very important kind of beetle, but important path. In the future, we repaint it.

Step 29
Invert the selection the short key Cmd /Ctrl+ Shift+ I or go to Select> Inverse.

Using the Move Tool (V) and move beetle into tab with our photo manipulation.

Step 30
Reduce the size of the beetle the short key Cmd /Ctrl+ T or go to Edit> Transform> Scale.

Duplicate (the short key Cmd /Ctrl+ J) and place both beetles as shown in Figure.

Step 31
Add wings to our work. Open picture with wings (the short key Cmd /Ctrl+ O or go to File > Open).

Step 32
Select the Quick Selection Tool (W) . Select wing and using the Move Tool (V) and move it into tab with our photo manipulation.


Step 33
Repeat the previous step with steel right wing. Now, place them as shown in Figure. To Flip Horizontal wings, go to Edit> Transform> Flip Horizontal.

Step 34
Now we need to paint over all the elements of this group, so they were like shadows. Add an adjustment layer to a group. Go to Layer > New Adjustment Layer > Gradient Map… or click on icon New Adjustment Layer and in list, select Gradient Map…

Step 35
In the window that appears, click on the gradient and gradient settings window appears. Set the color of the left marker #121012 and the right marker #030303. Do not forget to set the application of the adjustment layer only to the group.
9 comments on “How to Add Creepy Bugs to Your Photos”
Fabulous and clear tutorial . Congratulations Maria !!!
👍👍👍👍👍👍👍👍👍❤😉
Hey there, You've done an excellent job. I will certainly
digg it and personally suggest to my friends. I am sure they
will be benefited from this site.
Thank you for the great tutorial! It has been very helpful to see a few techniques in action.
One of the best collection , I seen on internet , Thanks for sharing
very nice
Great tutorial!
didnt work.
yes it did g , try harder
nice work