
Luminar AI lets you turn your ideas into reality with powerful, intelligent AI. Download the photo editor and see how you can completely transform your photos in a few clicks.
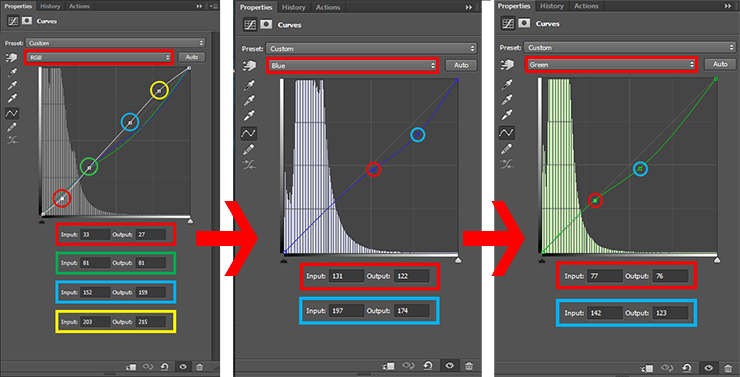
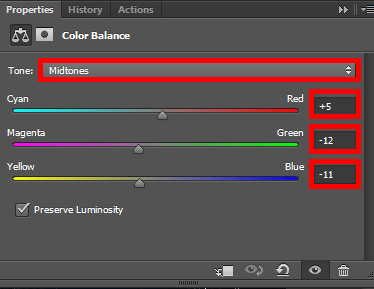
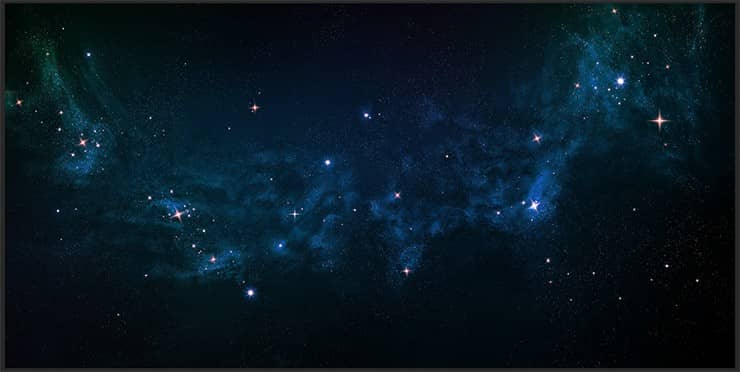
Final adjustment layer is "Color Balance". This layer, I a little bit adjusted the color gamut of my image. I decided that if everything is blue, the picture will lose its beauty and to fix it, I added a bit of yellow, magenta and red. Set Tone: Midtones, Magenta - Green: -12, Yellow - Blue: -11, Cyan - Red: +5.
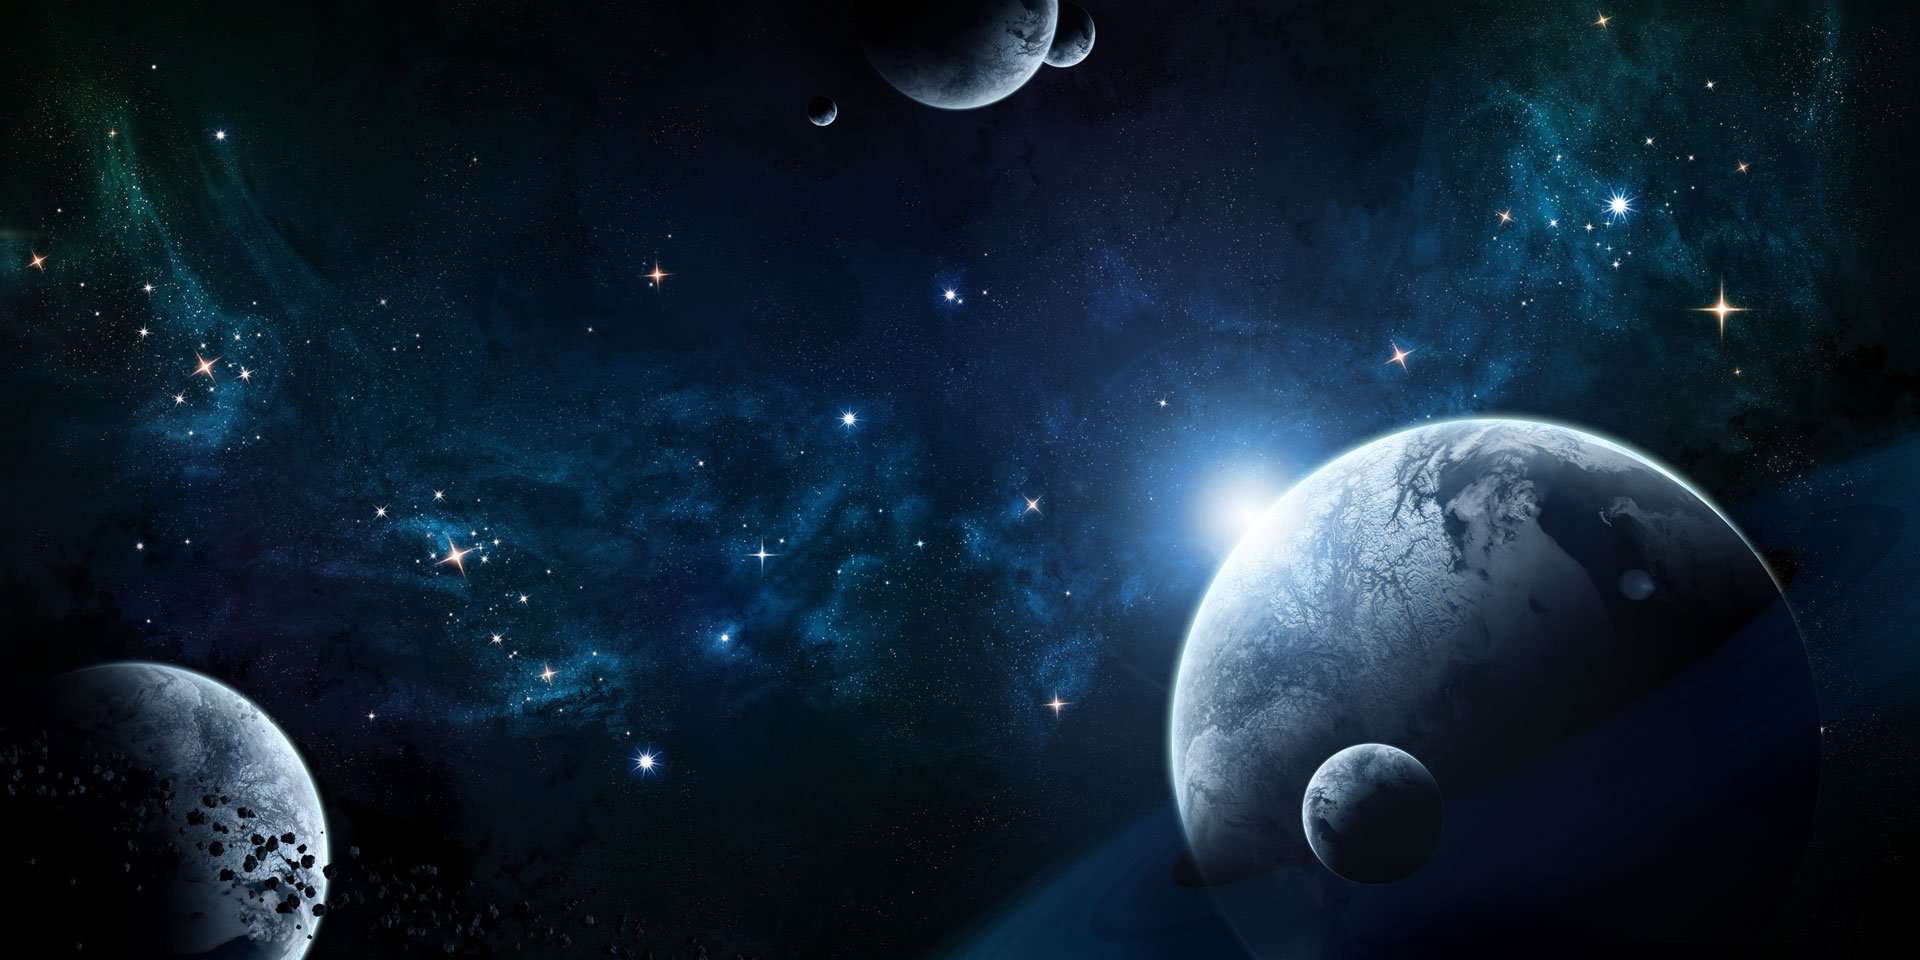
Now the image looks like this. See what beautiful steel star and nebula color transition. In the mood of the photo has been added to the red on stars, green at the ends of nebula and pleasant shade of purple in the center. I liked the result.
Step 17
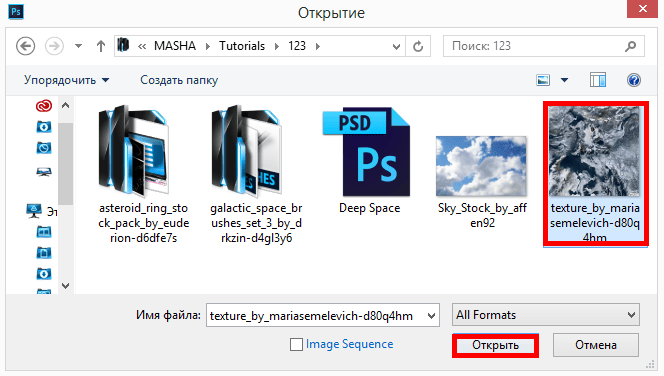
And now for the fun part - the planets. In this part of tutorial I did planet from texture. Is understood that we can take the ready-made, but I'm not looking for easy ways :)! After learning how to create them, you can do planets as you need. Open texture image "texture_by_mariasemelevich-d80q4hm" (Cmd/Ctrl + O or File > Open).
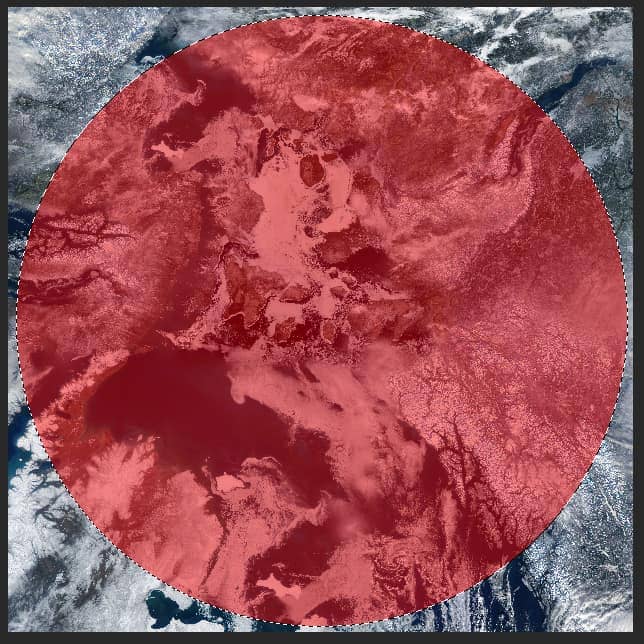
Select Elliptical Marquee Tool (M) and of the approximate center of the image, draw the maximum possible (must be flat) circle. Selection must be proportional from center, hold Shift+ Opt/Alt to it.
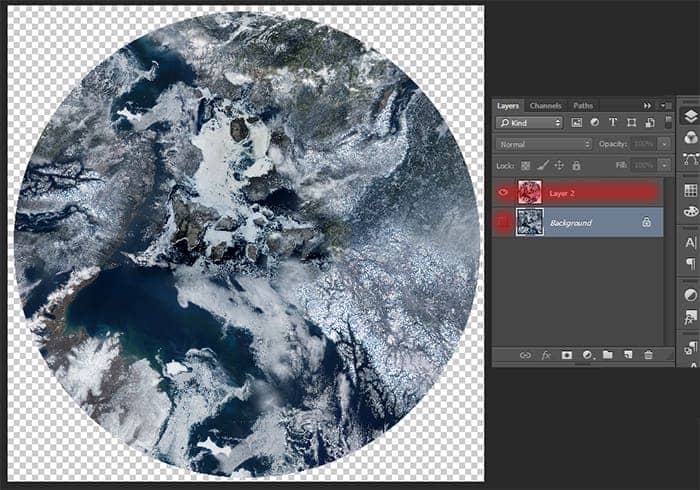
Duplicate this part in a new layer (Cmd/Ctrl +J). Hide layer- background with texture, so it does not disturb you by pressing on eye icon.
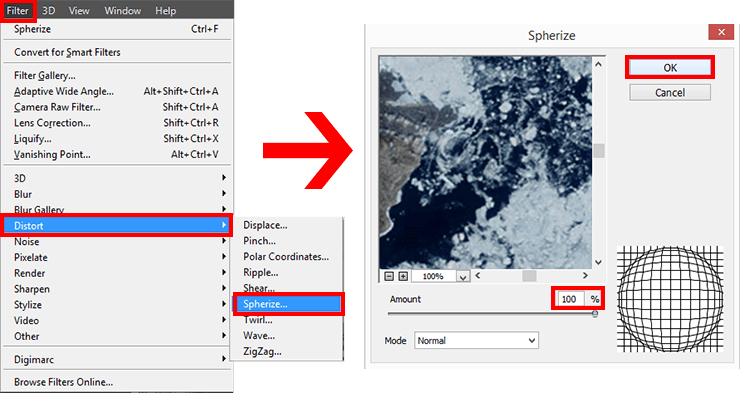
Step 18
Now select the future planet (hold Cmd/Ctrl and click on layer thumbnail), and add filter Spherize... (Filter > Distort > Spherize...). Set Amount: 100% (If in your future others works, you use the texture is not very detailed, apply this filter again. This will help make the planet a more realistic).
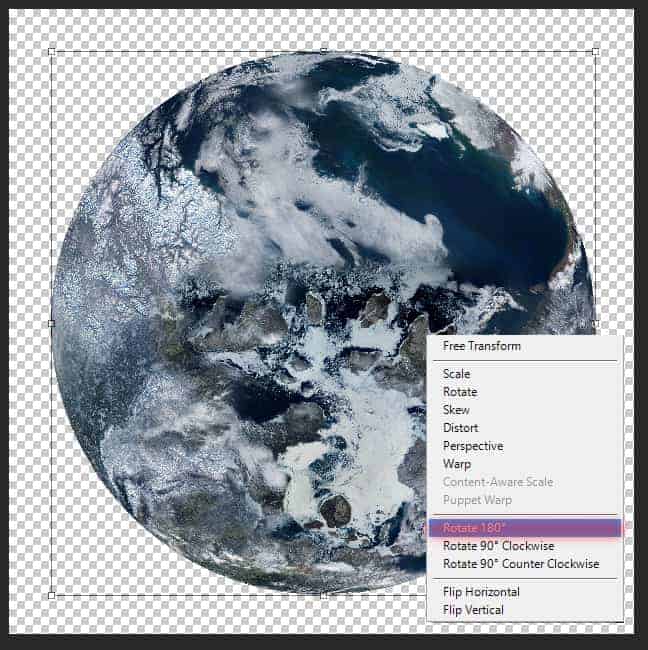
In this step, it all depends on what part of the image you want to use (I decided to rotate my planet on 180 degrees (Edit > Transform > Rotate 180 degrees)) because right now, I'll add a shadow on the planet. But before that slightly reduced planet (Cmd/Ctrl + T). Create a new layer, select planet and fill it a black color (Press D key, then X and use Cmd/Ctrl + Del). Deselect planet (Cmd/Ctrl + D).
Go to Filter > Blur > Gaussian Blur... and set Radius: 300px. Using Move Tool (V) (if you want to increase the shadow, use Cmd/Ctrl + T) place shadow on right place. If space is limited to blur, then you may get cut edges in the shadows. Remove them using Eraser Tool (E) (Size: 1000px, Opacity: 100%, Hardness: 0%). Select your original planet (hold Cmd/Ctrl and click on layer thumbnail) and click on shadow layer. Inverse selection (Cmd/Ctrl + Shift + I or Select > Inverse) and press BACKSPACE key to remove shadow outer planet.
22 comments on “How to Composite Your Own Space Scene from Scratch”
This is excellent. Thank you for the tutorial, I learned a lot!
This was very useful. Thank you.
Will this work in PS 2021?
That's what I'm using and it's working good so far!
The most detailed tutorial that I saw. Great! Thank you!
Very nice and detailed tutorial with a nice looking image.
Thanks for sharing. ;-)
Really Awesome !!!
The best as usual!
Step 7 is fairly confusing, I followed the steps but when i try to remove excess stars it comes out white and looks horrible, confused as to what I should do.
That's only because you weren't coloring on a layer mask! Make sure that after you apply the layer mask, you click on the second thumbnail on the layer. After doing so, begin coloring in a black brush. Anything colored black on a layer mask will actually be erased. If you want to make the stars reappear, simply color it white.
Every great tutorial. I need some help on Step 25. After I delete the center of black area the rings, the effects also disappear too. I still can't figure out how to make the rings effects and without black area. Thank you.
Hi Dylan, Thank you very much for your letter! Try to create rings, select all the layers with rings right click on layers > Convert to Smart Object. Select a dark circle (Elliptical Marquee Tool (M)). Add a layer mask (Layer > Add Layer Mask > Hide Selection or hold Opt/Alt and click on "Add layer mask" icon). This should remove the black circle. Then convert the layer to Smart Object again and you're done. Also, this happens if you are working on a background layer.
If you have any more questions, feel free to ask them! And I will answer you.
This is a really great tutorial, thanks for this, Maria!
http://i.imgur.com/RjttyDI.jpg
This is how it turned out for me (for some reason, it's darker when posting online, looks better in PS)! As you can see, I tried to make a larger star/sun closer to the planets, as it's not realistic to have such shine from a nebula.
I'm not very happy with how the sun turned out, could you give me an idea on how to make a better sun? Thanks!
hey i ve created a pic via photoshop plz tell me howss it ??? plz plz plz reply soon
I am having problems with step 9: I keep clicking Ctrl and F for the "Difference clouds", but nothing seems to happen inside the nebula, apart for at little shift in the stars, and I have clicked ALOT of times!
Hi Tommy, It's strange, because everything should work. Are you exactly set “Color Dodge” blending mode for nebula layer? If the blending mode everything is fine, then try to apply filters through Filter > Last Filter or Filter > Render > Difference Clouds. Surely set the default colors (D on keyboard) before you apply a cloud filters. Repeat steps 8 - 9 for nebula on a new layer if the problem does not go away. Make sure that you have made a colored background, otherwise Nebula did not appear. Write to me if the problem is not solved.
Answer a survey to see the tutorial? Nope
Filling in a free and quick survey would have been much quicker than filling in this form to leave a comment and would help support the author of the tutorial who has given up their time to create this excellent walk through.
Exactly what i was looking for :) thanks
I'm very glad that you enjoyed it! I hope you will find a lot of useful information.
really a lot of useful information .. do u made this tut ?!
Thank you so much! Yes, I'm author of this tutorial and write it.
Here is my page https://www.facebook.com/MariaSemelevichPhotography?ref=bookmarks.
and I write to you from my a personal profile :)