Luminar AI lets you turn your ideas into reality with powerful, intelligent AI. Download the photo editor and see how you can completely transform your photos in a few clicks.
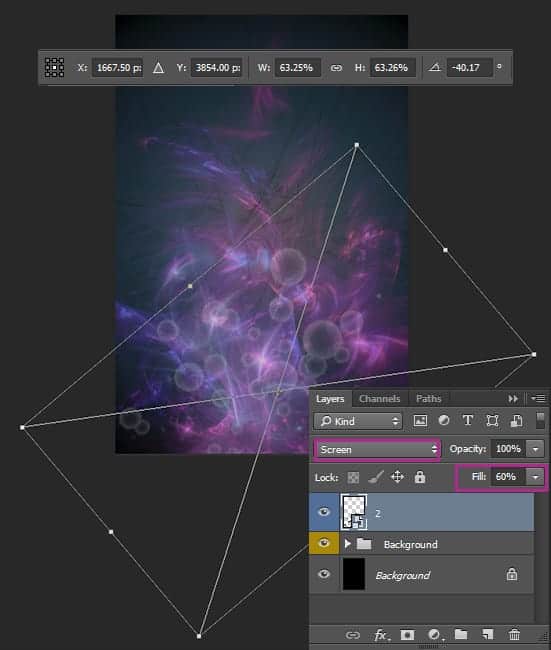
Step 7
Duplicate this layer via Cmd/Ctrl + G or go to Layer > Duplicate Layer... or grab and drop layer on the icon "Create a new layer" icon at the bottom of the layer panel. Change Blending Mode to "Soft Light" and restore Fill to 100%. This will add more contrast to the spheres.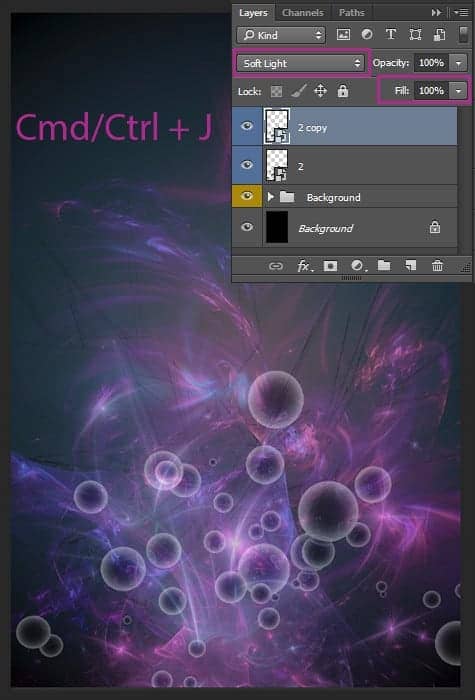
Step 8
Add more bubbles to cover all working fields by repeating Steps 6-7. Use both black bubbles images from the folder. Experiment with different blending modes to find more interesting effects such as "Multiply", "Overlay" and etc. On the image below shown all bubbles layers and their settings. After all, group the layers (Cmd/Ctrl + G or Layer > Group Layers) and name it "Spheres". Reduce group Fill to 65%.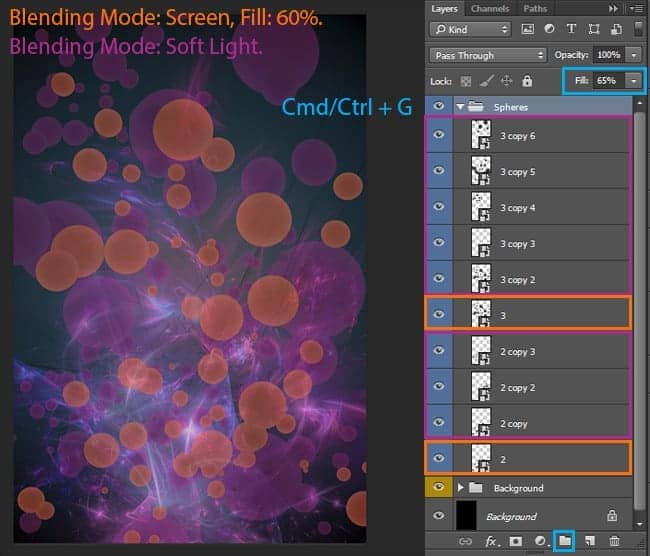
Step 9
Now time for a model. As I say you can use any model. Download and Place image with model (File > Place.../Place Embedded). Reduce the size of the model to leave more space for the effects and objects and apply changes. This tutorial is built on the effects rather than the objects.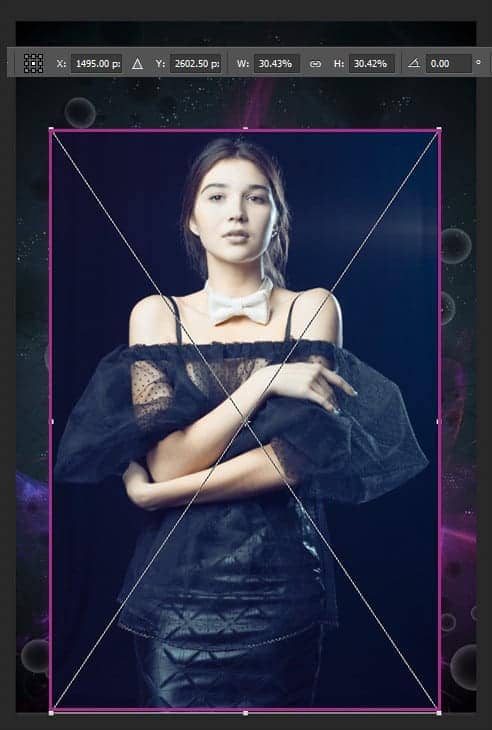
Step 10
You need to remove the background so we can continue montage. Hide all layers except model by clicking on the eye icon near thumbnail. Go to Channels tab (Window > Channels) and grab the "Green" channel and drop on "Create a new channel" icon so you create a copy of this channel. Use "Levels" (Image > Adjustments > Levels or use Cmd/Ctrl + L) adjustment to increase contrast of image until model become white and background black. I use the following settings for Blacks: 11, Neutrals: 0.62, Whites: 50. First, I always add a little black to hide the background when it is different in tone. Then do the same for whites. To correct, I use gray. I chose this channel because it is the best contrast. If you use this method in other cases, looking for a suitable channel.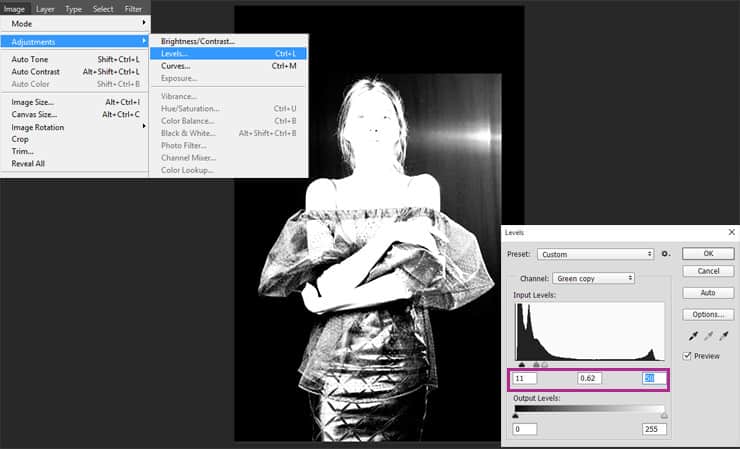
Step 11
Of course, not all of the models will be just white. Some of the details you need to adjust manually. Take a Brush Tool (B) with "Hard Round" preset, Size: 50-300 pixels, Opacity: 100%, Spacing (F5): 0% and set defaults background and foreground colors (D). Use black color to remove flare near the model's face and black on a model. Also, try not to touch the model's hair. While holding the Cmd/Ctrl key click on "Green Copy" thumbnail or "Load channel as selection" button to load selection. Now the most important thing to understand how this method works. All of black this is unnecessary background (that's what you want to remove) and white is the desired object. The most important thing is to get the contrast that was only black and white. If the image has shades of gray it means that this item also adds into selection but with less Opacity.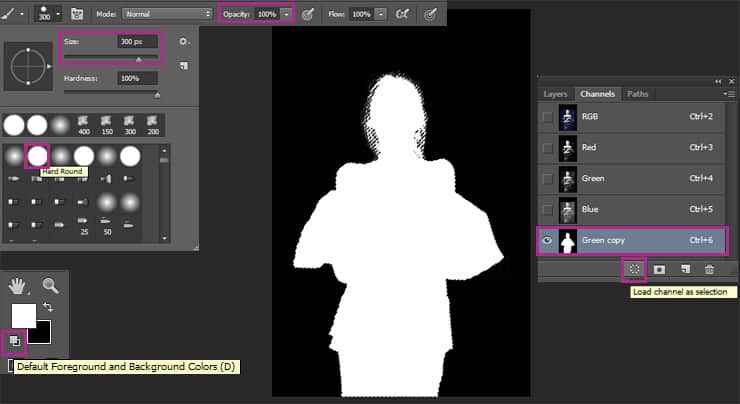
Step 12
Go to Layer panel and add a layer mask to a model (Layer > Layer Mask > Reveal Selection or click on the "Add layer mask" icon at the bottom of the Layer panel). Do not forget to restore the visibility of all layers. The method described above is very handy when the image contrasted and with a minimum number of objects. I often use it in my artworks, because it saves time. Duplicate model (Cmd/Ctrl + J or Layer > Duplicate Layer).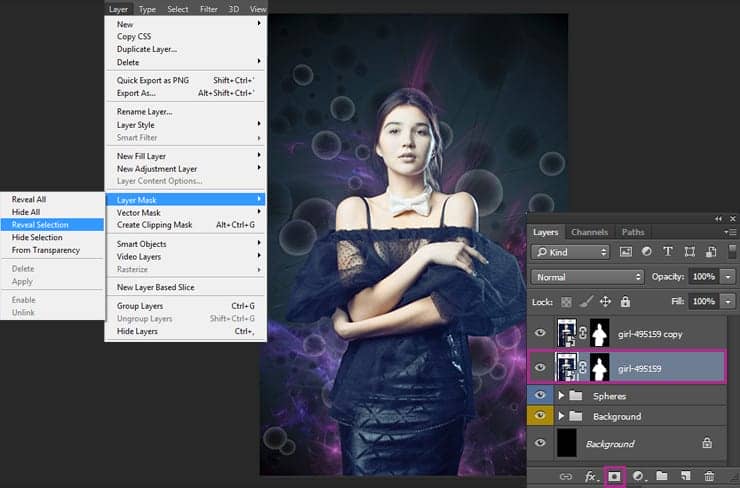
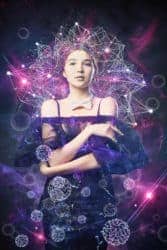

20 comments on “Create a 3D Abstract Photo Manipulation Style in Photoshop”
Cool cool
I always liked adding a wicked background to photos that are generally too busy.
kudos! I love your work, I’m new at this, your tutorial is very clear, I followed your guide and I made it,I hope you can make more tutorial like this, thank you very much.
I'm at Step 44 and am stuck on this part: "Remember, we create a merged copy? Use it again (Cmd/Ctrl + Opt/Alt + Shift + E) and move this layer to top of layer stack."
First, I don't remember creating a merged copy (that doesn't mean I didn't; I just don't remember), and, secondly, I don't know which layers you're referring to that should be included in the merged copy, so, if you could please provide some clarification, I'd be very grateful.
Thanks,
Ray
Hi Ray,
Thank you very much for your letter!
"Copy Merged Makes a merged copy of all the visible layers in the selected area"
https://helpx.adobe.com/pdf/photoshop_reference.pdf
This function is needed to obtain a copy of your work on a separate layer. You can merge all layers if you want, and then make a copy. But it will be wasted and you will not be able to go back to the layers. You must use the version of the image to which you want to apply effect (all layers in the Layers panel or the layers that you consider necessary use in your artwork). You just need a layer of your result on a separate layer, to apply effects. All the same as in Step 29. Or you can use the method that you prefer. Personally, I like to use this method because it is fast. I used all of the layers that have been in my work at this stage. You can see my layers sequence in the previous step (Step 43).
Kind Regards,
Maria.
Thank you very much, Maria. I really appreciate your help.
Your tutorials are very easy to follow and I appreciate that very much. I am just getting started and sometimes I am not even sure what photoshop can really do for me.
Thank you for your comment! I am very glad that you liked my tutorial :). I deliberately tried to make my tutorials are accessible to people with various Photoshop knowledge. I believe that you will succeed! From my experience, the best option is a constant practice and personal experience to help you achieve good results!
Good luck and new creative achievements to you!
Maria.
I'm enjoying this tutorial, but it would be even better if the reasoning behind what we're doing was explained, e.g. Step 23 Replace layer mask from “Curves” model layer to Gradient Fill layer by holding Opt/Alt and drag and drop layer mask to gradient layer mask. I understand the basic concept behind layer masks, but I don't understand why we're copying a mask from one layer to another and the effect that has.
If you could supply an explanation, that would be most appreciated.
Thanks
Thank you for your comment! I'm glad you liked my tutorial :)
It is necessary to not doing the same action each time. Because otherwise, you need to create a selection of model and add a layer mask to the desired layer. So just a faster and more optimized work on photo manipulation.
I would like to say that we need a layer mask on which the model (white color) is separated from the background (black) and remove some areas on it to to hide the effect of the adjustment layer, where it is not necessary.
I hope I answered your question. If you still have questions do not hesitate to ask and I'm happy to answer you :)
Maria.
I'm sorry, but I don't understand what we're supposed to be doing in Step 21. You say "Use the average skin tones near the area being edited." I have no idea what that means. I'm fairly new to Photoshop, so it could be my lack of experience, but if you could clarify this step and how exactly we're supposed to go about it, that would be great.
Thanks in advance.
I think the author meant to select the average skin tone color with the Eyedropper tool. You can set the "Sample Size" setting to 101x101 pixels in the options bar (below the menus after you have the Eyedropper tool selected).
Thanks for the response.
Can you fix screenshots at Steps 22 and 44?
The screenshots seem to be showing fine on my end
i would lover to learn how do you have any video i can watch?
kudos
superior!
Hello, wrong link on the Atom Stock Pack
http://mariasemelevich.deviantart.com/art/Atom-Stock-Pack-550943280 - right
Thanks! Link fixed