Turn any photo into a dot grid artwork with these Photoshop actions. You'll get great results with dots that change size. They get larger in brighter areas and smaller in darker areas. Free download available.
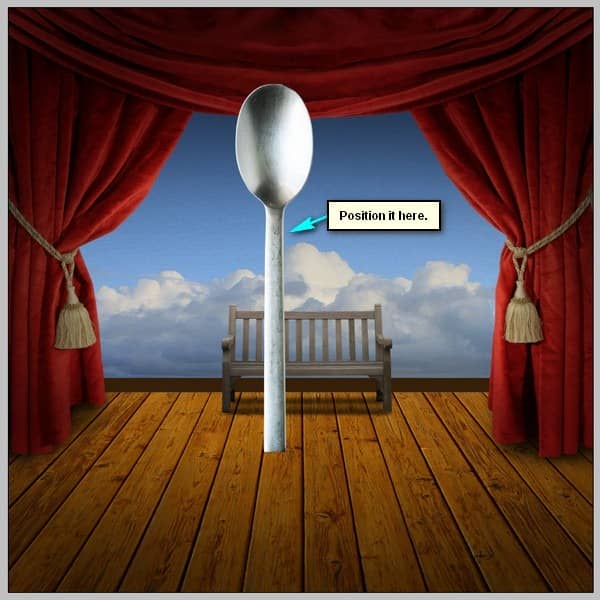
Next, activate the Transform tool (Ctrl/Cmd + T) and resize the spoon as shown below:
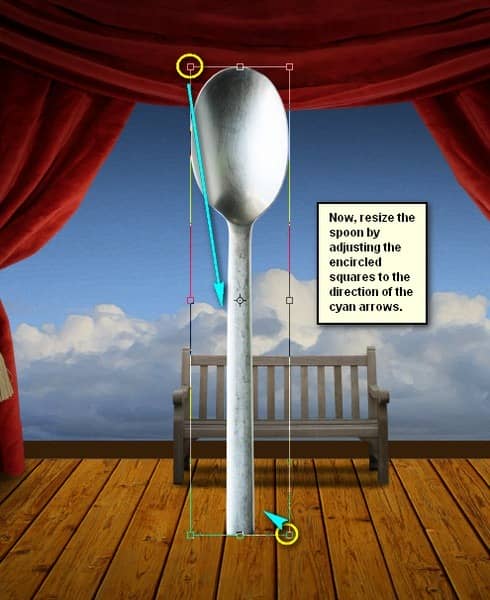
The resized result should be similar to this:
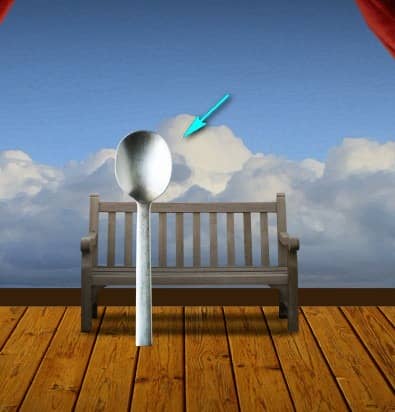
Step 26
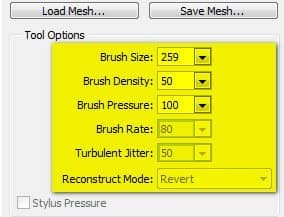
Next, let’s make the spoon sit down. To do that, we will need to activate the Liquify tool. The Liquify tool can be found by clicking on Filter > Liquify. Once the Liquify tab has been opened input the following settings:
Tool Options
- Brush size: 259px
- Brush density: 50
- Brush Pressure: 100
- Brush Rate: 80
- Turbulent Jitter: 50
- Reconstruct Mode: Revert
- Stylus Pressure: Uncheck
- The rest - default
Now, let’s liquify it!
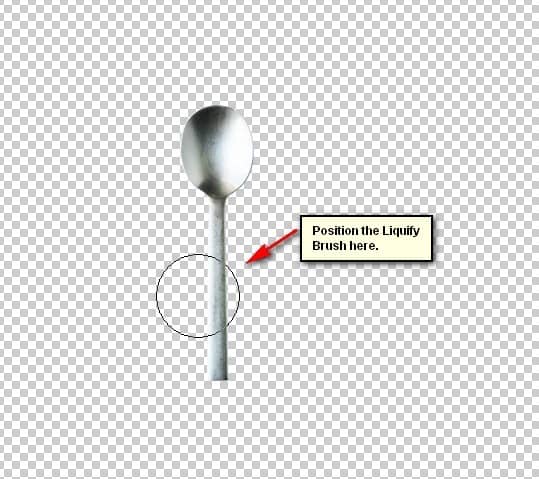
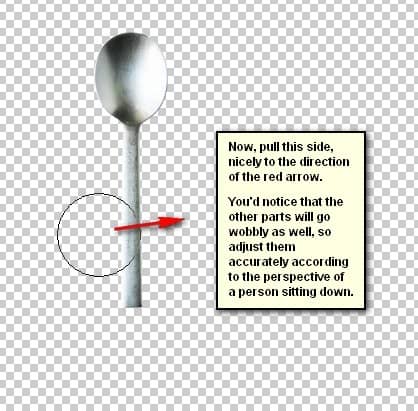
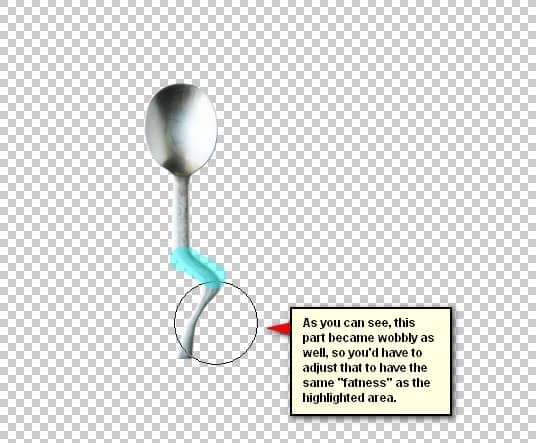
The result of that should be similar to this:

Step 27
Next, let’s create a new layer (Ctrl/Cmd + Shift + N) above the spoon layer and then create a clipping mask above him. Name this new layer as “Darken spoon”. Once done, activate the Brush tool (B) and input the following:
- Brush size: 400px
- Hardness: 0%
- Opacity: 15%
- Flow: 100%
- #: 000000
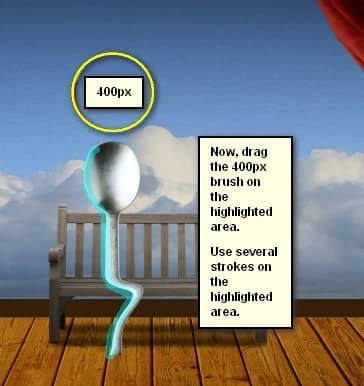
The result:
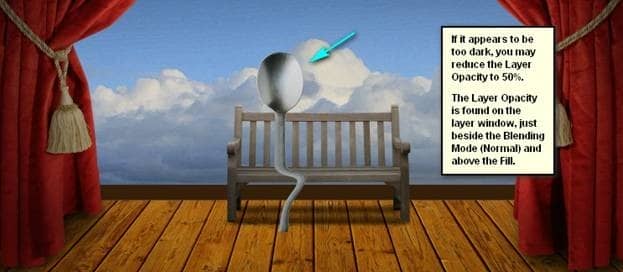
Step 28
Next, let’s create the shadow of the spoon. Create a new layer (Ctrl/Cmd + Shift + N) and then put it below the spoon layer. Name this layer as “spoon shadow”. Activate the Brush tool (B) and input the following:
- Brush size: 45px
- Hardness: 0%
- Opacity: 15%
- Flow: 100%
- #: 000000
Now, let’s paint!
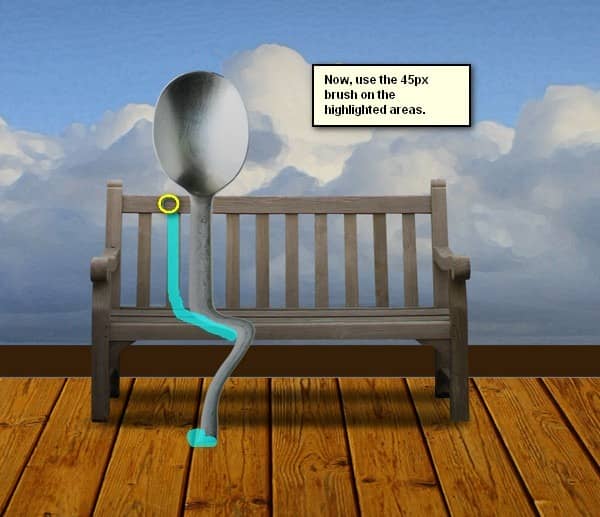
The result:
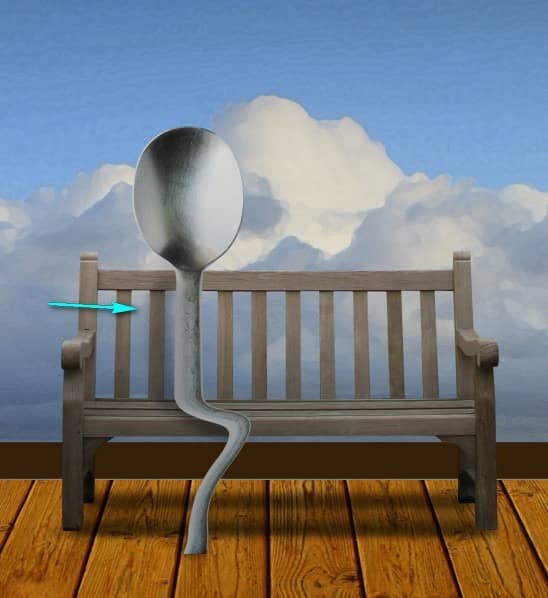
Step 29: Create the sitting Fork
Like what we did in Step 6 for the spoon - activate the Polygonal Lasso Tool (L) and then create a selection area around the fork.
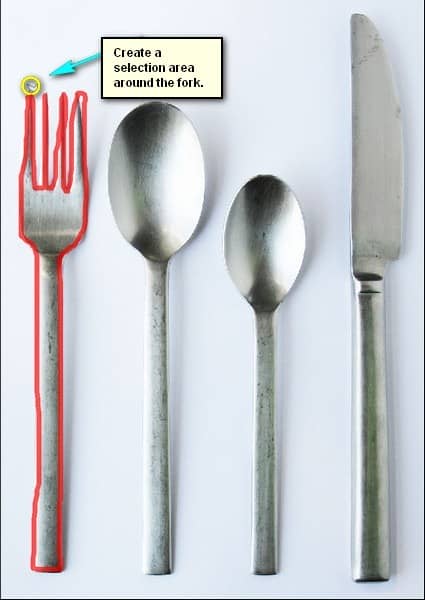
Step 30
Once done, activate the Move tool (V) and drag the fork to our canvas. Once on the canvas, make sure to put it above all the other layers. Position it as shown below:
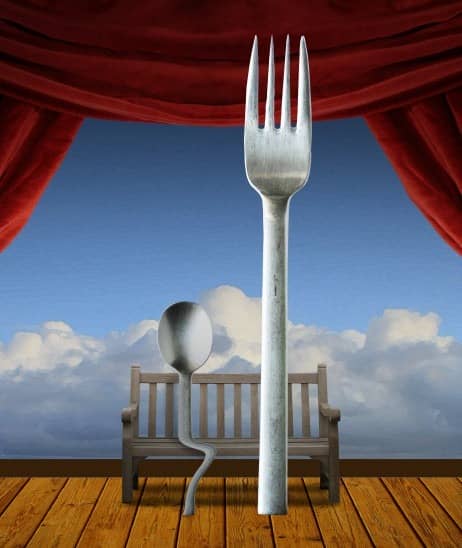
Step 31
Next, activate the Transform tool (Ctrl/Cmd + T) and then resize the fork as shown below:
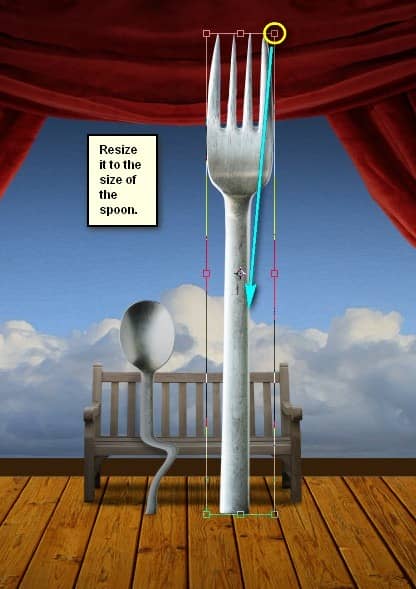
The result of that should be similar to this:

Step 32
Now, let’s activate the Liquify tool (Filter > Liquify) and then input the same settings as from the spoon.
Tool Options
- Brush size: 259px
- Brush density: 50
- Brush Pressure: 100
- Brush Rate: 80
- Turbulent Jitter: 50
- Reconstruct Mode: Revert
- Stylus Pressure: Uncheck
Now, let’s Liquify!
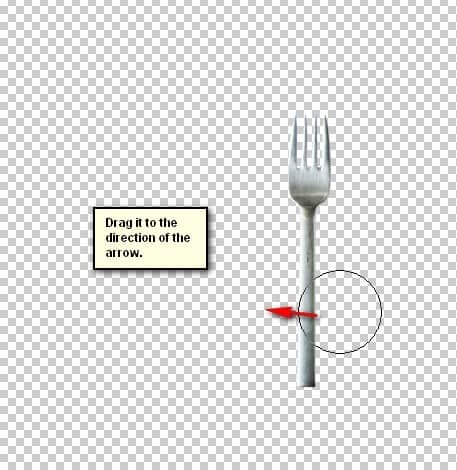
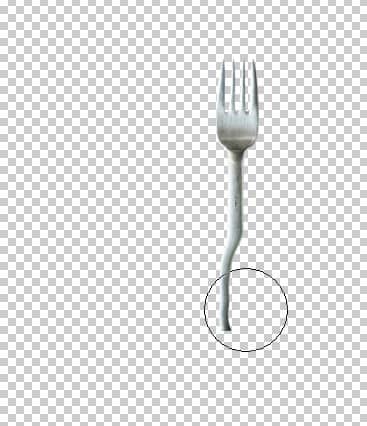
The result of that should be similar to this:
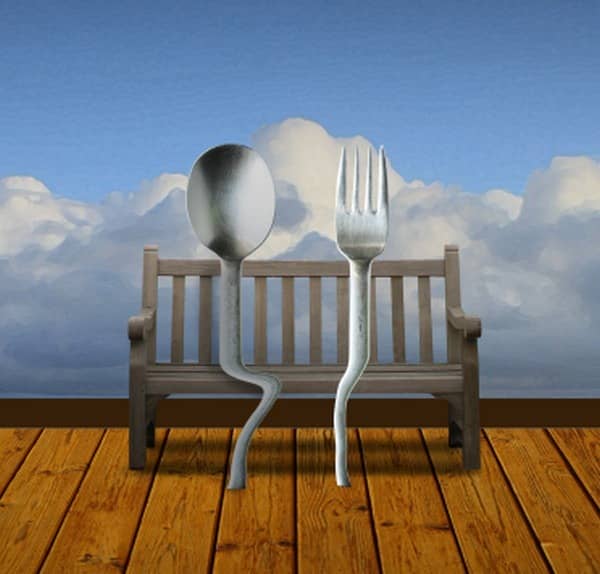
Step 33
Now, let’s create a new layer (Ctrl/Cmd + Shift + N) above the fork layer. Create a clipping mask for this layer and then name it “Darken fork”. Activate the Brush tool (B) and input the following:
- Brush size: 300px
- Hardness: 0%
- Opacity: 15%
- Flow: 100%
- #: 000000
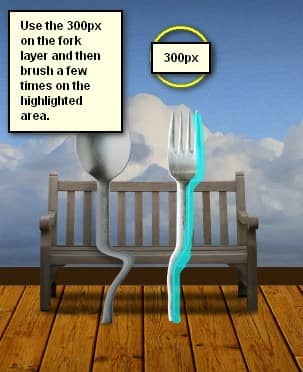
The result:
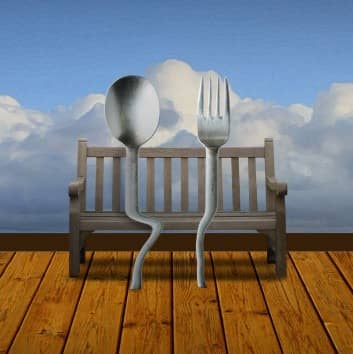
Step 34
Next, let’s create the fork’s shadow. First, let’s create a new layer (Ctrl/Cmd + Shift + N) and put this new layer below the fork layer; name it as “fork’s shadow”.
Activate the Brush tool (B) and input the following:
- Brush size: 45px
- Hardness: 0%
- Opacity: 15%
- Flow: 100%
- #: 000000
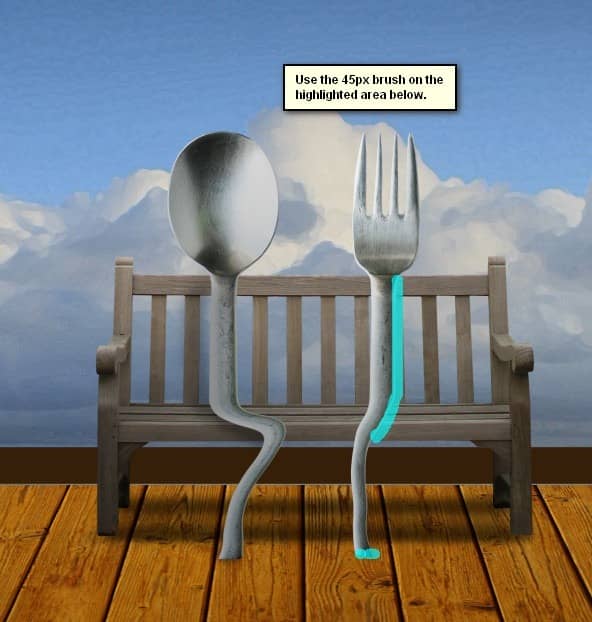
The result of that should be similar to this:
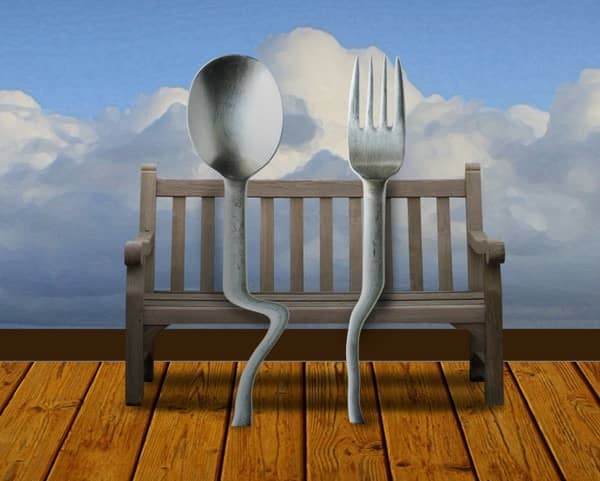
Step 35: Enhance Color
Now, let’s enhance the color of our image. First, let’s create a Color Balance layer, from the Create New Fill/Adjustment layer button on the Layer window.


25 comments on “Create a Romantic Cutlery Artwork Inspired by Salvador Dali”
the cutlery's link is error . please fix !! :(
Thanks for the tutorial. I followed your guidelines closely, and although I had to substitute images for the floor and cutlery (the original images were no longer available), I was able to replicate your original fairly well. I am using the completed image for an assignment in a college class. Thanks so much
o
k
Wow expertinspiration I like all!?
please fix the psd link
Link seems to be working for us. Here's the direct link: https://www.photoshoptutorials.ws/downloads/psd/Theater%20of%20Life.zip
Thank u Mike excellent tutorial
(>^o^)> I AM COMMENT <(^o^<)
Awesome work and tutorial, Michael! Congrats!
Let me add a correction: at step 36 the gradient map regulation level must be added with the LUMINOSTY blend mode...you must have forgotten to write it down :)
change blend mode on Gradient Map (step 35) plox .
what the hell happened at Step 35 ??? :-/
very very nice!!
Awesome tutorial..... Really helpful for a beginner like me :-)....
Been looking at your tutorials and portfolio ... thanks a lot for sharing. Beautiful stuff. I really appreciate it.
Great tutorial; thank you!
FYI: The "Download the PSD" link points to the 'Big Fish' PSD rather than the file for this tutorial.
Thanks Mike! PSD link has been fixed
Very nice!
Really nice tuto, helpful, well explained. thx
Thanks a lot for the nice tut - good job!!!
"AWESOME"
Gracias por el tutorial aprendi mucho
mira como me fue http://www.facebook.com/photo.php?fbid=4785628130887&set=a.4638641296308.2170398.1601304038&type=1&theater¬if_t=like exelente
This was very well done. Teaches a lot of things nicely. Thanks for the tutorial.
Beautiful!!!
love romance and love your way to work
nice step by step work!