

Make skin look perfect in one-click with these AI-powered Photoshop actions.
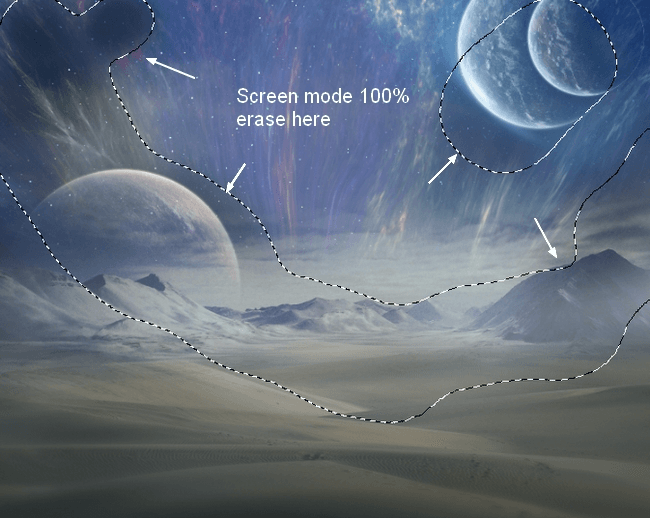
Change the mode to Screen 100% and use a layer mask to reduce the effect at the top edges of the scene and on the planets:
Step 19
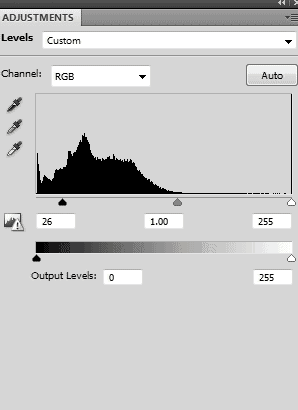
I used Levels to darken the effect:
Step 20
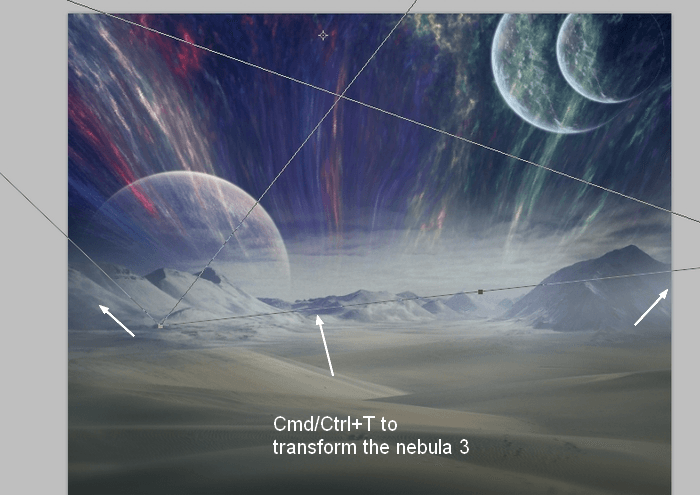
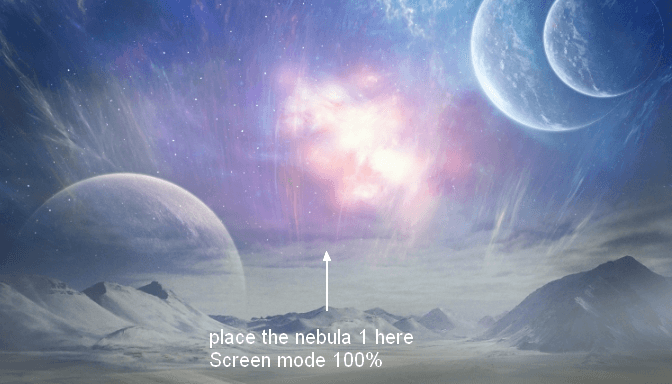
Place the nebula 1 image in the center of the sky and change the mode to Screen 100%:
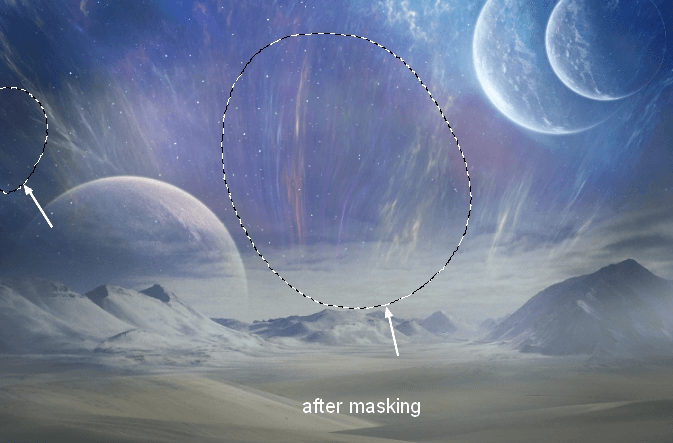
Use a layer mask to remove the light on the middle and at the edge to get a subtle effect:
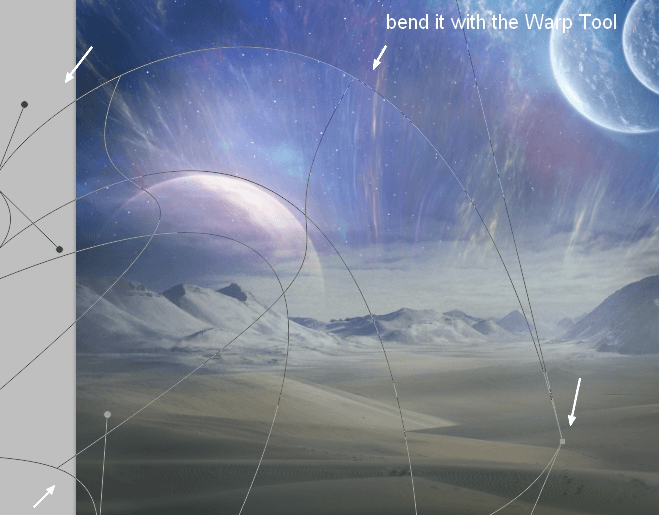
Duplicate this layer and use the Warp Tool (Edit > Transform >Warp) to bend this nebula image as shown below:
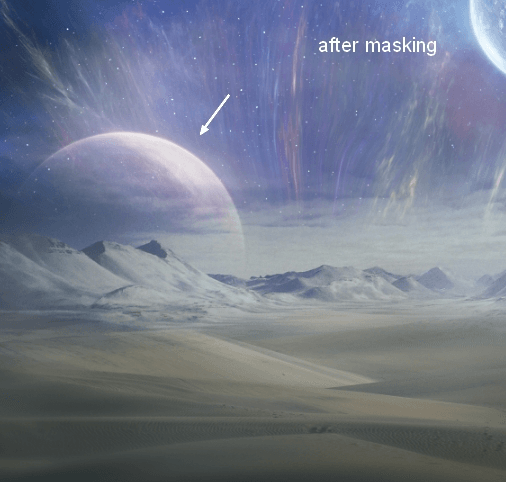
Use a layer mask to remove the hard edges and leave the effect visible only on the planet 2:
Step 21
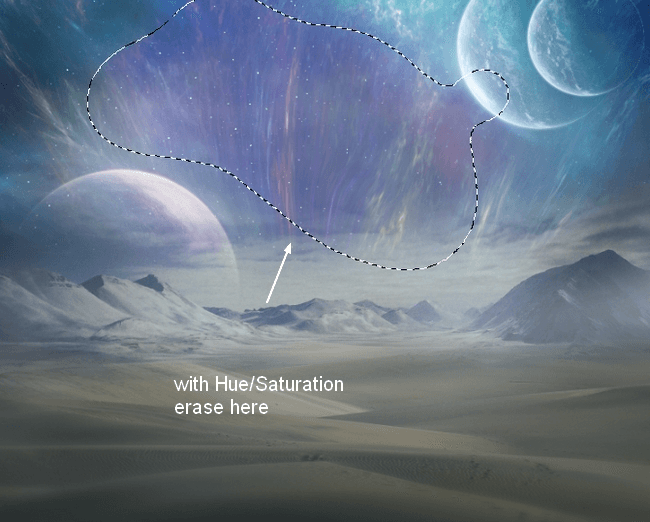
Make two these layers selected and press Cmd/Ctrl+G to group them. Change this group mode from Pass Through (default group mode) to Screen 100%. Make a Hue/Saturation adjustment layer to change the color of the nebula 1:
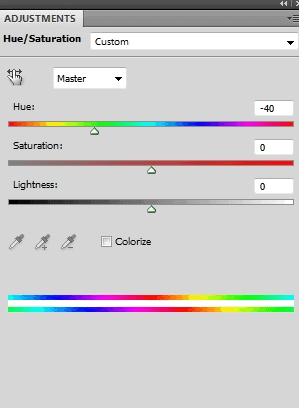
On this layer mask I used a soft black brush to erase the middle as I didn't want it to be affected by this adjustment layer:
Step 22
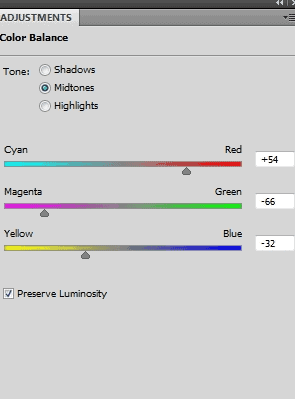
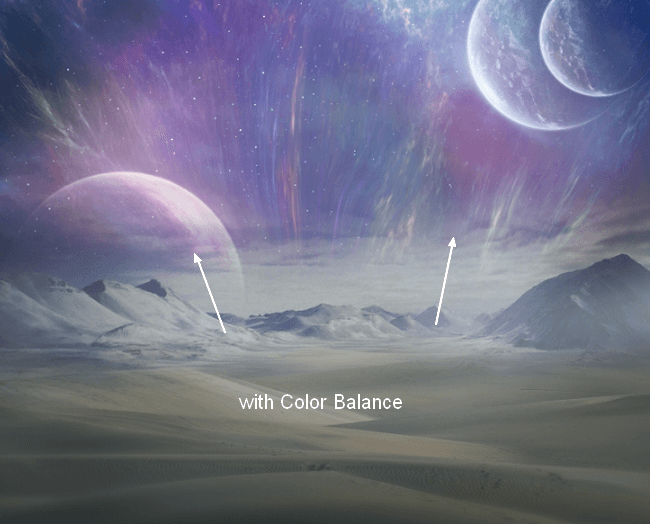
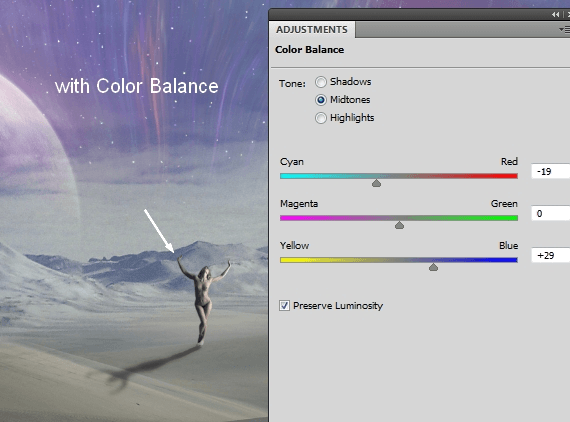
I used Color Balance for this effect:
Step 23
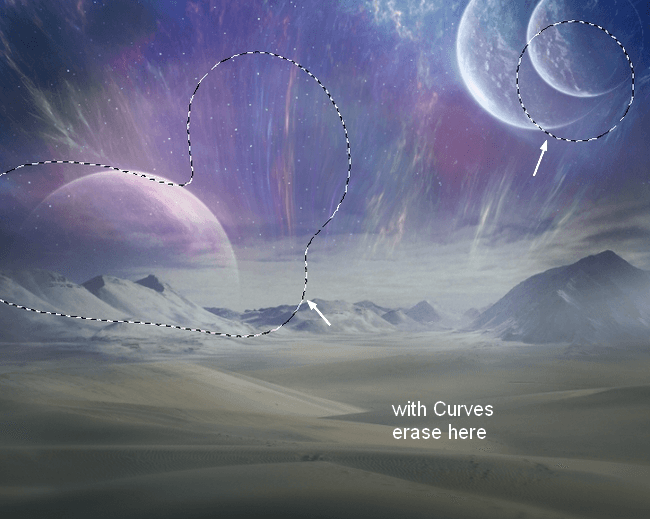
I used Curves to make the effect more subtle and on this layer mask used a soft black brush to erase the sides as shown below:
Step 24
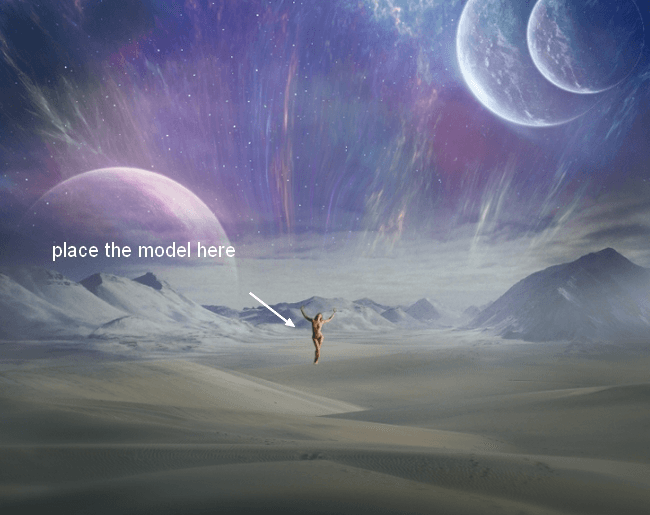
Place the model stock photo in the middle section of the ground and remove the background using a layer mask. Set this layer on the top.
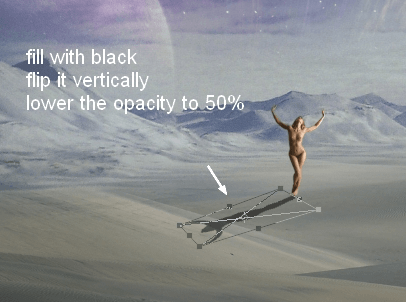
To make her shadow, make a new layer under the model one. Hold down Cmd/Ctrl while clicking the model layer mask thumbnail to load its selection:
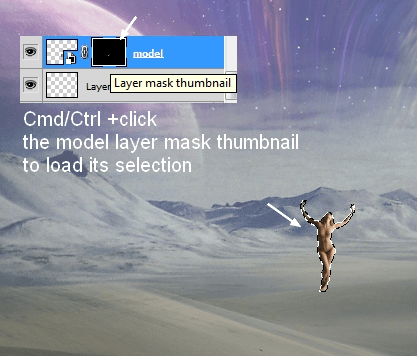
Fill this selection with black (Shift+F5) and convert it to a Smart Object. Flip it vertically (Edit > Transform > Flip Vertical) and lower the opacity to 50%. Move it under the model feet and transform it using Cmd/Ctrl+T:
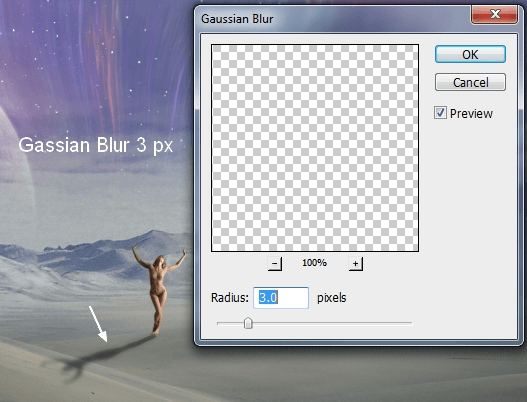
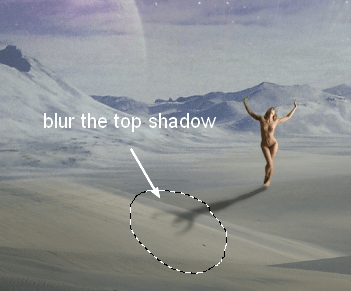
Apply Gaussian Blur with 3px and use a layer mask to blur the top of the shadow a little:
Step 25
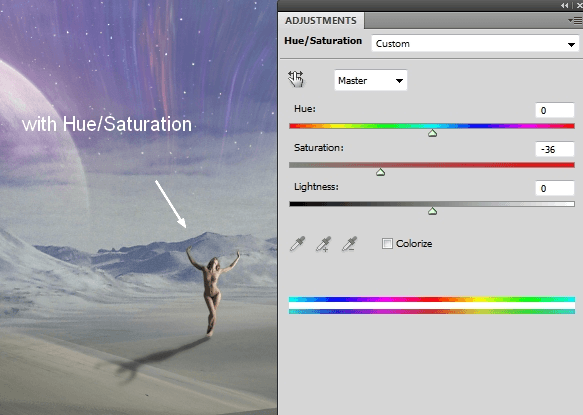
I used Hue/Saturation to reduce the model saturation:
Step 26
Make a Color Balance adjustment layer for the model:
Step 27
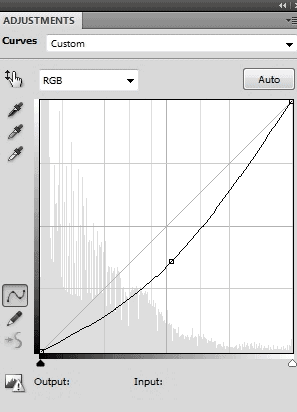
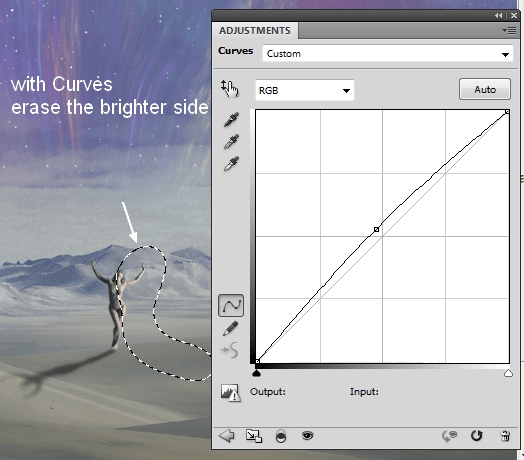
I used Curves to brighten the dark side of the model and on this layer mask erase the brighter side a little:
Step 28
Make a new layer on the top and use the Elliptical Marquee Tool (L) to make a selection of a circle above the mode (hold down the Shift key while drawing it):
14 comments on “Create an Abstract Sci-Fi Scene with Photoshop”
Wow, the topic was explained in a lovely way. Because it explains so beautifully step by step, that angle people can quickly grasp it. Thanks for sharing it with us.
I am also a graphic designer. I was also invited to visit my website once.
My weblink:
hiiiiiiiiiiiiiiiiiiiiiiiiiiiiiiiiiiiiiiiiiiiiiiiiiiiiiiiiiiiiiiiiiiiiiiiiiiiiiiiiiiiiiiiiiiiiiiiiiiiiiiiiiiiiiiiiiiiiiiiiiiiiiiiiiiiiiiiiiiiiiiiiiiiiiiiiiiiiiiiiiiiiiiiiiiiiiiiiiiiiiiiiiiiiiiiiiiiiiiiiiiiiiiiiiiiiiiiiiiiiiiiiiiiiiiiiiiiiiiiiiiiiiiiiiiiiiiiiiiiiiiiiiiiiiiiiiiiiiiiiiiiiiiii lmao
Nice tutorial. and the final result was really awesome and mindblowing.
Wow, this is great! Awesome job, love the final result!
wow this tutorial is epic!
How to create ID picture step by step
Thank you so much. Thanks for sharing.
[▪☆⚠ #єиɖ_ਆ_ਗLьτ⚠☆▪]
[•●#_______ατΤ_GΔlβ∆∆τ●• ]
Thank you very much for this tutorial
beautiful
Thank you very much for this tutorial! It was really good. I kinda nailed it, even tho' I am a beginner. xD
nooooooooooooooo
I am a student working on Photoshop and i was wondering about how you can get the smart filter?
Hi there, go to the drop down menu that is above with the rest of the filters, and search there. If you are on mac you can always go to the help tool, and type in what you are looking for, and the system will pop up what you have typed in, showing you in the menu. Hope this helps!