

Make skin look perfect in one-click with these AI-powered Photoshop actions.

With the same ways place more other trees behind the rock on the left and right sides.

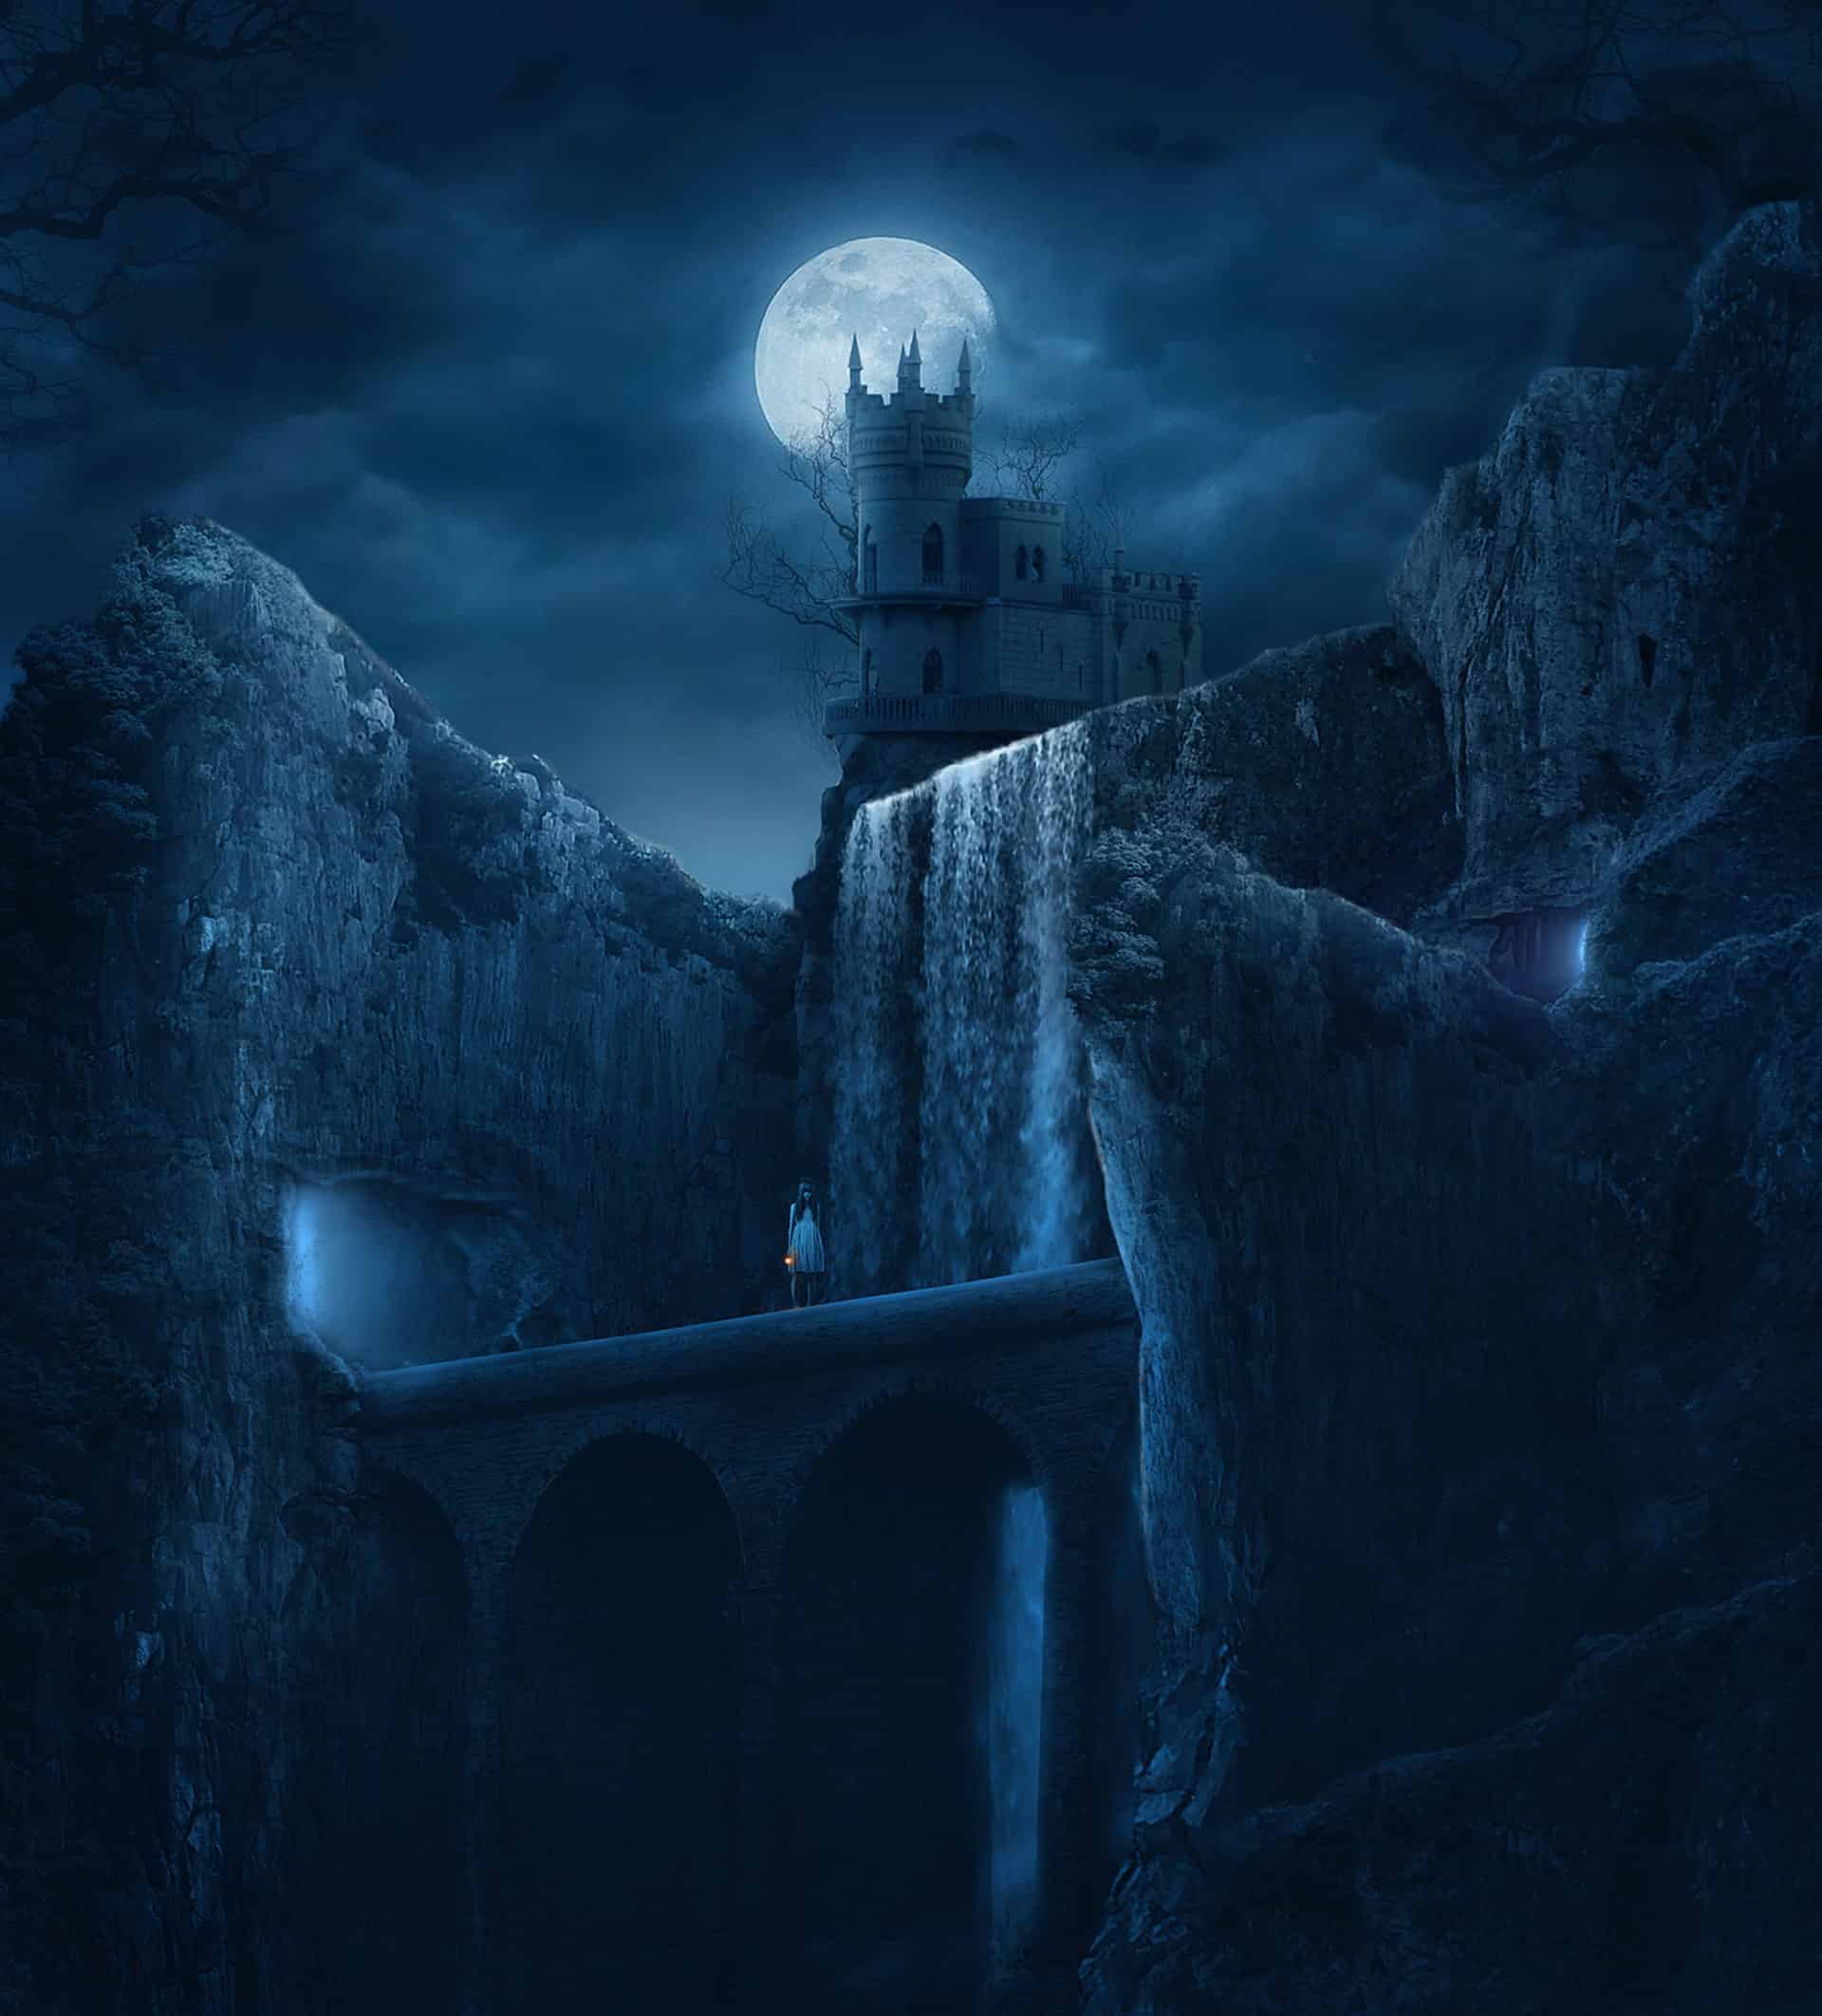
Step 16
Well here is the complete composition of the scene we have created so far. Next following step, we will do color adjustments to every object in the scene. We will use the color tone and mode of the background (cloud image) as a reference to the color adjustment.

Let’s set the color adjustment for the rock layers within the rock folder. Open the rock folder and select the first rock layer to be active on it. Go to layer > adjustment layer > hue/saturation. Make sure to give this hue/saturation layer a clipping mask.

Set the values of this layer as indicated in the screenshot.

Give this layer another new adjustment layer with a clipping mask. This time choose color balance and set the values as the one below.

Then we need to add some highlights to the upper edges of the rock. To do this, create a new layer (Shift+Ctrl+N) with a clipping mask. Take a very soft round brush set to about 30 px size at 20% opacity. With the color of #c3dbe8, paint the edges of the rock to give them some highlight.

Do color adjustment layers to the second rock. Firstly give it a hue/saturation layer with the same values as the one used for the first one. Then give the second rock brightness/contrast adjustment layer with values indicated below.

Finally, give the second rock color balance adjustment layer with the same values used for the first rock. Here is the result:

Step 17
Proceed to give color adjustment layers to the left rock layer. Give these new adjustment layers clipping masks. Make sure to position the layers above the texture layers within the left rock folder. Here are the adjustment layers to be given:

Make sure to hide the effect of the brightness/contrast layer by masking on some areas as pointed by red arrows. This will bring back the original brightness of the image. The areas are parts where the moonlight is supposed to be more casted. So we should reveal them.


Finally, create a new layer (Shift+Ctrl+N) with a clipping mask. On this layer, paint soft dark blue color on lower areas around the left rock.
18 comments on “How to Create a Dark Mysterious Hideout from a Rough Sketch”
Does't work to just copy and paste images to new document. Can't transform. Needs another way to be able to move the cut out images into the new document and still be able to transform.
Hey! Dek Wid,
My bad ;) I missed the link to next page. Beautiful work. I really love the way you combined different Images. Looking forward to see more from your side.
Cheers
You have not shown the complete tutorial. Want to see rest of the steps after step 14 till that blue mysterious atmosphere... ;)
Ajay Yashpaul
Thank you very very much...I had finished 98% this tutorial:) .Just some step last example nebula, girl ... is difficult
Brilliant Tutorial. I will add it to my next years calendar.
More please Dek.
Marvellous creativity. I love it!
amazing tutorial so far! Two thumbs up!
There's something wrong with the perspective of the castle I suppose
good work and continue we are waiting for more
good work and continue we are waiting for more
Nice work buddy.. you are real artist..!!
xiexie
厉害!谢谢分享
(⊙o⊙)?
Dek your tutorials are the best on this website
This is a great tutorial, this is what we want, a tutorial with quality.
Thanks Photoshop Tutorials and Dek Wid for this powerful tutorial.
plis can u kindly teach us...we want to know more plis...post it!
i love this job