

Luminar AI lets you turn your ideas into reality with powerful, intelligent AI. Download the photo editor and see how you can completely transform your photos in a few clicks.

Step 16
Now select the mask of color balance layer.
Now activate Brush tool (B) with these settings :
Brush size: 400px
Hardness: 0%
Opacity: 40%
Flow: 100%
Color: #000000
Now paint over the highlighted area.

The result should be similar to this:

Step 17
Now create a curves adjustment layer which can be found by pressing on the Create New Fill/Adjustment layer button shown on the layer window:
When the curves box opens, input the following:

The result should be similar to this:

Step 18
Now we will work on the text part of our tutorial.
Now Select rectangular marquee tool and make a selection and fill it with #070606 color and reduce it's opacity to 65% and name it "Text base overlay".

Now install DevilBreezeDemi,Medium,light fonts in your computer we are going to use these fonts.
So write Above the Text base overlay.

Add more text to our canvas like Dj names or other details.

Step 19
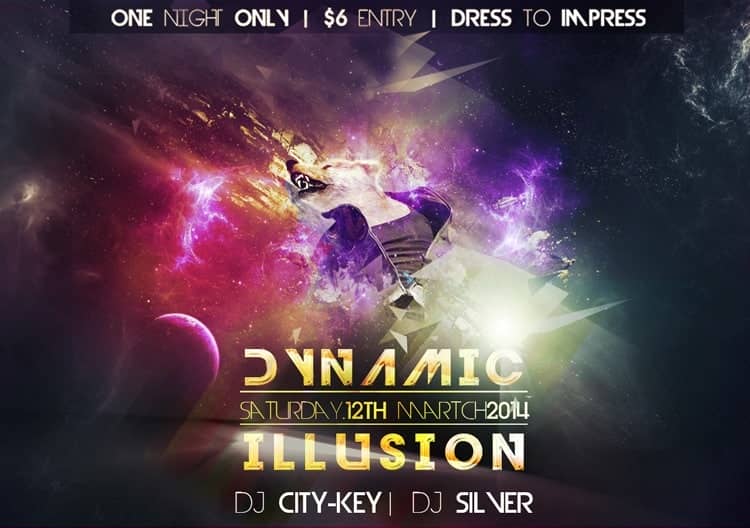
Now Type "DYNAMIC" .

Now open Layer style and fill every this as shown bellow.


The result should be similar to this:

Repeat the same process and add more text.

Step 20
Now open a new canvas wish a size of 800 width and 800 height.
Fill it with #000000 color .

Now activate pen tool and make a rectangular shape and fill it with "edef4b" color .

Insert the mask on the layer by choosing Add layer mask on the bottom part of the Layers panel and choose the Soft Round brush of black color.

Repeat the same process and make more strips .

Try different colors.

When you got satisfied with the result mearge them togather and drag to our canvas.

Change it's layer mode to LINER BURN.

The result should be similar to this:

Step 21
Create a new layer and name it "geometric shapes".Then activate pen tool (p)and create a triangle selection.we're going to fill it with a radial gradient.

Now grab the Gradient Tool (G), set it to Radial, and change the Opacity to 5%. Also, make sure the Transparency option is selected. Now, let's have some fun with filling this triangle, you can add several shots of gradient to this triangle, then the color will be harder.


Use the same method and create lots of triangles, sample different colors and apply some gradients. You can merge a pack of triangles, duplicate them (Command + J) and rotate (Command + T) to get some messy results.
3 comments on “Create a Dynamic Night Club Poster in Photoshop”
wow.. Fantastic steps.. I really like it. keep up :-)
Wonderful tutorial..Thanks for sharing
Thank you for the feature :)