
Make your artwork look like they're from an alternate universe. These Cyberpunk presets work with Photoshop (via the Camera Raw filter) and Lightroom. Download all 788 presets for 90% off.
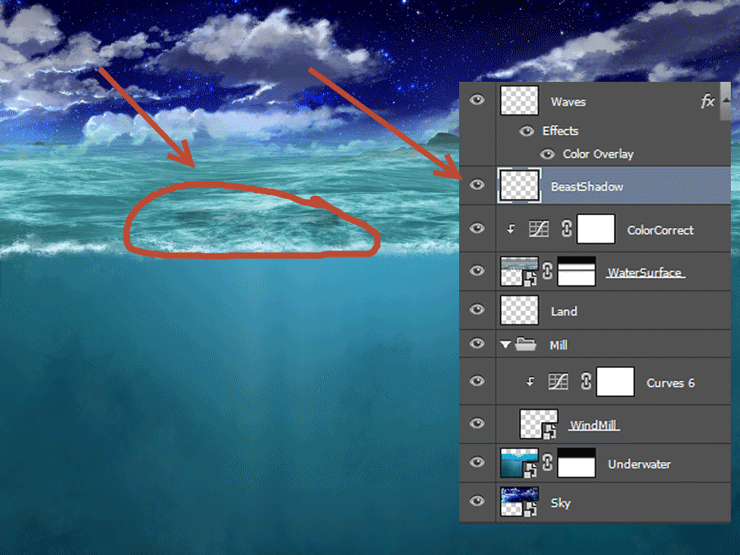
Step 11
Create a new layer and change the blending mode to Multiply. Choose the round soft brush at 20% Opacity and paint with black on the water surface as indicated below. This will be the shadow of the sea creature. The reason I’m doing this now instead of doing it after I place the creature is because you’ll probably have a hard way finding your way through countless layer and putting this layer where it should be.
Step 12
Create a new layer and fill it with a deep blue color sampled from the sky(#060733). Change the blending mode to Linear Dodge.
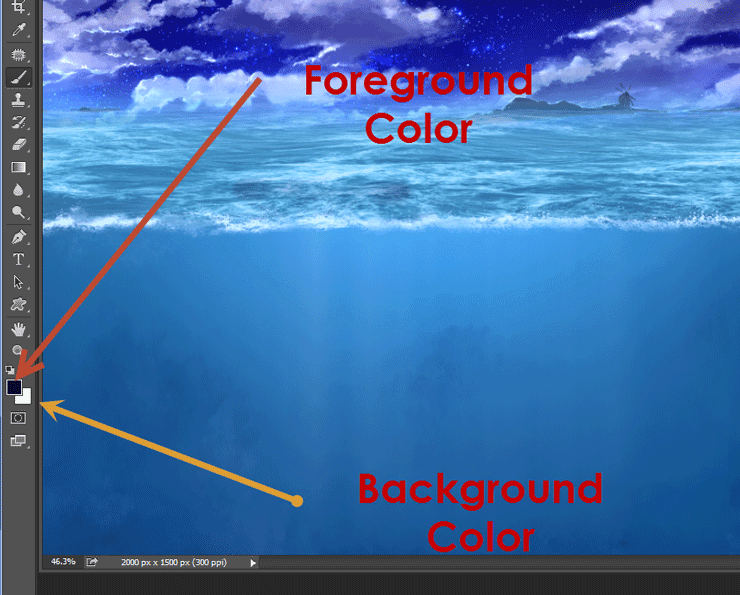
Photoshop has a foreground and a background color. If you press Alt + Backspace you will fill the selected layer with the foreground and pressing Ctrl + Backspace will fill the layer with the background color. Also pressing D will set the foreground color to black and background to white. So if you wanted to quickly fill a layer with black or white you would select the layer, press D and then press Alt + Backspace or Ctrl + Backspace.
Step 13
Create a new layer. Select a bubble brush and lower the Opacity to 10-20%. Paint some bubbles on the underwater portion of our scene. Use a layer mask to hide unwanted bubbles.

Step 14
Create a couple of new layers and choose a light ray brush from the light brushes set. Change the blend of the layers to Overlay and create some rays coming from above (use 50% Opacity). Create layer masks for each layer and hide the upper portion of the light rays leaving them visible only underwater.
As you can see the Overlay blending mode is great for light effects. Color dodge is also great for achieving glow effects.

Step 15
Open the file “Small Fish”. Select the fish and copy/paste into our document. Place three fish (simply duplicate the pasted fish layer by pressing Ctrl + J a couple of times) near the water surface in a tight pack and one loose fish near the bottom. Lower the opacity of the fish layers to 31%.
One good practice is to group layers in order to keep the document nice and tidy. Select multiple layers (hold Ctrl while selecting) and press Ctrl + G to group.
12 comments on “Create an Epic Pirate Sea Battle in Photoshop”
This is so awesome! Detailed tutorial, thank you!
Great! How to view this article..
Nice
oh! nice tutorial, thanks for the shared.
thx!
I've spent 3 days for this tut-techniques and I think (hope-) ) I've done something very good)
Omar EL-Midany wa7da b wa7da :P
اللهم صل عالنبي :D
تحوس انه نجم :v
The blood is too fake. It has a milky material and too much blood for merely a human.
wow nice work but the thing is that am new to this how can i get your article. i serious need to learn this, hope to hear from
An