

Luminar AI lets you turn your ideas into reality with powerful, intelligent AI. Download the photo editor and see how you can completely transform your photos in a few clicks.
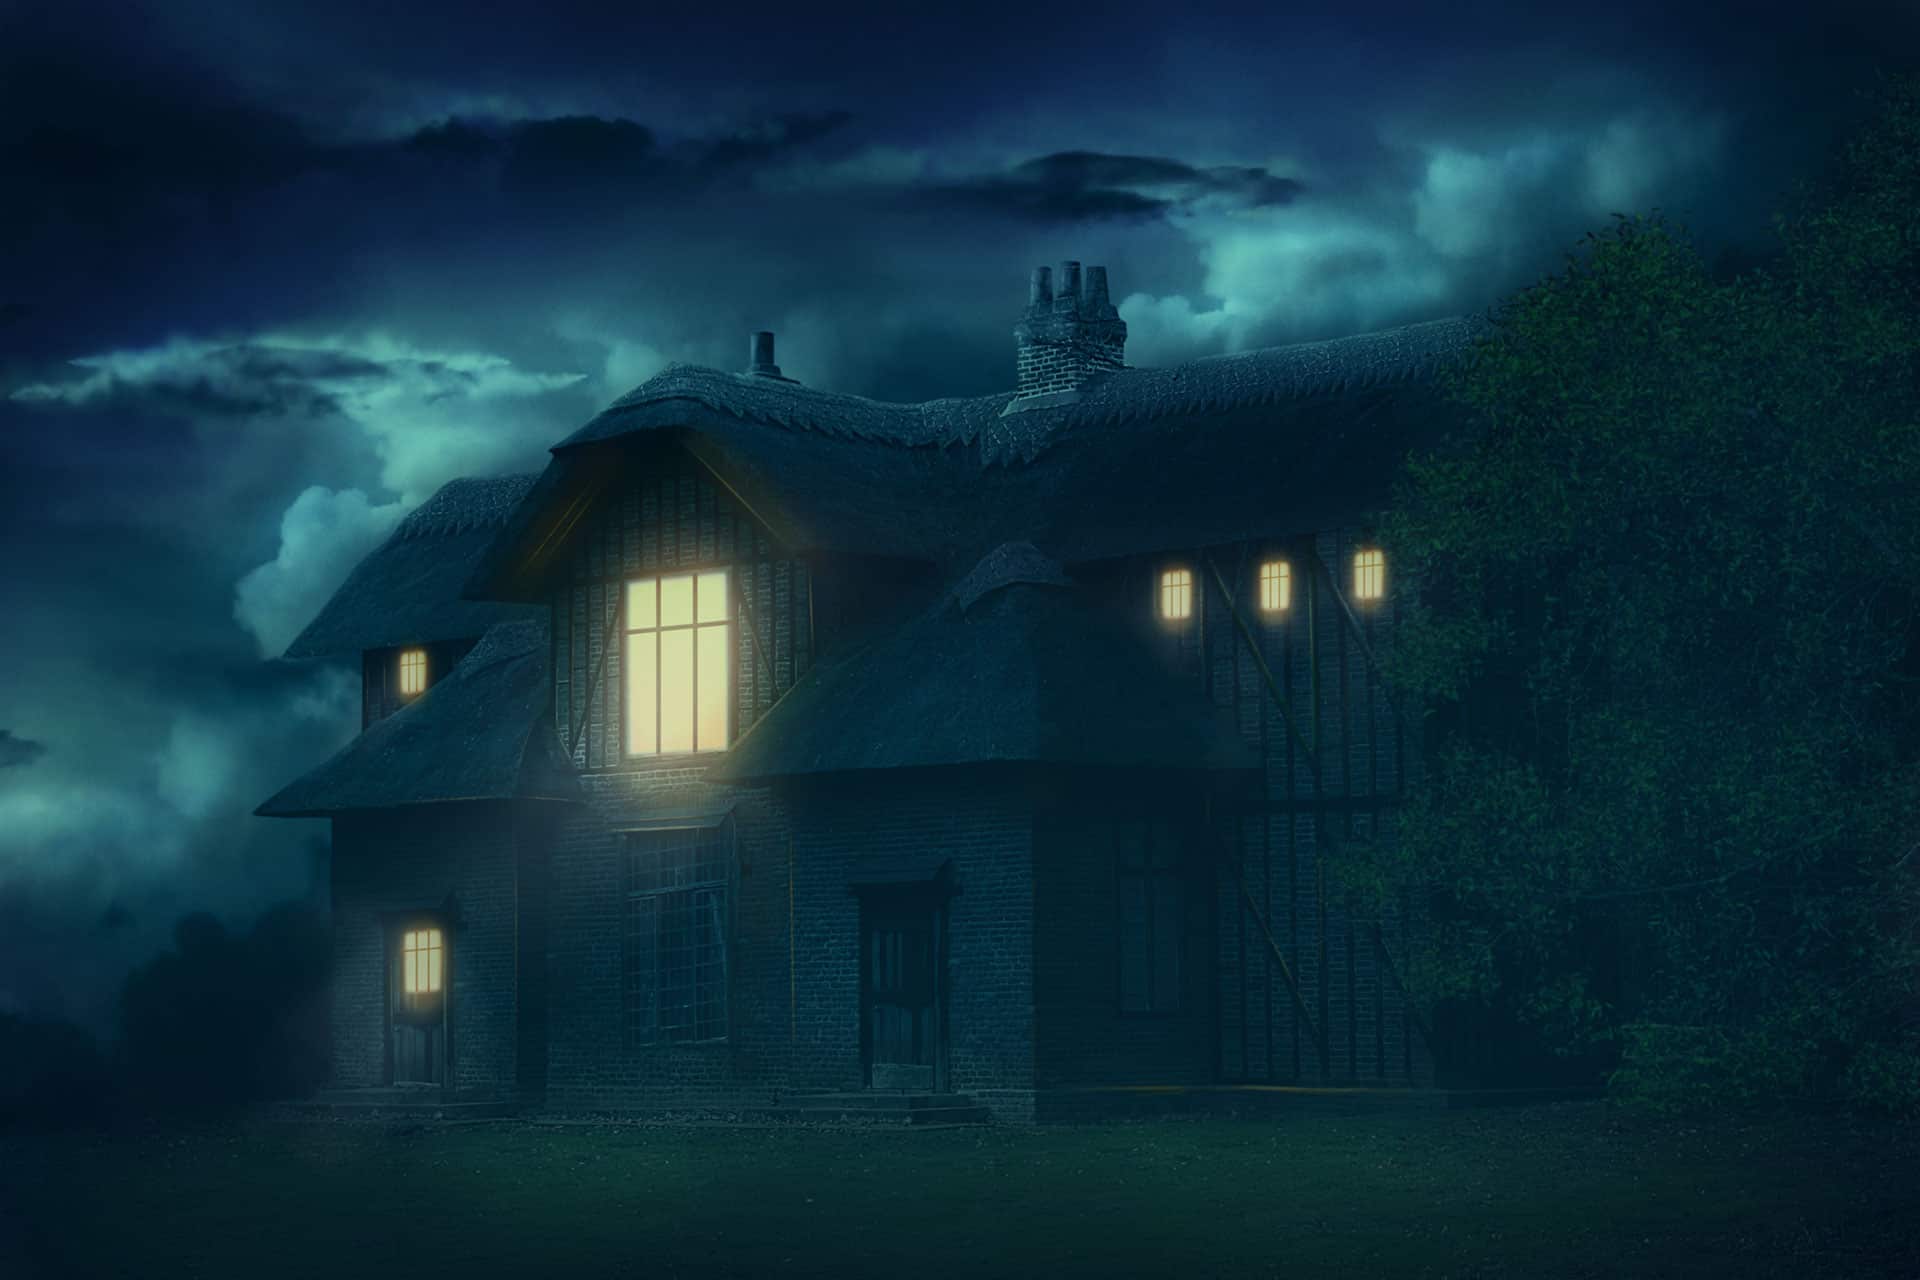
We have this result.
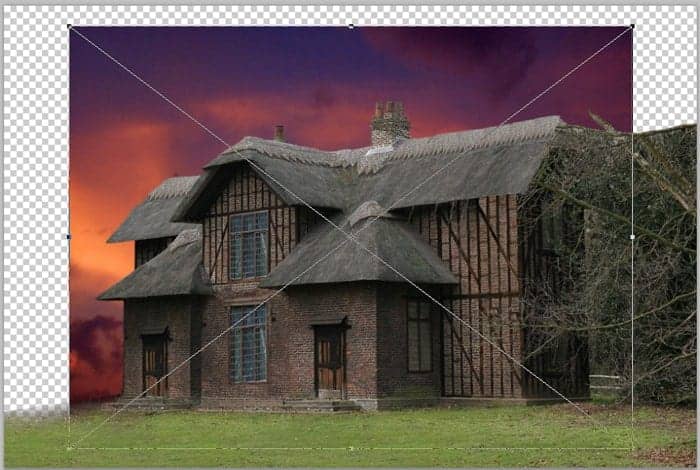
Step 9
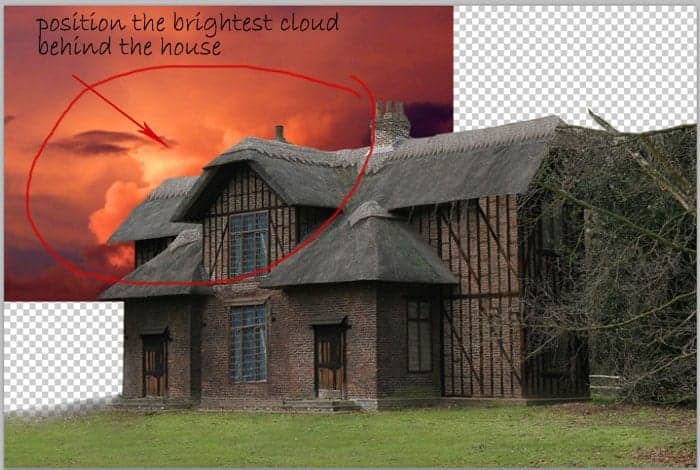
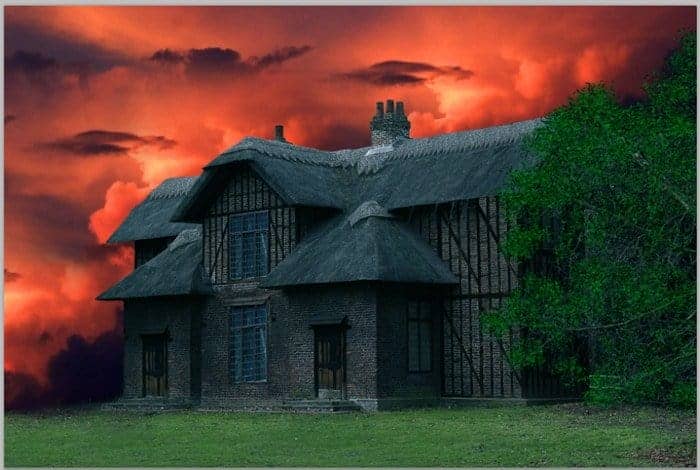
Proceed to add some cloud texture for the background of the scene. Open the cloud image in the document. Position the cloud layer below the house layer.
Take the free transform tool (Ctrl+T). Scale the image to the size needed. We will take the brightest part of the cloud used as the cloud texture for the background. After scaling, place the brightest cloud in the upper position behind the left part of the roof’s house. Here is the result we have for inspiration.
Duplicate (Ctrl+J) the cloud layer. Move the duplicate to the position where the brightest cloud of the image is in the upper position behind the right part of the roof’s house.
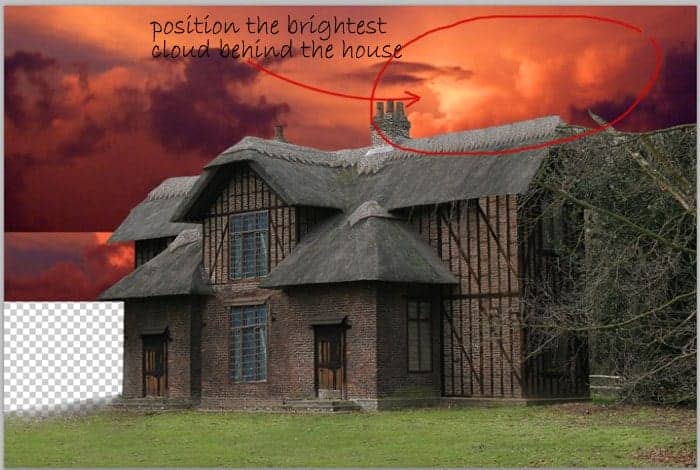
Here is the result we should have:
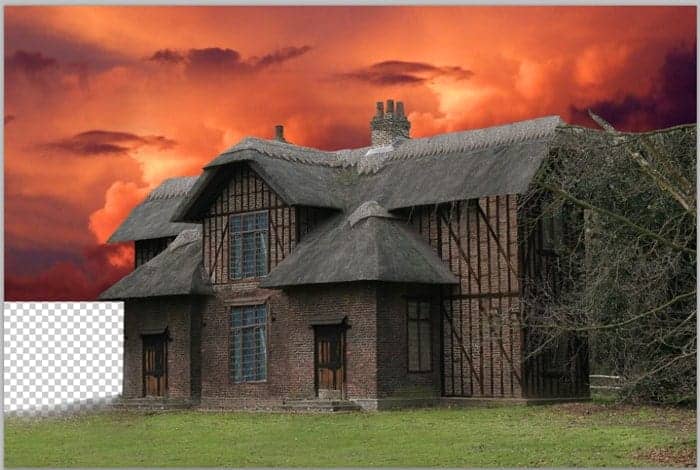
Duplicate (Ctrl+J) the cloud layer once again and place the duplicate to cover the blank part with a cloud texture. This is the result I created. Select all the cloud layers and hit Ctrl+G to group them into a folder. Name this folder/group cloud BG.
Step 10
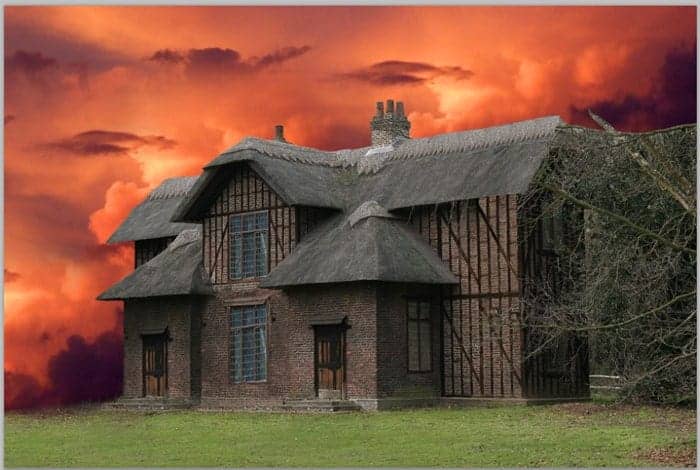
Next, we will fix the tree beside the house. We will add leaves for the tree.
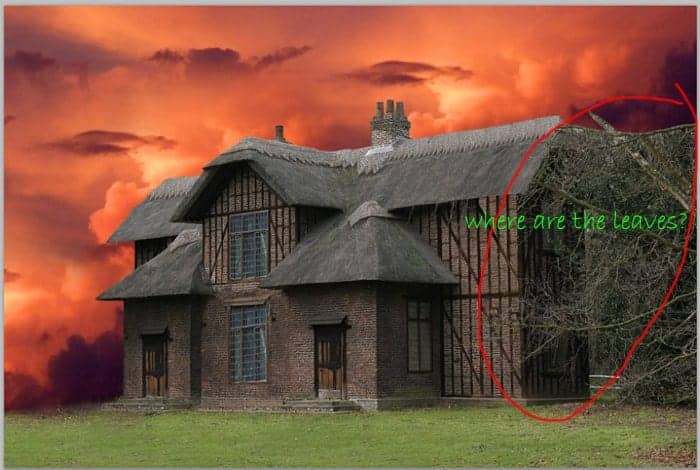
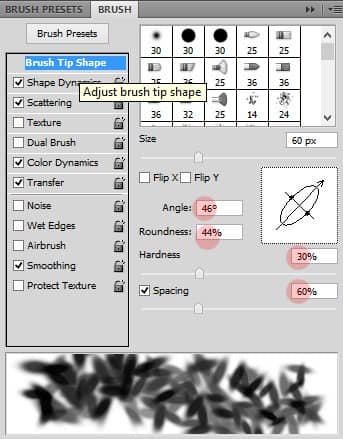
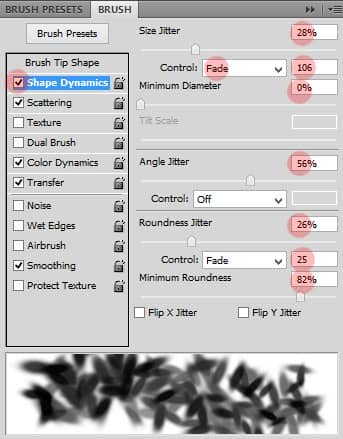
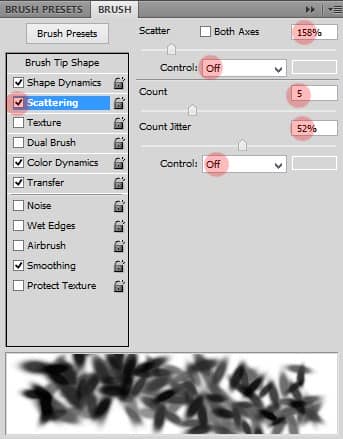
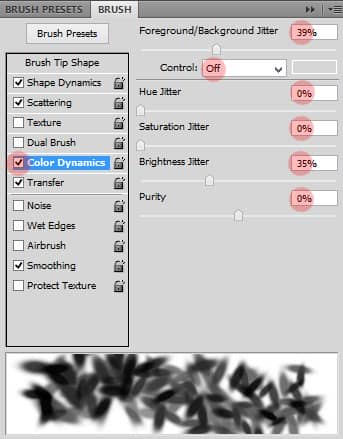
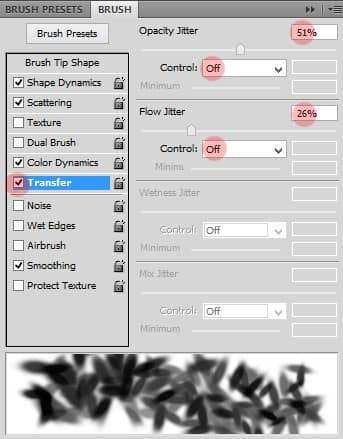
To add the leaves for the tree, we will paint them for it using the brush (B) provided in photoshop. Take the brush tool (B) and open the brush panel to set the shape of the brush shape. Follow the setting as below:
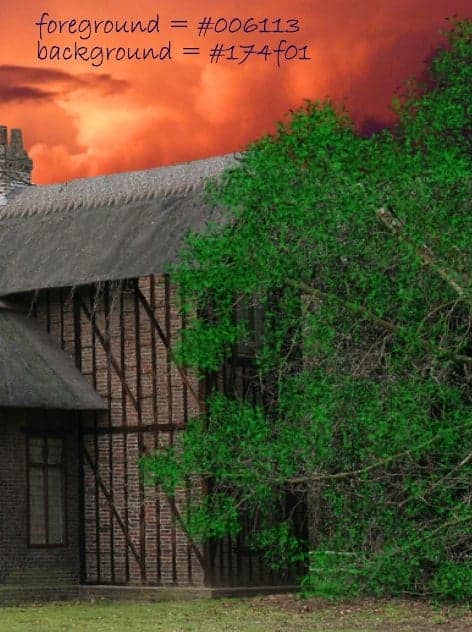
After setting the brush, set the foreground color to #006113 and the background to #174f01. Create a new layer by hitting Shift+Ctrl+N. Name this new layer leaves. On this layer, stroke the brush on parts where the leaves should be added. Try to vary the size of the brush to get the desired result. Here is the result for your inspiration.
Step 11
Now we will set the overall color for the scene. Create a new layer (Shift+Ctrl+N) above all the layers. Fill the layer (by hitting Shift+F5) with a solid color of #09425f. Name this layer blue.
Set this layer to soft light blending at 100% opacity.
Duplicate (Ctrl+J) this blue layer. Set the duplicate to color blending at 100% opacity. This will give the scene an overall blue tone.
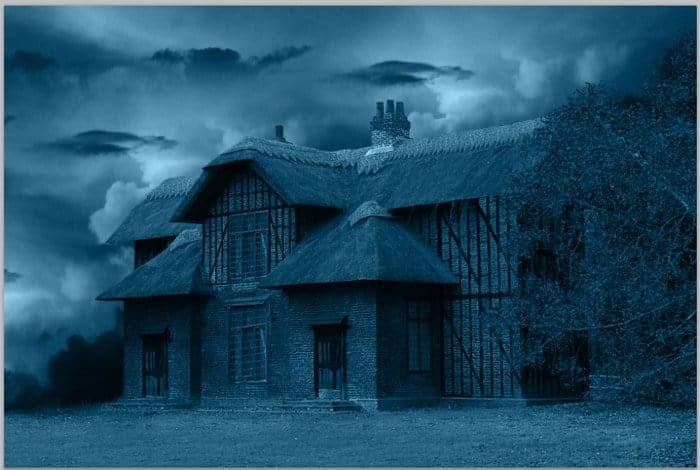
We should reveal the green color of the lawn and leaves a bit. To do this, we should give the duplicate layer a layer mask. Mask some part around the lawn and leaves.
11 comments on “Create Gloomy House Scene in Photoshop”
How do I "Mask some the edges of this layer"? I have cut out the section of grass as instructed, but there is a line on the edge of the cut out that I have not been able to remove or blend so the line is not seen. Guidance would be appreciated.
Step 21 - #fdg601? (cs 5.1 doesn't appear to be taking the 'g' in this color?) is this my mistake?
I believe that's a 9 - not a g.
Sorry for the confusion! I'll update step 21 to clear things up.
i had the same problem
I am working on this tutorial and thus far this is great!!!! I do have a few little questions and that is like in step 28 where the value in the radius appears to be 3,7 ? what is that suppose to be with a comma between the two numeric values?
It should actually be a period; not a comma. So the correct value is 3.7 and not 3,7.
The second time I do a lesson and find new secrets. Excellent lesson. There is much to learn, very useful. I'll come back to it and do a third time. Thank you very much. It's my pic http://j-p-g.net/if/2015/09/15/0335689001442323082.jpg
Wonderful tutorial with detail. Thanks.
Stunning lesson. THANKS!
I'll try it ^-^
Que Maravilla de Foto